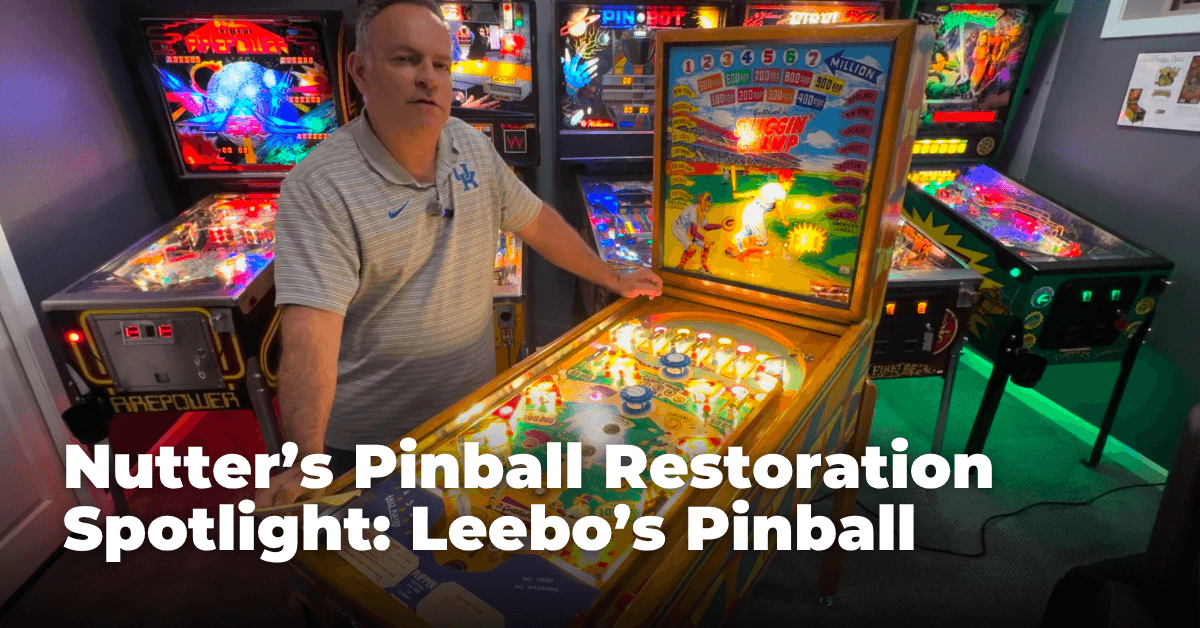
Nutter’s Pinball Restoration Spotlight: mrm_4

Some years ago, I was digging around in the restoration threads on Pinside, and I stumbled into a thread for “My Dy-no-mite Strato-Flite”. Little did I know that I had happened across one of the leaders of the pinball restoration community, Matt, aka mrm_4. I was treated to countless pictures and 257 posts showing the deepest dive I’d ever seen into an EM restoration. I sat there and read through the entire thing. It was beautiful, and I was amazed. From there, I discovered his 700 photo opus Rollergames restoration, and many others, like a Bally Rocket, a Firepower, a failed Dracula, a Xenon, a Space Mission, a United Monterrey, a Rollergames, and his most current, a Four Million B.C. I was drooling on myself and in awe at his skill and the level of detail for every single one.
Today, we will take a deep dive into Matt’s journey in pinball, how he became a restoration wizard, and then look in detail at some of his impressive work.
“I Got Addicted To Being Overwhelmed”
“What’s funny is I’ve realized that I got addicted to that feeling of being overwhelmed,” Matt said in our chat, and I often feel like this attitude is reflective of the entire pinball restoration hobby. There’s so much that goes into a successful project, woodworking, painting, electrical, board work, metal work, mechanical work, on and on. Over the years, Matt has become an expert at all of it and, more importantly, goes out of his way to be one of the hobby's leaders, helping others feel less overwhelmed through high-level documentation and knowledge sharing in his many Pinside project threads.
Also impressive, Matt doesn’t just restore expensive A-List machines. He takes whatever machine he thinks is neat and makes the thing better than new. As Matt mentioned during the course of our conversation, “To me there’s nothing better than bringing a complete basket case back from the dead and someone saying it looks better than new.”

Matt’s Journey to Pinball
“Dude, Screw This. Let’s Play Pinball!”
Matt used to be a musician. He was a guitarist in several local rock bands in his area through the early 2000s and 2010s, but he gradually lost interest. However, one night in 2015, he and an old bandmate decided to go bowling at Stonehedge in Akron, OH (now called Station 300). They walked in, rented shoes, and got a lane. When they went to the bar to grab drinks, there was a huge row of pinball machines. They were blown away. He remembered saying, “Dude, screw this. Let’s play pinball!” The addiction to the silver ball filled the void left by his old hobby of playing guitar. “I got my first project pin in late 2017,” he reminisced. “A Bally Mata Hari about 2.5 hours away on Craigslist. I specifically bought it looking for a restoration project, and I haven’t been able to stop ever since.”
Restoration of various items seemed to fit into his lifestyle. “I’ve always had an interest in fixing things or cleaning up older items. I’ve also always been fascinated with electronics,” he said. “I remember getting in some serious trouble when I was 5 for taking apart the VCR because I wanted to know how it worked. In my teens, I got my fix by working on my first few used junky cars. In my 20s, I restored an old upright piano that came with the house I bought, and also restored a pool table. After a couple of years of playing pinball, I decided it was time to own one and got a Transformers LE. Two days after getting it, the transistor went out for the left flipper. I was terrified that I wasn’t gonna be able to get it fixed,” he explained.
“Then I found Pinside.”

He continues, “Digging through threads, I found examples of others having the same issue, figured out what transistor it was, and found someone to replace it for me. I remember watching the guy I paid $40 to desolder the old transistor and put in the new one, and thought, ‘what the heck??? I could’ve done that!!!’”
But then he ended up where most of us do. Wondering where to start. “After seeing someone do board work, I started going down pinball repair rabbit holes in (Pinside) threads and YouTube. I was obsessed and wanted to learn to fix as much as I could on a game. Ronnie from Joe’s Classic Video Games was like a dealer for the gateway drug of restoration, then, of course, discovering Vid’s guides, and then eventually finding HEP. I remember looking through the first few restoration threads I found, and was just blown away by what I was seeing. There was so much involved, painting, woodworking, graphic design, electronics, plastics, clear coating, lighting, cleaning, polishing, and waxing processes, mods, etc. I was in heaven and absorbed everything I read and watched. Honestly, everyone that restores and posts on Pinside inspires me. And everyone does such a great job of capturing their progress and processes. The restoration community of the hobby is full of great, talented people, and they all share so much knowledge, whether it’s intentional or just by way of showing off their babies.”

As a frequent user of Matt’s threads, I asked him if he intentionally goes out of his way to lay out his restoration processes and show the tools required. “I really love finding old restoration threads that no one has commented on for 10 years and seeing all that detail and info,” he said. “Like it was always there waiting for me to find it. I hope that happens with one of my threads someday. So, I make my posts with that in mind. Will this make sense and help someone else out long after I sell and forget about this machine?”
I was curious where he developed his restoration skills. Many people have a day job that complements the skills required to restore pins. “It DOES NOT tie into my day job,” he said. “I supervise a training department, so pinball restoration is a total escape from work. Don’t get me wrong, I love my job, but after work, when I go down to the workshop, I get to reset my mind and totally zone out or get hyper focused on whatever the current project is and have those moments of Zen and truly escape the thoughts of work.”
It sounds like a good place to be.
The Great Debate
Electromechanical or Solid State? This issue has been debated long and hard by nerds all over the internet. Most people have an unreasonably strong opinion about which is better, sometimes based on one game that upset them 25 years ago, so they swore off the lot. EMs are classic, beautiful, intricate, and slow. SS games are faster, still pretty, but somewhat more reliable. To me, SS is easy to keep going and to work on. EMs are a little trickier and, arguably, more rewarding when they run correctly… they also contain some of the best art, the most frustratingly fun gameplay, and some of the most interesting history of all of pinball.
“I started out loving SS,” Matt said. “But as time went on, I realized the beauty in EMs. When it comes to Restos, I’ll do both. I will say EMs can be brutal. I like to take every single relay, stepper, score reel, and all other mechs completely apart, ultrasonic, tumble, polish, etc., and it is insanely time-consuming. What’s funny is I’ve realized that I got addicted to that feeling of being overwhelmed. I really felt that during my Space Mission project and then again with Rollergames.”
If you haven’t tried restoring each type, I would encourage you to give it a go. There are always people willing to help, and as I’ve often said (Matt agrees), all of these machines are worth saving.

One has to wonder: why does he choose to restore a machine that, even if brand new, he would never be able to recoup the cost, time, and effort required to make it shiny? “Honestly, I just love doing it. I know I'll never get the money back I put into these games, but it's a true labor of love. Of course, games will eventually sell, and I'll probably get more than the average price of a fair condition game, but capturing the progress, learning new things, knowing that someone else is going to enjoy the game for years after the fact, all of that makes the financial side easier to accept. I mean, it's a hobby. If this was a way to put food on the table, then I'm sure my outlook would be altered a bit. And above all, I just flat out enjoy it. There's a fancy word I'm trying to think of to explain it... oh yeah ‘fun’. It's just flat out FUN!”
Can’t argue with that!
Matt’s Restoration Resume
Don’t take my word for it, though. Go out and find a machine or two that interests you and try to make it better. You can restore it to your ability, but you’d be surprised how quickly you learn. You never know what you’ll end up with.
Here are some of Matt’s restorations for motivation!
Dumpster Firepower
-
Pinside Thread: DUMPSTER FIREpower
-
Game: Williams Firepower (1980)


Firepower After
“My buddy Matt (@deez on Pinside, fellow collector and also an operator) sold this game to me,” he said. “This was an example of a complete burn-pile candidate. Almost everything on the underside of the playfield was rusted out; you could see what I was dealing with when you look at some of the ‘before’ pics. Holy geez, it was bad, and the smell of mouse pee was a battle of its own. The plan was to do a hardtop for that game with an extra playfield, but I wanted to see if I could pull off restoring an original playfield first. I bought a small airbrush kit and gave it a try. Did a lot by hand and other parts with the airbrush, and I was happy with it. Then came the clear coating... I wanted to burn my house down from the rage I experienced doing that. That playfield has like 12 cans of clear on it! hahaha. I learned a lot about fisheyes and preclearing prep. In the end, it turned out great, but man oh man, it really tried my patience like no other.”
Handshake in Space
-
Pinside Thread: Handshake in Space – Space Mission
-
Game: Williams Space Mission (1976)


Space Mission Before

Space Mission After
“I got a call from a buddy,” he recalls, “that knew a coworker that was moving and needed the game out of his garage. The price was right, so I drove over to see it. As soon as I saw it, I knew it was a perfect candidate for a resto. One thing in particular that came from this game was discovering a missing label that Williams used to track quality control for their playfields. I have an obsession with labels as a part of the restoration process. I've developed a mindset that the games not complete unless all labels are accounted for. This led to a fun hunt and a great thread that showcases how helpful this community is.”
Don’t Flip…FLIP!
-
Pinside Thread: Don’t Flip… FLIP! - Rollergames
-
Game: Williams Rollergames (1990)
Suffice it to say that one should check out Matt’s thread on Pinside detailing his restoration of his 1990 Williams Rollergames machine. It contains a massive 700 pictures documenting the process and commentary on every single one. It’s a wealth of knowledge and even contains documentation of some failures. “I had been wanting to get one and the timing was right when the guy listed it,” Matt said. “I will say when I got home with the game, while trying to dolly it into my house, I lost my footing in my side yard, and the game completely rolled off the dolly and proceeded to tumble down a small hill. I laughed at myself and started screaming at the sky like a lunatic, but luckily, no damage was done. Funny enough, this was karma for making fun of my buddy @deez for doing the same thing to his Xenon. Which I eventually bought off of him a couple years later and also restored.”
The main thing in this thread that impressed me (and enabled me to restore my Count-Down playfield [YouTube Playlist and Pinside Thread] and Blue Max playfield [YouTube Playlist and Pinside Thread]) was his total playfield restoration on this machine. It was insane. My jaw was on the floor every time he’d post an update. It gave me the courage to finally cut my own stencils and use an airbrush. From redoing small details to hand painting to airbrushing to reseating inserts to clear coating… it was amazing to watch this develop.
Now, I want to spend a few minutes walking you through exactly what strikes me as impressive about this project.
First, he completely stripped the playfield, top and bottom. This enabled him to wash all the parts, wires, and assemblies. This also meant his fingers didn’t pick up all the dirt, oil, and grime left on unwashed parts. He meticulously labeled each wire before he disconnected it.


Rollergames Playfield Parts
All of these parts are washed, cleaned, and rebuilt before reassembly. His thread documents how he serviced each part.

When it comes to playfield restoration, he doesn’t mess around. He takes on huge projects and absolutely gets into the weeds. After he finished stripping all of the parts off the playfield, he was left with this mess that most people would have just replaced. But where’s the fun in just swapping the playfield?

First, he went about the meticulous process of repairing the inserts, which featured various logos advertising brands.

Next, he went over the entire playfield, using a combination of hand-painting and airbrush techniques to repair each part. Here’s an example of him just restoring a foot! You can imagine the effort that went into the entire playfield.


Rollergames Foot Retouch 2

Rollergames Foot Retouch 3

Rollergames Foot Retouch 4

Rollergames Foot Retouch 5
He even repaired some of the damaged color gradients and background colors. Sometimes you can just touch up the background color, but it’s extremely difficult to get it to look correct. Eyes are very good at picking out differences in color, sheen, and texture. Some of this will be hidden by the clear coat, but unless you repaint the entire section of a color, you’re probably going to be able to see it.


Repainting Rollergames Playfield Background Colors
After all this work was done, he repainted the playfield keylines. Here, he used combinations of hand drawing with plastic stencils, precision-cut stencils with a Silhouette Cameo 4, and airbrushing techniques.

Finally, he clear-coated the playfield to seal in his outstanding artwork.

His thread continues, and he documents the rest of the restoration. During the process, he touches every piece of the machine, including the head, the cabinet, the playfield parts, the boards, the harnesses, etc. The end result was an amazingly beautiful machine.

“Rollergames was a blast for me,” he reminisced. “That’s the game that pushed me to really get serious about airbrushing. I needed to get a Cameo for the stencils, so I learned a little around that side of the hobby, creating stencils and all. And then a ton of fading with the colors, the way they transition. Lot of cool neon colors and just a lot different than what I have ever done up to that point.”
Dy-No-Mite Strato-Flite
-
Pinside Thread: My Dy-No-Mite Strato-Flite
-
Game: Williams Strato-Flite (1974)
Like all of Matt’s threads, this contains an insane amount of information, including over 500 images with commentary documenting the process. Saying this is an exhaustive look is an understatement.
Naturally, any good restoration will pay special attention to the playfield. Once it was stripped, the Strato-Flite playfield was in fairly good shape. Regardless, he took the time to properly touch it up and apply a clear coat using methods similar to those described in the Rollergames section.

Strato-Flite Playfield Before


Strato-Flite Playfield Paint 2

Strato-Flite Playfield After
All the mechs were cleaned and rebuilt. All the steppers were disassembled, cleaned, adjusted, and reassembled. I love the extra attention to detail that he does by adding new coil sleeves; it really makes it pop.


Strato-Flite Stepper Before

Strato-Flite Stepper After
Next came a step that most people skip. I’m surprised by this fact, given how supremely important score motors are to the operation of an EM machine, but it’s not for the faint of heart. The score motor contains many pieces, making it easy to introduce an error. But he completely disassembled and rebuilt the score motor. He even takes the time to make new labels for everything.


Strato-Flite Score Motor 2

Strato-Flite Score Motor 3

Strato-Flite Score Motor 4
The entire bottom mech board was disassembled, cleaned, and rebuilt. It just looks beautiful. He definitely cleaned the wood on the bottom, maybe stained it, but a little extra touch would be to paint it one of the detail colors used on the cabinet. I believe that he does this on one of his other restorations.

Next, he got carried away like most of us do and repainted the cabinet, complete with beautiful-looking star speckles. If you’re thinking of repainting a pinball machine, he offers the following advice: “LIGHT COATS, several LIGHT COATS! Be patient, especially if you use rattle cans. Every mistake or issue I’ve ran into while painting is always because I tried to rush something.” Good advice. This process will take a long time to do correctly, and you’ll find that you’ll spend 90% of that time prepping.


Strato-Flite Cabinet 2

Strato-Flite Cabinet 3

Strato-Flite Cabinet 4
Finally, the machine was reassembled, looking like a million bucks. No need for commentary, just pretty pictures!


Strato-Flite After 2


“Strato Flite was a great time,” he said. “Initially, I didn't want to clear coat the playfield. I still, to this day, hate clear coating. The plan was to just paint it and then use a playfield protector, which I did at first, until I moved on to the rest of the game. When I went to the cab, I wanted to really get this game clean and started with the mech board. I made a decision to take the score motor and all the stacks apart and get them as good as possible, remembering all the trouble the stacks gave me on my Shangri La.
“After I got the score motor and stacks finished, something broke in my mind, and I couldn't stop. I was going to do this whole board, and man, did I? That's where that feeling of being overwhelmed with a project hit me, and I was loving it. And I'm so glad I did, that mech board looks so good, even today, I'll open the door and just look at little gleams of brass shining back at me. I will say for those that want to go that deep in restoration or even repairs for that matter, that deep of a cleaning with steppers and relays makes the game play so solid, and it's worth the time and effort. Take a lot of pictures from several angles, try to have a pic showing where every single spring and screw goes. Then start taking it apart, it'll go back together, I promise.
“I’m actually in that part of the process for 4MBC, I have all the score reels completely apart and cleaned up, and putting one of the steppers back together as I'm writing this. So, after doing all that with the mech board and then again with the light panel and the rest of a full restoration, I couldn't just leave the Strato Flite playfield uncleared and ended up doing it. Really happy with how that game turned out, especially the little white specs on the blue paint for the cab and the upper arch.”

What’s Next for Matt?
Sometimes it takes a little while for someone to get up the nerve to document their restorations online. But I can assure you, it will be a worthwhile experience, regardless of where you post. It will benefit you, your audience, or, as Matt said, someone 10 years from now struggling to get started. As Matt explains, “I had a Gold Wings that I did a partial restoration on. I was afraid to start a thread for it because I didn’t want to get made fun of. People picked on that game so much. I really wish I made a thread for it after the fact. I sold that game to make room for another game, and I still get excited to see posts made in the Gold Wings club.” There are always bad apples, but the vast majority of people out there just love seeing pictures of cool machines being brought back from the dead.
“I have my haters,” he said, “but for the most part, people that follow me or reach out are very appreciative and compliment my progress. I really enjoy seeing that random bouncing envelope, and it’s someone reaching out about a thread from years ago that they found that impressed them or inspired them or that they’re doing something similar and need a little help.”
So, with all that, what’s next? Restoration is an addictive hobby, and Matt is clearly addicted. “I'm currently working through a Four Million BC,” he said. “This game is going a lot slower for me than usual. I think it’s because I really hate being in between projects, so I'm subconsciously dragging it out. Admittedly, I did get a little burnt-out last year working through this one. So, over the winter, I got another game to just fix up casually to get me back into the mindset. A 1948 Chicago Coin Sally. I'm just waiting on getting the back glass back from a friend, and it'll be complete.
“The gentleman that bought my Space Mission really wants me to restore his Haunted House. Not a pin, but a rifle EM. So, I may consider that soon, just not sure about how much room I have to take something like that on. And I have a Gottlieb Ice Revue that I'm about to do a deep shop job on, similar to the Sally.” Lots of fun stuff coming down the pipeline. I look forward to watching his progress.
Excellent work, Matt. I’m in absolute awe of your skills. “That’s what I strive to be,” he said, “the ‘ok-est’ pinball restorer in the hobby.”

Michael Swanson likes to get lost in his ongoing midlife crisis by deep diving into the details of pinball restoration. He gets carried away with his own pinball projects and likes to follow various other individuals that share his interests. His Kineticist focus will be on highlighting various pinball restoration experts, processes, tools, and tips. He is a Mechanical Engineer, and lives in the Houston area with his wife and two young sons. Michael documents his restorations in two places. He uses YouTube to document in video format and threads on Pinside to document in photo format with commentary.
Like what you're reading?
Get pinball news, analysis, and deep dives delivered to your inbox.
Related Posts
More in Pinball Restoration or browse all topics.