Mr. Know-It-All’s Guide to Rocky & Bullwinkle Pinball

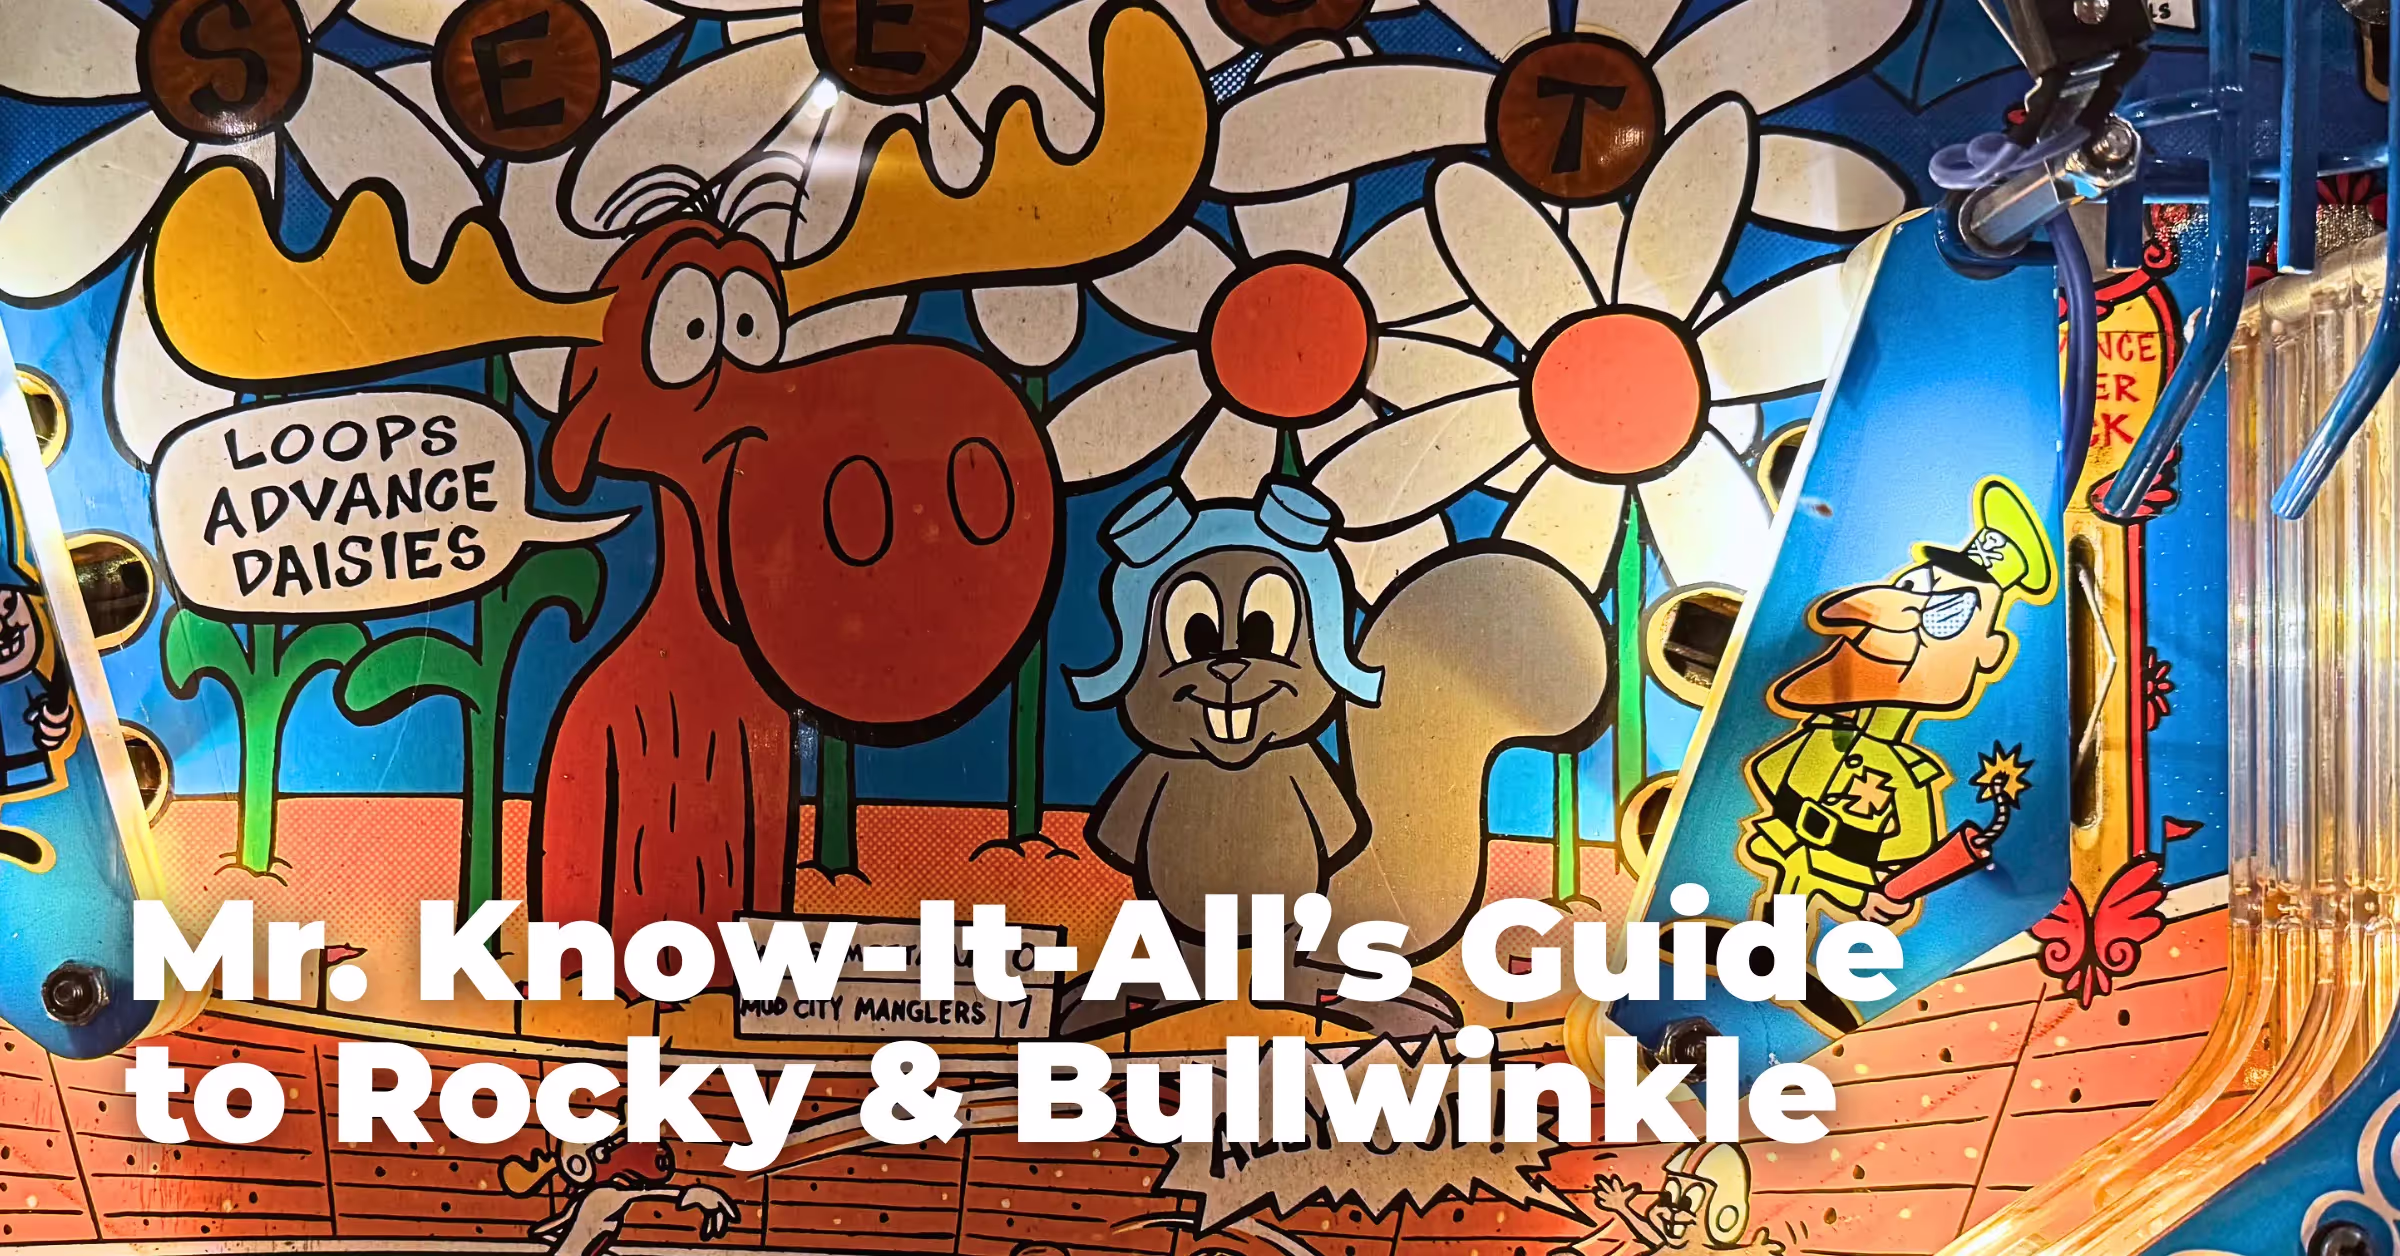
One of the lesser-known 90s pinball designers is Tim Seckel. Hired by Data East in the early 90s, Seckel’s pinball machines still relied on a lot of the company’s trademarks – one or two large ramps that overshadowed other scoring for instance – but had more of an emphasis on orbits and other shots than usual. Seckel’s second pinball machine was based on a cartoon I personally have a soft spot for: Jay Ward’s “Rocky & Bullwinkle”, a serialized cartoon (albeit featuring many recurring skits) that made up for its limited animation with incredibly clever writing that still holds up today for the most part. The design team’s passion for the show can be seen throughout all the playfield art!
Data East’s Rocky & Bullwinkle is a simple machine regarding scoring but has many odd quirks that I’ll discuss in this guide. Players’ main goal will be to start Tri-Ball, ideally from the “instant tri-ball” WABAC award, and then collect as many jackpots as possible which keep increasing in value. Side objectives include the left ramp WABAC awards which lead to a quirky “wizard mode” called Back in Time, the puzzles filled out by the scoops that can award high-scoring modes, and the orbits which advance & light mystery select.
About Adventures of Rocky and Bullwinkle and Friends Pinball
Pinball machine based on the iconic 60s TV cartoon about the adventures of moose & squirrel, and a dog and boy traveling in time and learning about history, and messed up fairy tales and fables - everything but the kitchen sink. View more details about Rocky and Bullwinkle on the Kineticist Game Page.
- Manufacturer: Data East
- Year: 1993
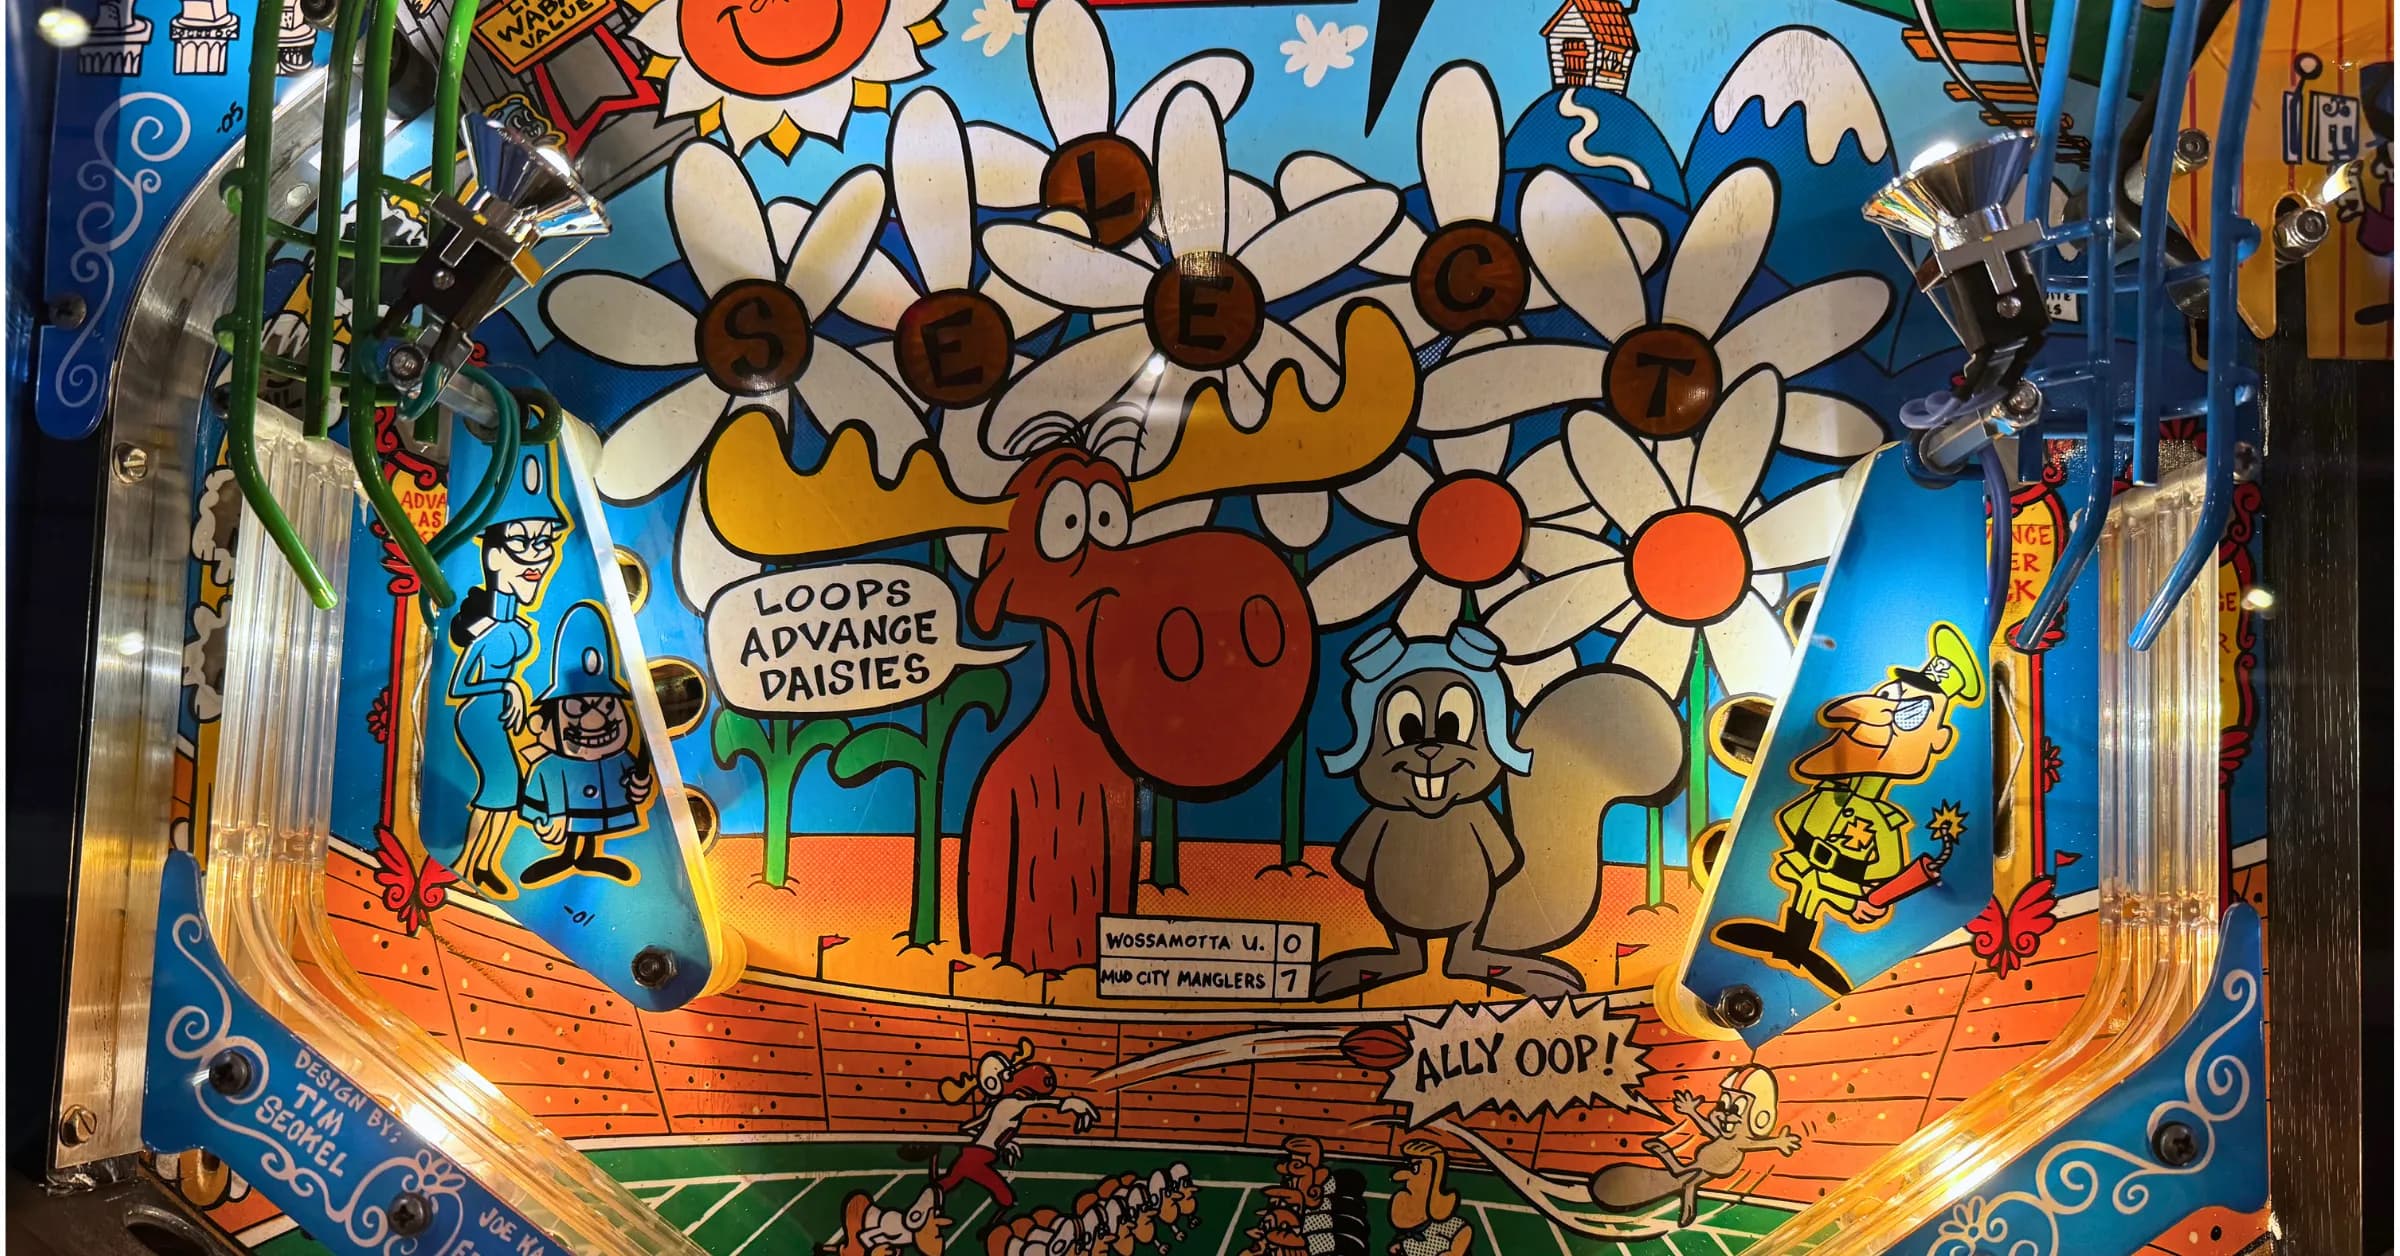
- Design: Tim Seckel
- Code: Kristina Donofrio, John Carpenter, Lonnie Ropp
- Mechanics: Norm Wurz, Joe Balcer
- Art: Kevin O’Connor
- Animation: Kurt Andersen, Jack Liddon
- Music / Sound: Brian Schmidt
Rocky & Bullwinkle Playfield Overview

The playfield art of Rocky & Bullwinkle is very vibrant and colorful and accentuates the simple layout of this machine. On the far left of the playfield is a kickout where extra balls are earned and balls exit the center scoop, though balls can exit this kickout at many different strengths so fast reaction times are needed to keep the ball in play. Gating the left kickout are three standup targets marked with hats that light Hat Trick at the left orbit when completed during single-ball play and add balls during tri-ball if only two balls remain.
The left orbit is a narrow orbit that sends the ball around to either the left or right flipper (typically the left) and collects SELECT letters (multiple if the orbit is repeated in quick succession) and collects hat trick when lit, diverting the ball to a saucer that directly feeds the left flipper. Directly right of the left orbit is the left ramp, a wide ramp that collects WABAC awards when lit, increases the tri-ball jackpot during tri-ball, and starts “looping” if available.
The center scoop is an important shot to master and can be reliably hit from either the left or right flipper. Along with lighting the next WABAC award if one isn’t lit, it spots a puzzle piece towards the next puzzle and awards mystery select if it has been lit via enough orbits. However, balls exiting the center scoop will exit via the left kickout, so be prepared. Right of the center scoop is the right ramp, another very important shot as it starts tri-ball when flashing and collects jackpots & super jackpots during tri-ball. The right ramp has a diverter that sends balls to the left flipper during the “spin ‘n win” puzzle mode, which encourages repeatedly shooting the right ramp.
On the far right of the playfield are the right orbit, which has a wider entrance than its left orbit counterpart and lights laser kick if available. The right orbit is the best way to access the top lanes which increase the bonus multipliers and is also where super pops is started if available. Also on the far right of the playfield is a drop target bank below a figure of Nell trapped in the sawmill. Completing the drop targets advances the lit number, with Save Nell hurry-up starting and the Nell figure moving once the drop targets have been completed enough times.
Scattered throughout the playfield are four colored standup targets spelling BOMB that serve as a different but way riskier way to light the right ramp for tri-ball, and an interesting inlane / outlane setup. Rolling through the flashing inlane, which cycles with the flippers, advances the value of the laser kick at the left outlane. While normally it’s best to try for 5M per laser kick, with a high bonus multiplier it’s worth changing course and making each laser kick award “adv. X” instead.
Scoring on Rocky & Bullwinkle is consistent with the other Data East machines of its era, with 100M being considered a “good” score and 300M+ being above average – though billions are quite possible given enough skill and patience with tri-ball.
Getting Started with Rocky & Bullwinkle Pinball
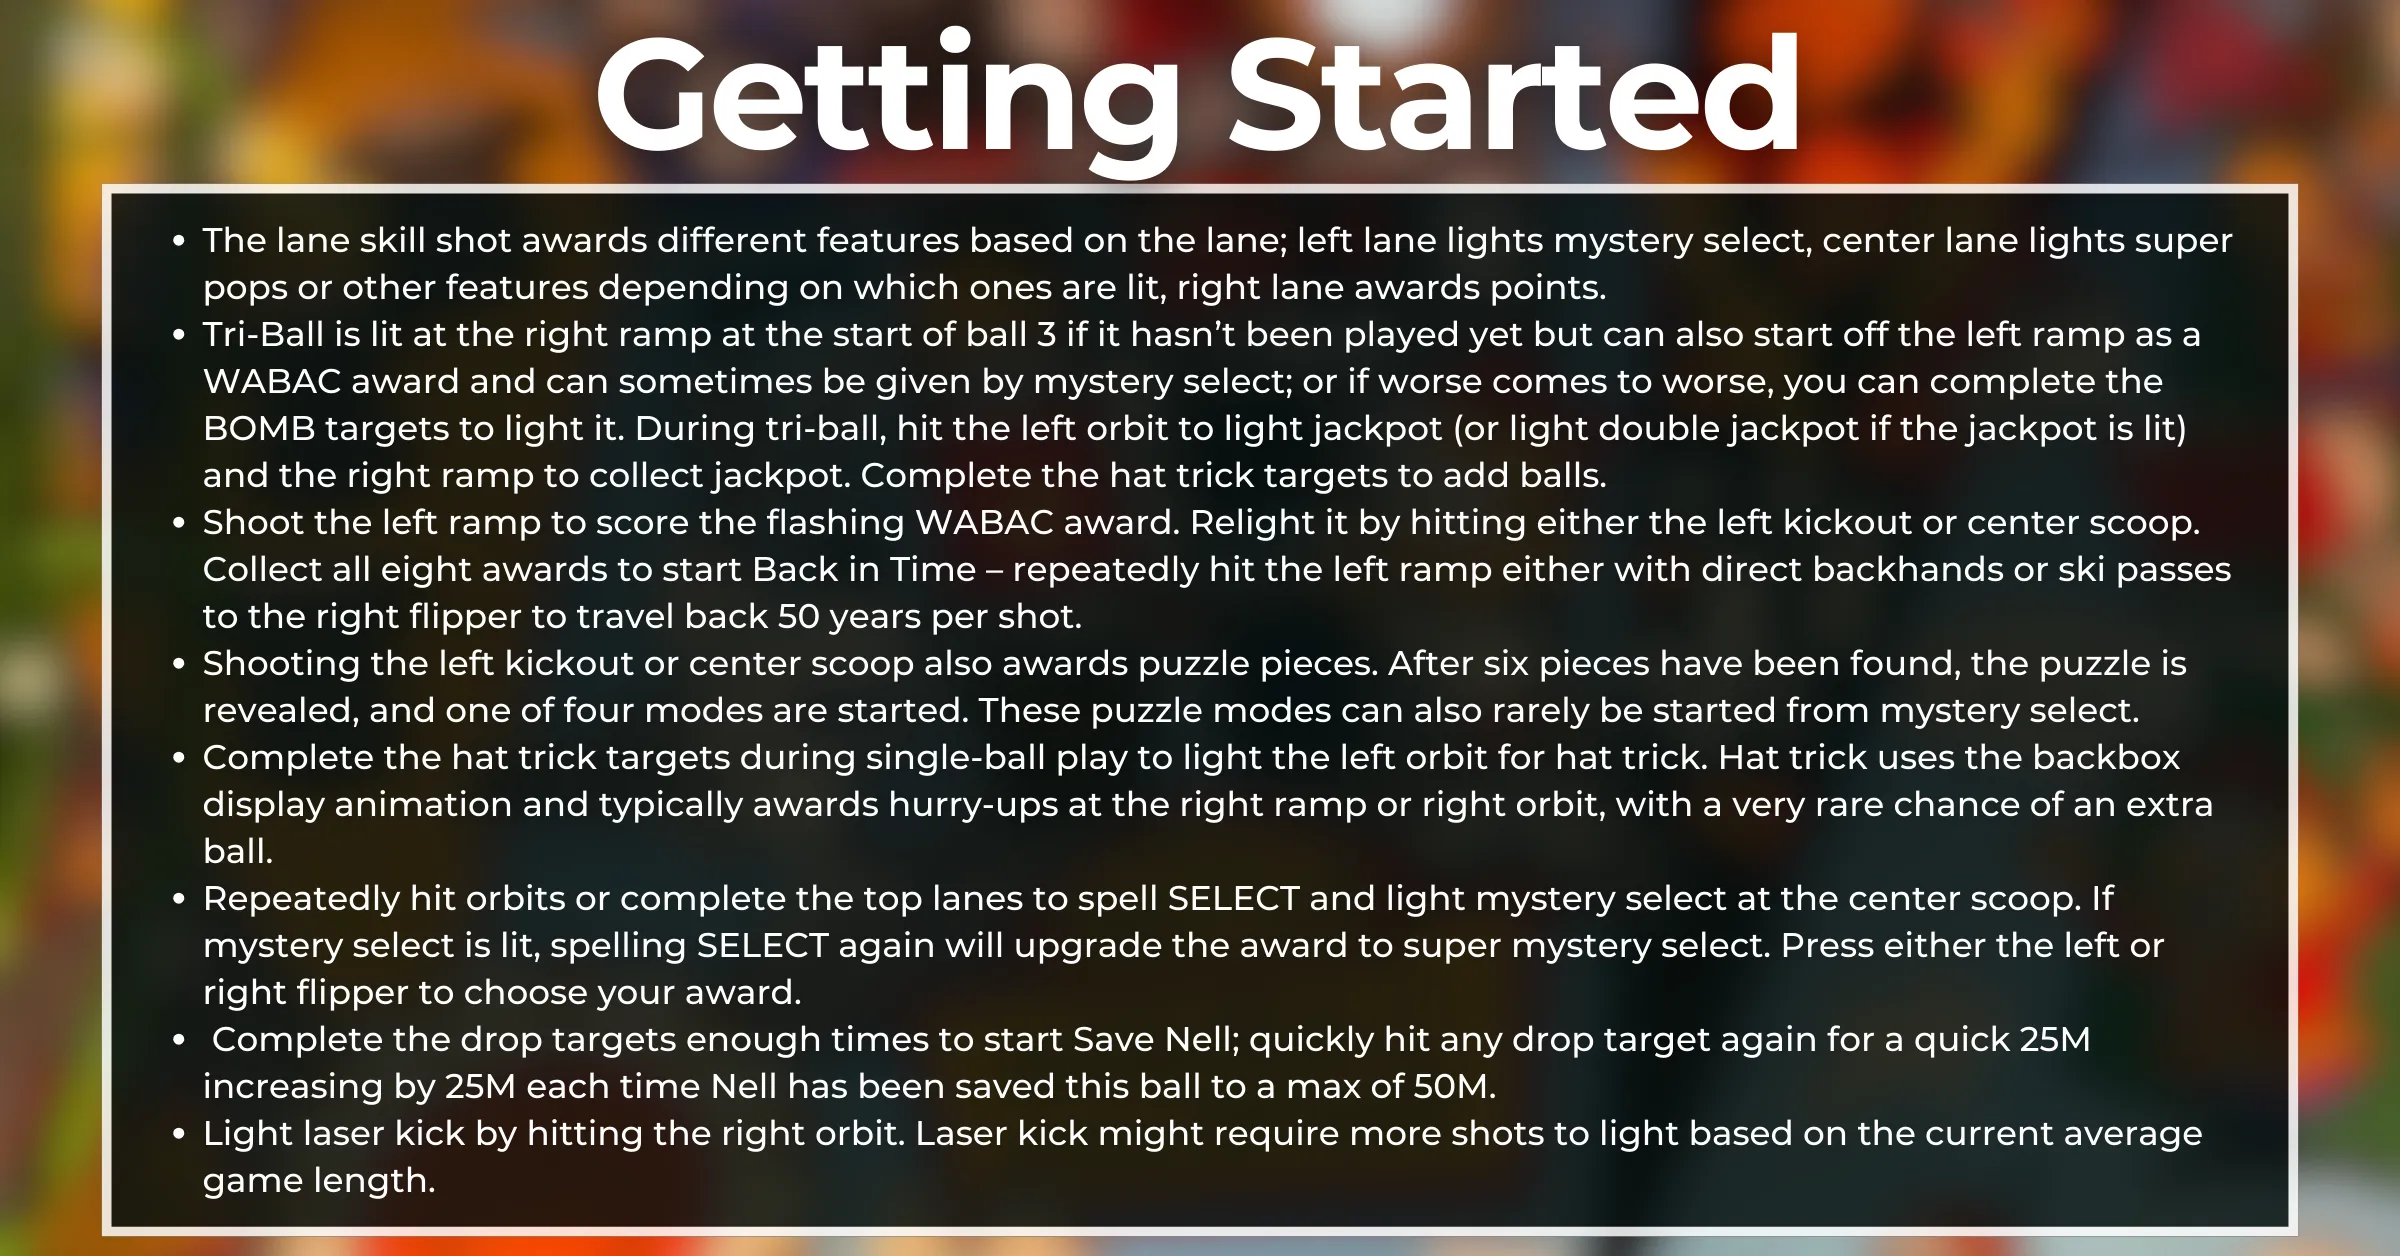
- The lane skill shot awards different features based on the lane; left lane lights mystery select, center lane lights super pops or other features depending on which ones are lit, right lane awards points.
- Tri-Ball is lit at the right ramp at the start of ball 3 if it hasn’t been played yet but can also start off the left ramp as a WABAC award and can sometimes be given by mystery select; or if worse comes to worse, you can complete the BOMB targets to light it. During tri-ball, hit the left orbit to light jackpot (or light double jackpot if the jackpot is lit) and the right ramp to collect jackpot. Complete the hat trick targets to add balls.
- Shoot the left ramp to score the flashing WABAC award. Relight it by hitting either the left kickout or center scoop. Collect all eight awards to start Back in Time – repeatedly hit the left ramp either with direct backhands or ski passes to the right flipper to travel back 50 years per shot.
- Shooting the left kickout or center scoop also awards puzzle pieces. After six pieces have been found, the puzzle is revealed, and one of four modes are started. These puzzle modes can also rarely be started from mystery select.
- Complete the hat trick targets during single-ball play to light the left orbit for hat trick. Hat trick uses the backbox display animation and typically awards hurry-ups at the right ramp or right orbit, with a very rare chance of an extra ball.
- Repeatedly hit orbits or complete the top lanes to spell SELECT and light mystery select at the center scoop. If mystery select is lit, spelling SELECT again will upgrade the award to super mystery select. Press either the left or right flipper to choose your award.
- Complete the drop targets enough times to start Save Nell; quickly hit any drop target again for a quick 25M increasing by 25M each time Nell has been saved this ball to a max of 50M.
- Light laser kick by hitting the right orbit. Laser kick might require more shots to light based on the current average game length.
Skill Shot
This straightforward lane skill shot is complicated a little by what awards are given for the corresponding lanes. Plunge the ball and then change the flashing lane as the ball is plunged as usual but take note of the awards given by each lane.
- The left lane lights mystery select and is objectively the best skill shot of the three. If mystery select is already lit, it will upgrade the award to super mystery select.
- The center lane starts super pops, or if super pops is already lit, lights looping (at the left and right ramps).
- The right lane awards 4M + 1M x ball number.
Tri-Ball
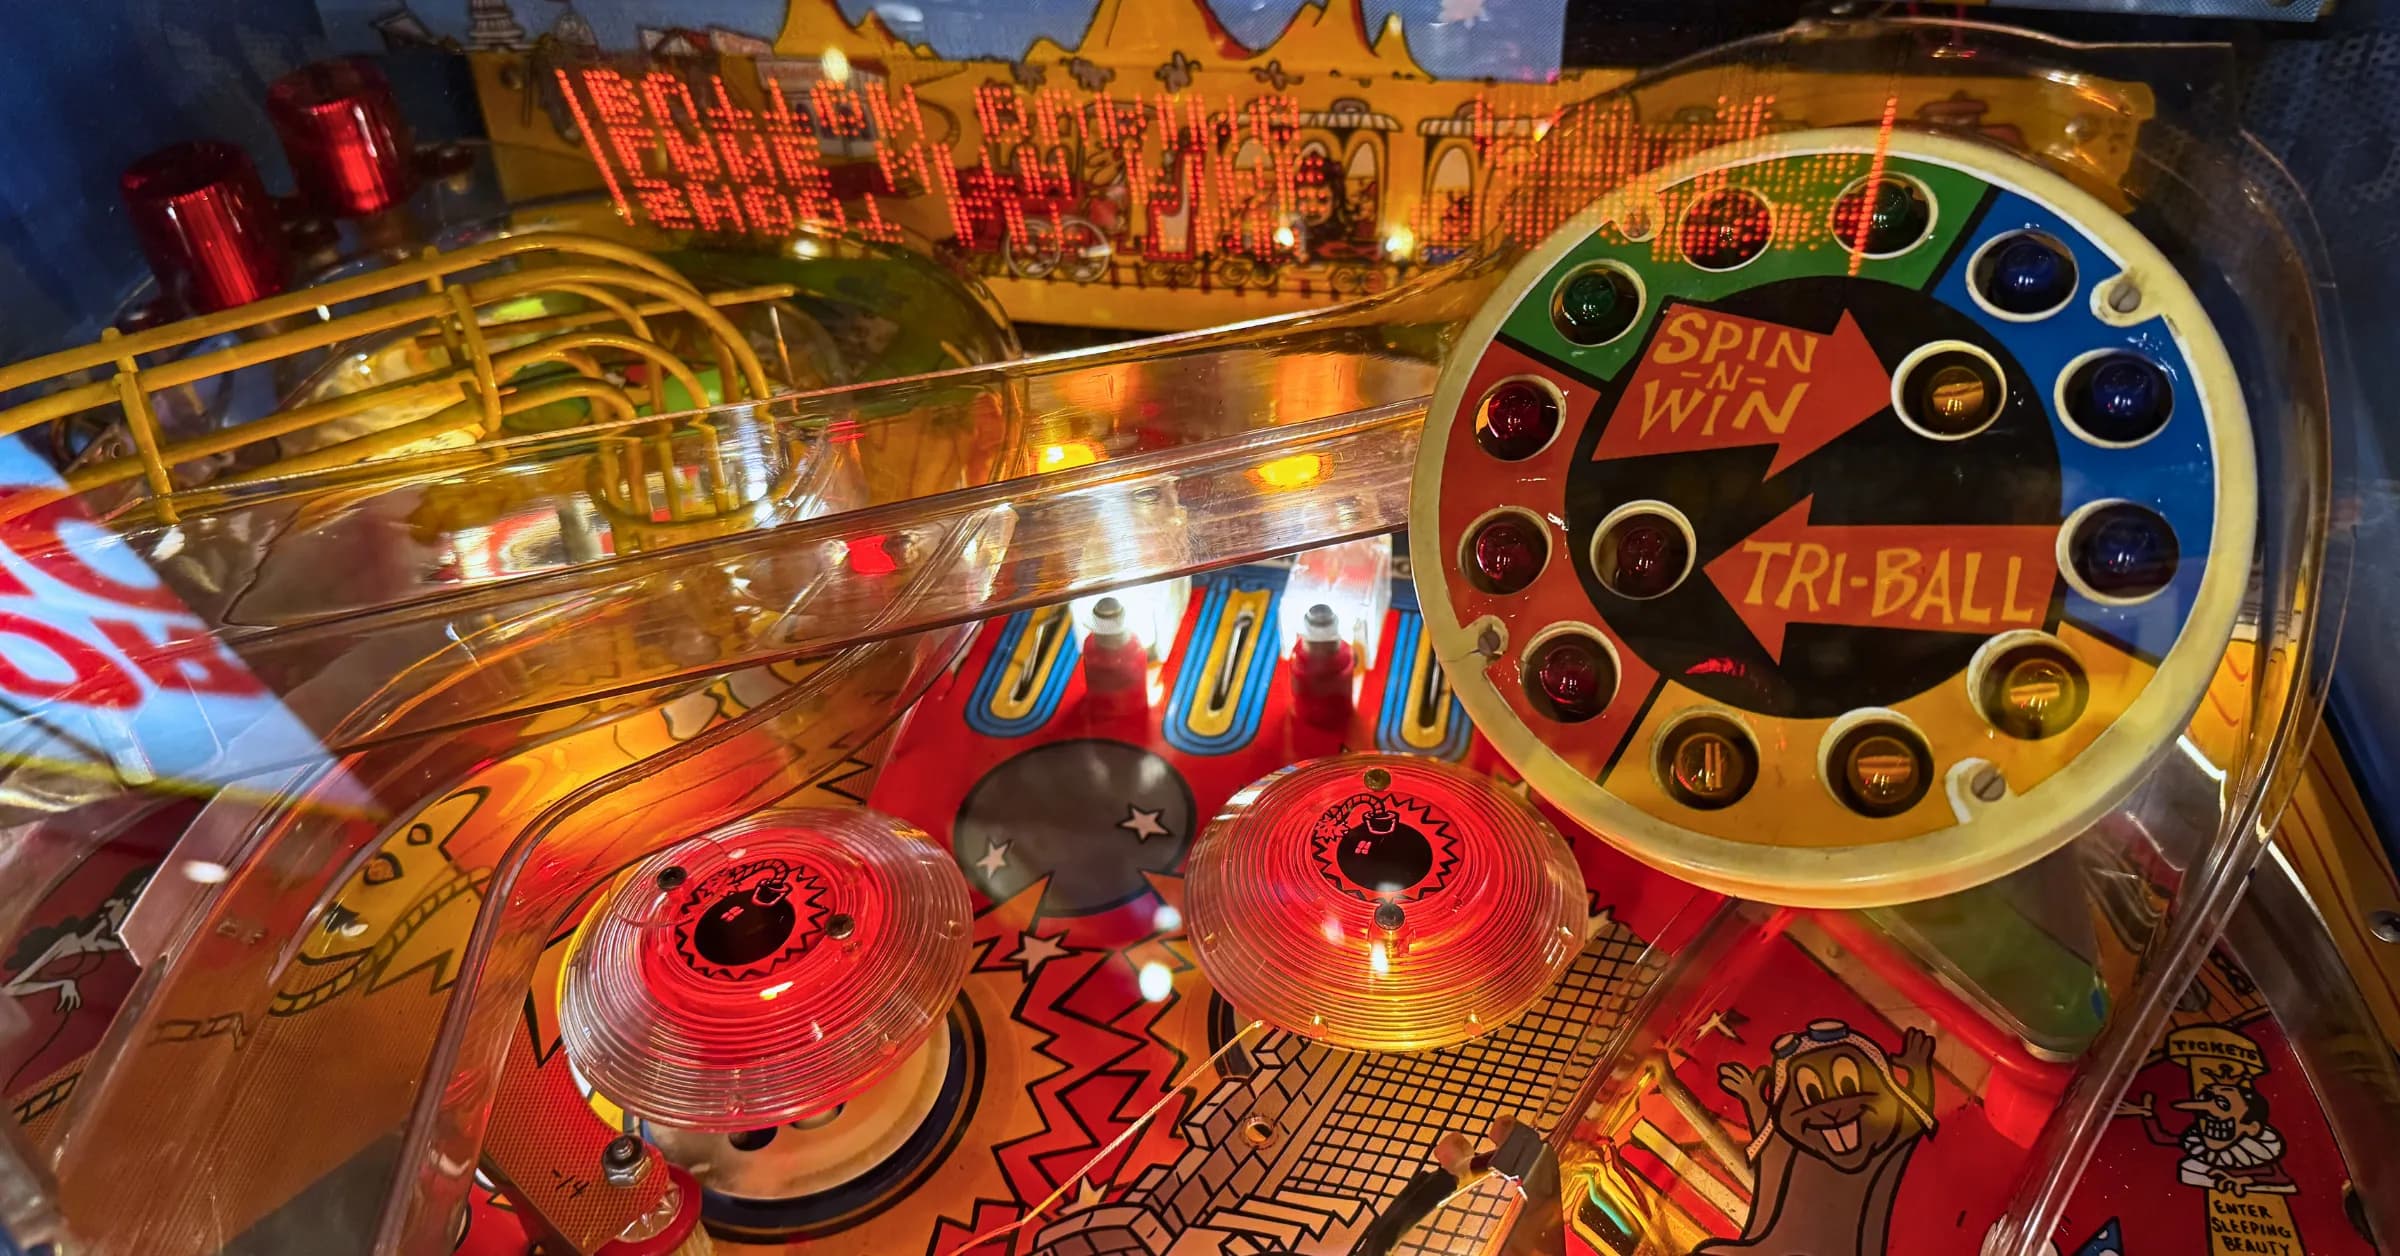
Tri-Ball is the bread & butter of scoring high on Rocky & Bullwinkle and should be the goal of anyone playing this machine for score. Tri-Ball lights at the right ramp after completing the BOMB targets enough to fill the wheel above the right ramp, but this method is very dangerous and you’re best off finding other ways to play Tri-Ball – you can earn it off of the instant tri-ball WABAC award, as an award from mystery select, and it lights automatically on ball 3 if it hasn’t been played yet this game.
Though the Tri-Ball intro animation looks great, it does not interrupt play like a typical multiball start animation does, so let the displays play out as you keep 3 balls in play. Your immediate goal should be hitting the left orbit to light jackpot, which is scored at the right ramp and starts at 20M but increases by 1M per left ramp, and 5M per jackpot scored this tri-ball. If jackpot is already lit, the left orbit will instead light double jackpot for about 8 seconds. There is also an 100M super jackpot called Bullwinkle’s Treasure available at the right ramp after hitting enough BOMB targets to fill out the wheel during tri-ball, but as mentioned earlier, these BOMB targets are deadly and not worth going for.
Drained down to two balls? This can make the multiball a fair bit easier if you cradle one ball on each flipper, use one flipper to hit the left orbit, and the other to hit the right ramp. Or if you’re not feeling as confident with the shots, try aiming for the hat trick targets – this will add another ball to the tri-ball to keep it going for longer! Fun fact, this is the first pinball machine to include an “add-a-ball” in the modern tradition.
WABAC Awards / Back in Time
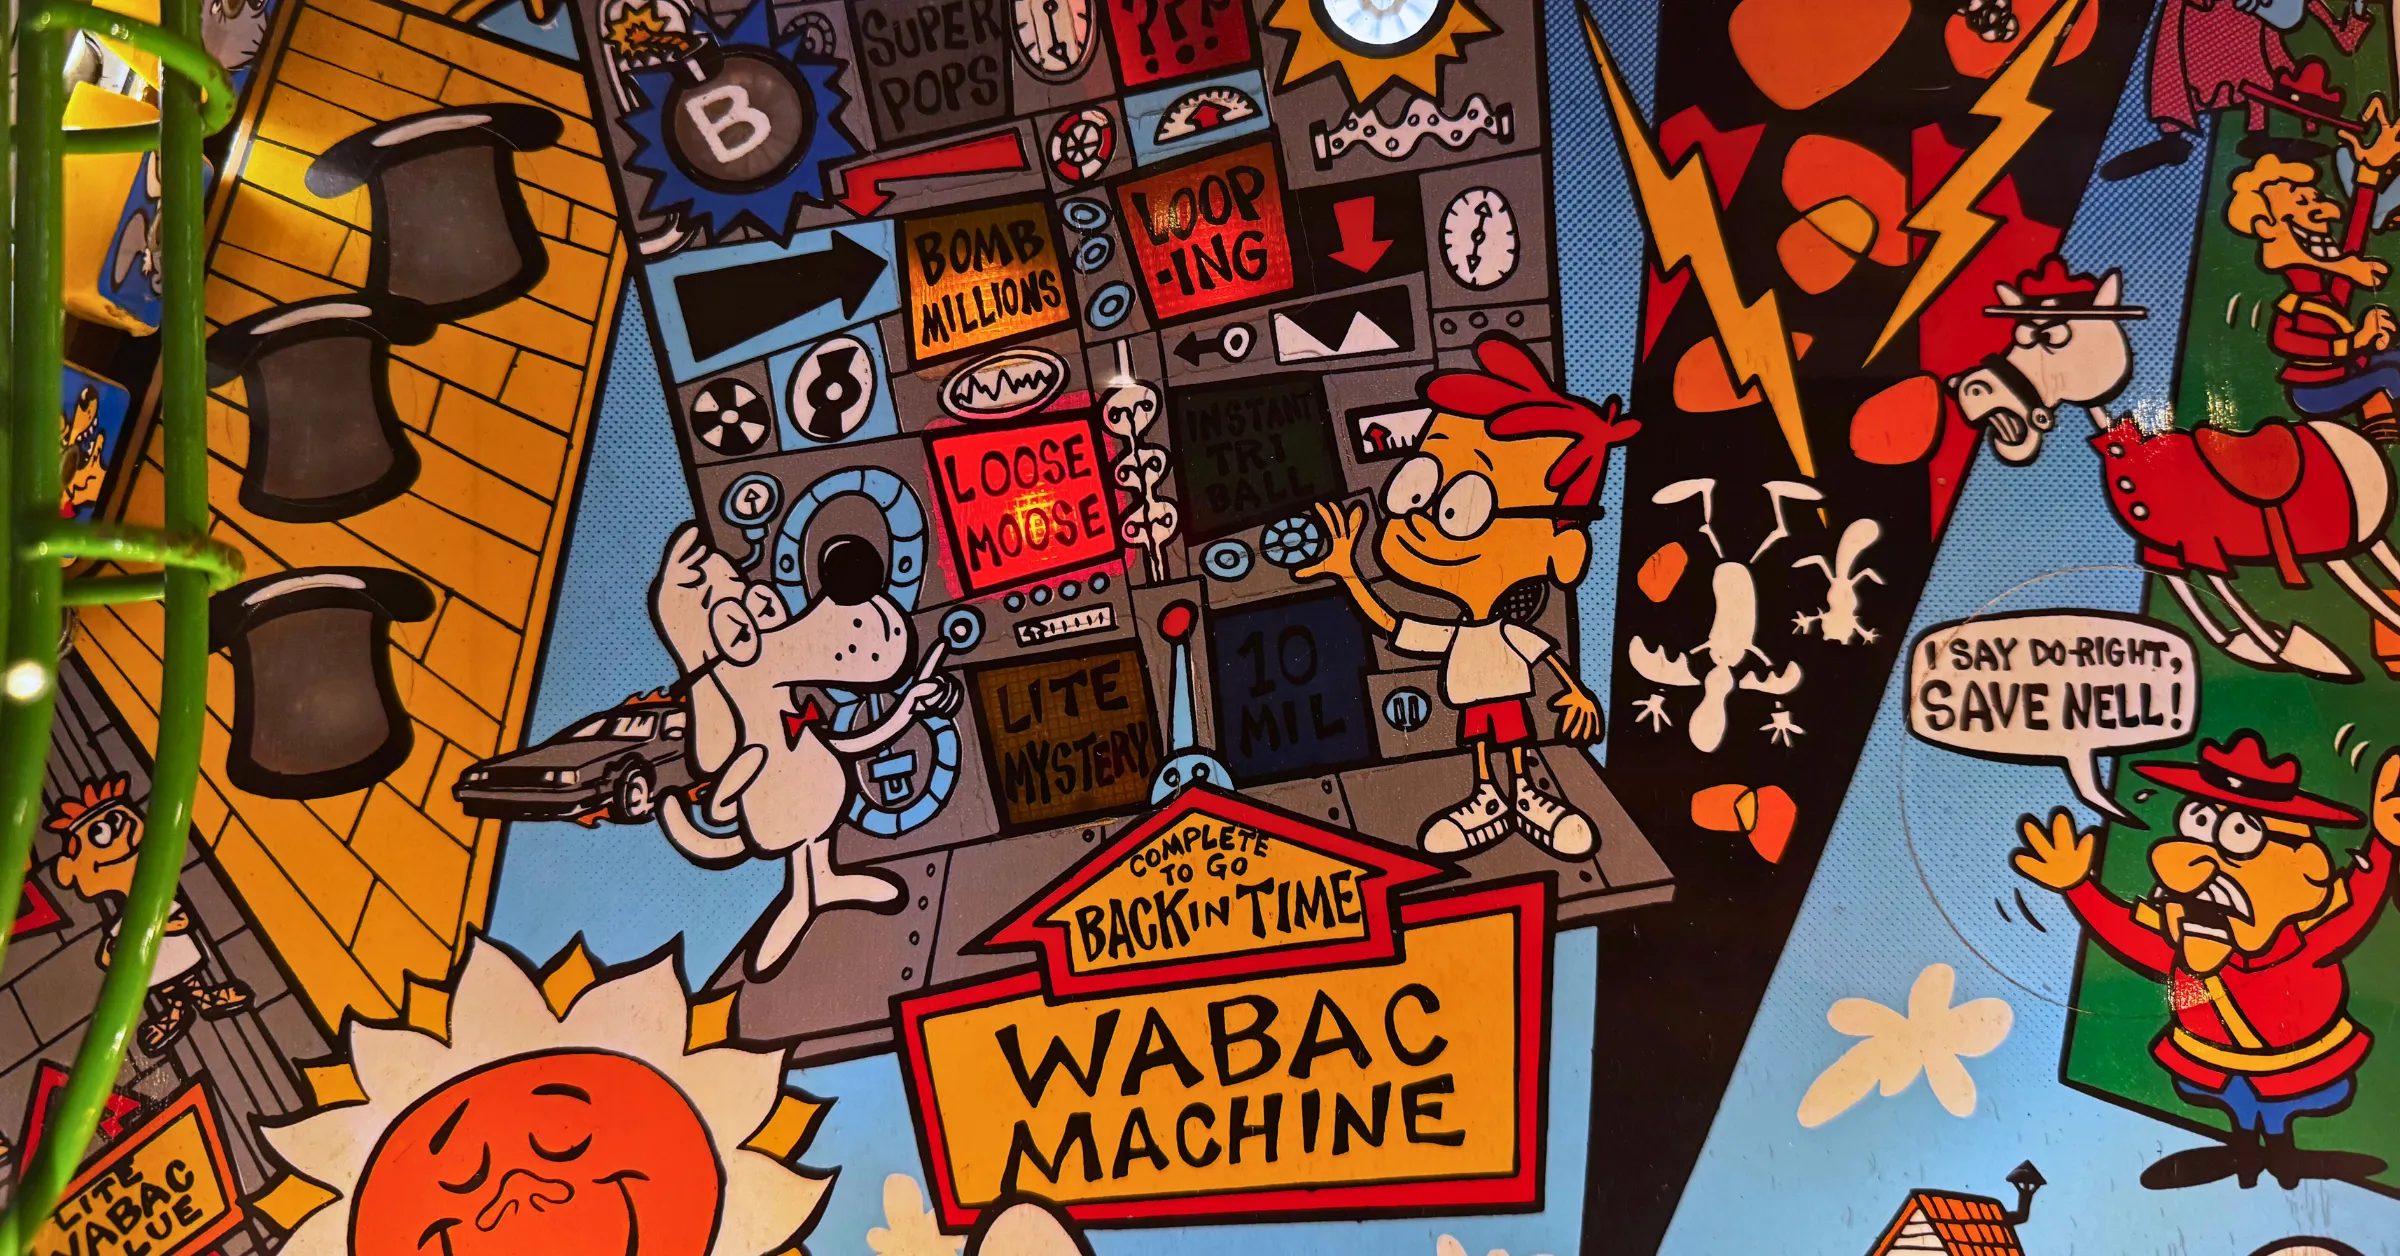
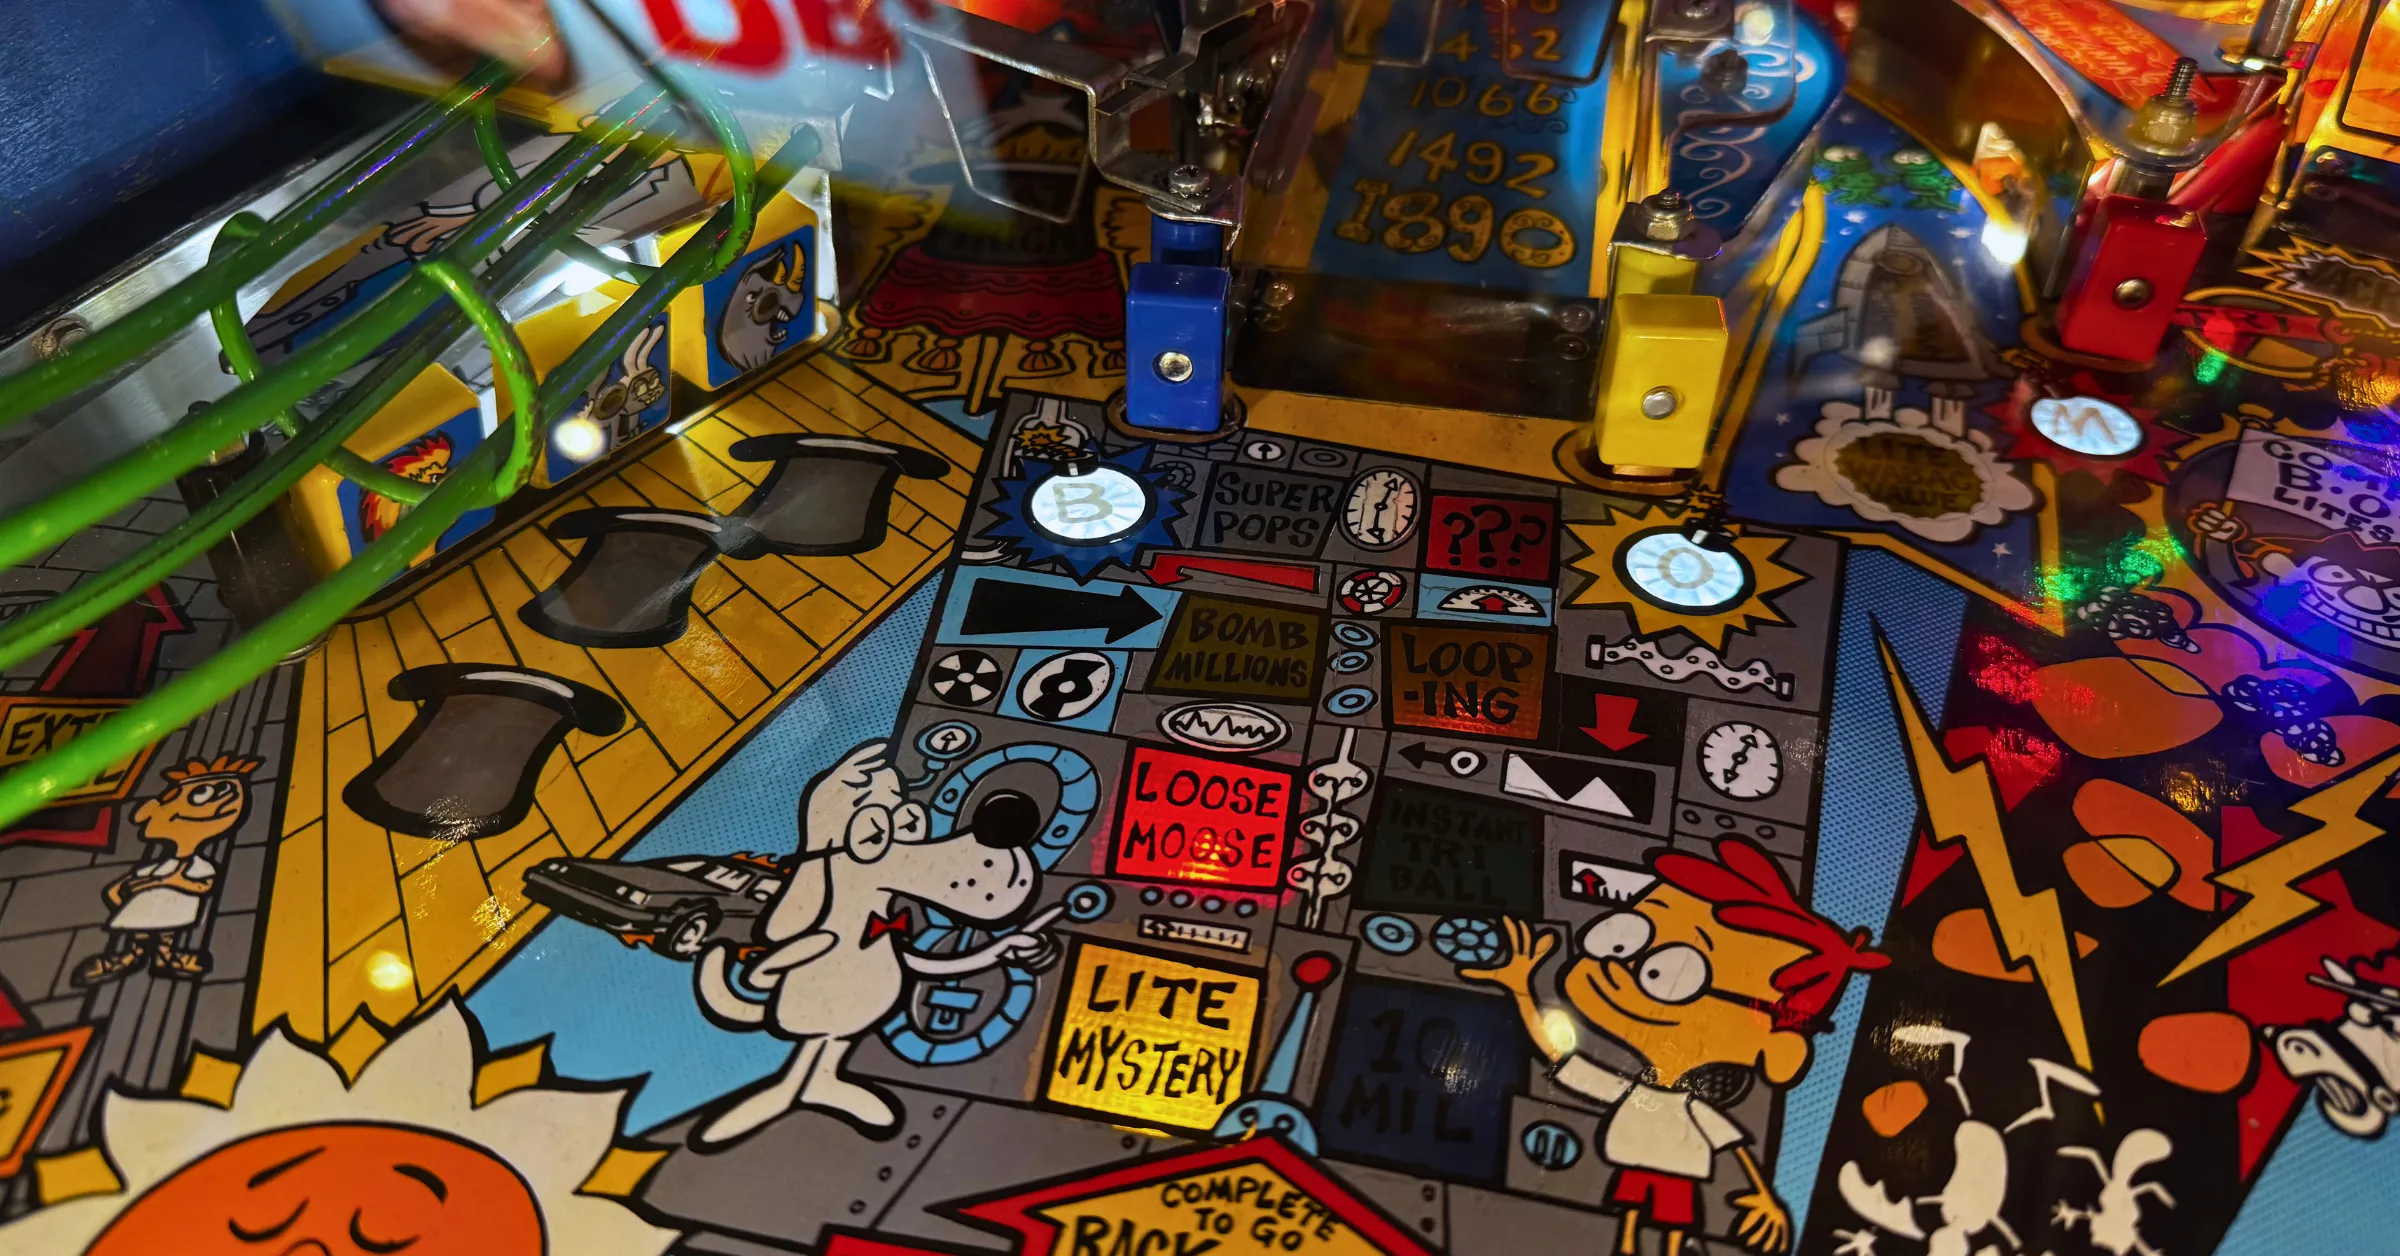
At the start of the game, a random panel on the WABAC time machine is lit in front of the left ramp. These panels are collected with left ramp shots and then relit by hitting either the left kickout or center scoop. From top to bottom, left to right, the panels are:
- Super Pops (started when a bumper is hit; increases from 500k to 1M to 2M for every 10 hits, ends when a ball exits the bumpers)
- ??? (mystery score between 5M – 20M, or rarely double score if below 100M)
- Bomb Millions (1M per wheel light lit, augments the wheel to four lights if none are lit)
- Light Looping (started on the next ramp shot; for 20 seconds, ramps start at 2M + 1M per shot if alternated & made in quick succession)
- Loose Moose (15 seconds of fast scoring, all switches score 500k. Loose moose total is scored in end-of-ball bonus)
- Instant Tri-Ball
- Light Mystery (lights mystery select at the center scoop, or super mystery select if applicable)
- 10M
The left ramp isn’t the only way to fill out WABAC panels. If you scored a WABAC award like super pops, light looping, or tri-ball from another method like the skill shot or mystery select, that panel will be lit automatically.
Once all eight awards have been scored, the next left ramp shot will start Back in Time but more importantly reset the WABAC awards so they can all be collected again. Back in Time itself is an odd sort of wizard mode where every left ramp shot sends the player 50 years back in time (starting from 1993 A.D. when the machine released) and adds 3 seconds to the mode’s 15-second timer. The player’s current year is kept track of throughout the game and points (50M, 75M, then 100M) are awarded after reaching thresholds of 500 years, so after every 10 ramp shots. The furthest a player has gone back in time is also kept as a high score with its own initials.
Puzzle Modes
Balls that fall into the center scoop or left kickout not only light WABAC awards but also remove puzzle pieces from the display. Once all six pieces are removed, an animation will be shown leading into one of four valuable timed modes:
- Rocket Squirrel Scoring (all major shots score 5M for 20 seconds)
- Spin ‘n Win (right ramp scores between 5M and 20M for 20 seconds and sends balls to the left flipper; timer resets to 4 seconds if the player is under 4 seconds and hits a ramp)
- 2M Drops (start off with 10M and add 2M for every drop target hit; all 5 drop targets are always available)
- Back in Time (instantly lights the left ramp for Back in Time & resets WABAC awards)
These four modes are given in a random order. The fifth and sixth puzzle “modes” are extra ball and special, respectively.
Hat Trick
Completing the hat targets on the left side of the playfield makes Rocky say “wrong hat!” a lot but also lights the left orbit for hat trick. Hat trick uses backbox display animation to recreate one of the cartoon’s intermissions, where Bullwinkle tries to pull a rabbit out of his hat, but it never seems to go according to plan. The rotating mech in the backbox includes three different animals that correspond to three different modes or awards:
- Lion (right ramp is lit for 15M hurry-up)
- Rhino (right orbit is lit for 20M hurry-up, repeatedly hit the orbit within 3 seconds for the locked in hurry-up value)
- Rocky in a rabbit outfit (awards extra ball)
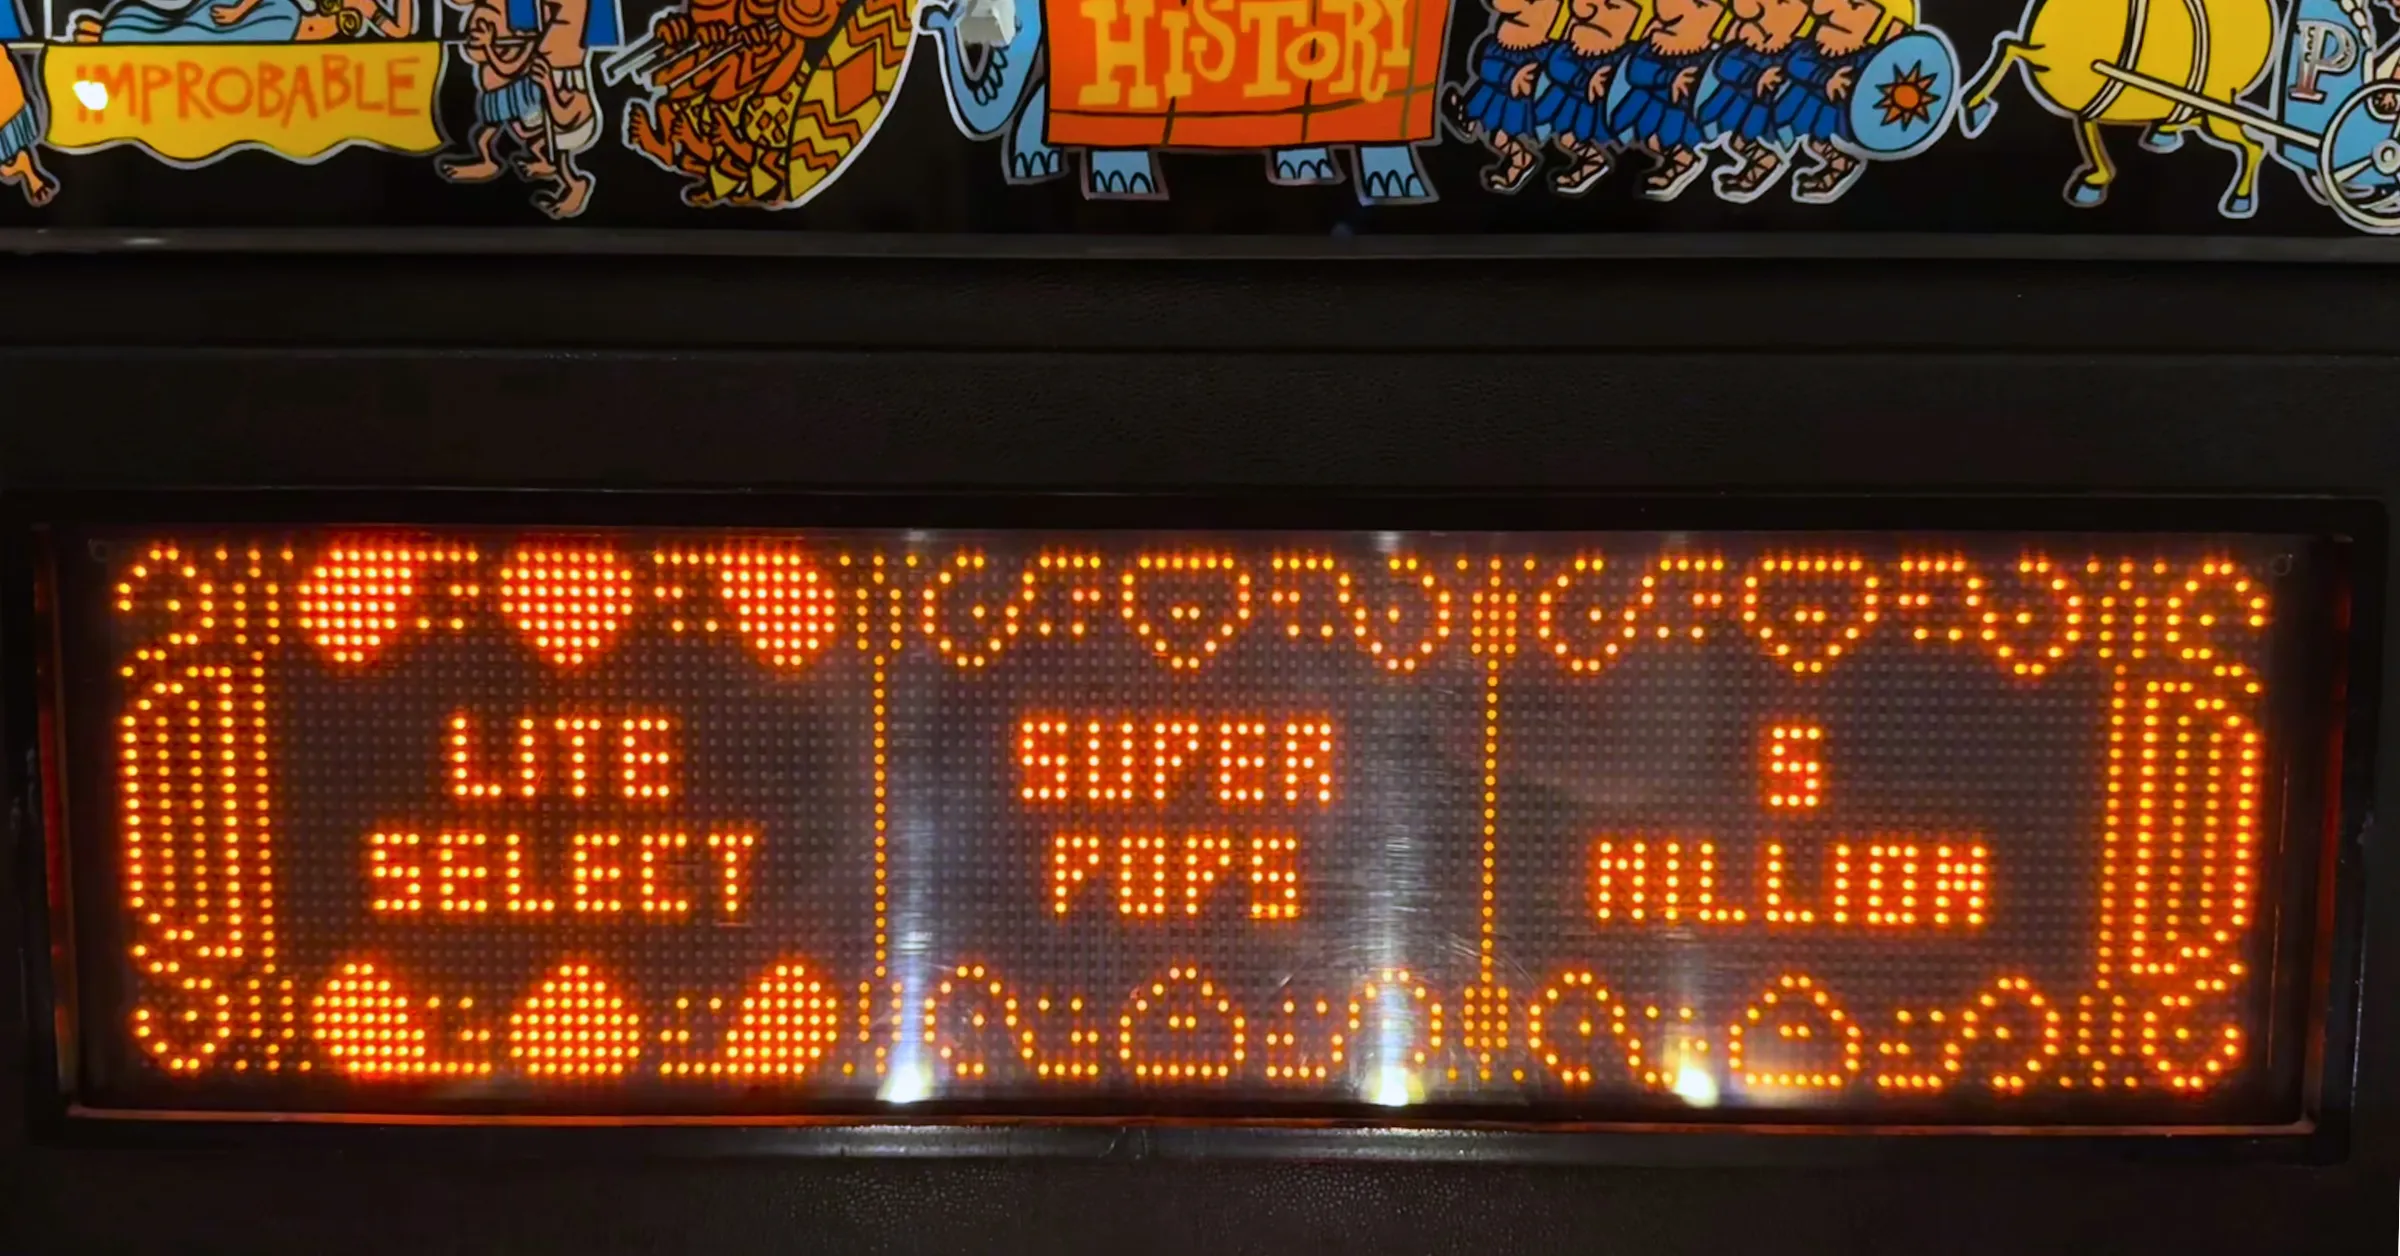
Mystery Select

Shoot the left orbit, right orbit, or complete the top rollover lanes to add SELECT letters. Repeated shots to the same orbit with no switch hits in between add 2 SELECT letters. When SELECT is completed, the player can either hit the center scoop for mystery select or keep hitting the orbits to spell SELECT again and qualify super mystery select. Press either the left or right flipper to select the award on either side of the display.
Though super mystery select seems like the better option, depending on the current game state it might be better to go for “standard” mystery select instead. “Standard” mystery select has the chance of giving WABAC awards or starting Save Nell, while super mystery select will never give WABAC awards that aren’t instant tri-ball and otherwise prioritizes puzzle modes. Double score can be earned from both standard and super mystery select, but the standard mystery select removes this award after 150M, and super mystery select removes it at 300M. Weigh your options accordingly!
Save Nell
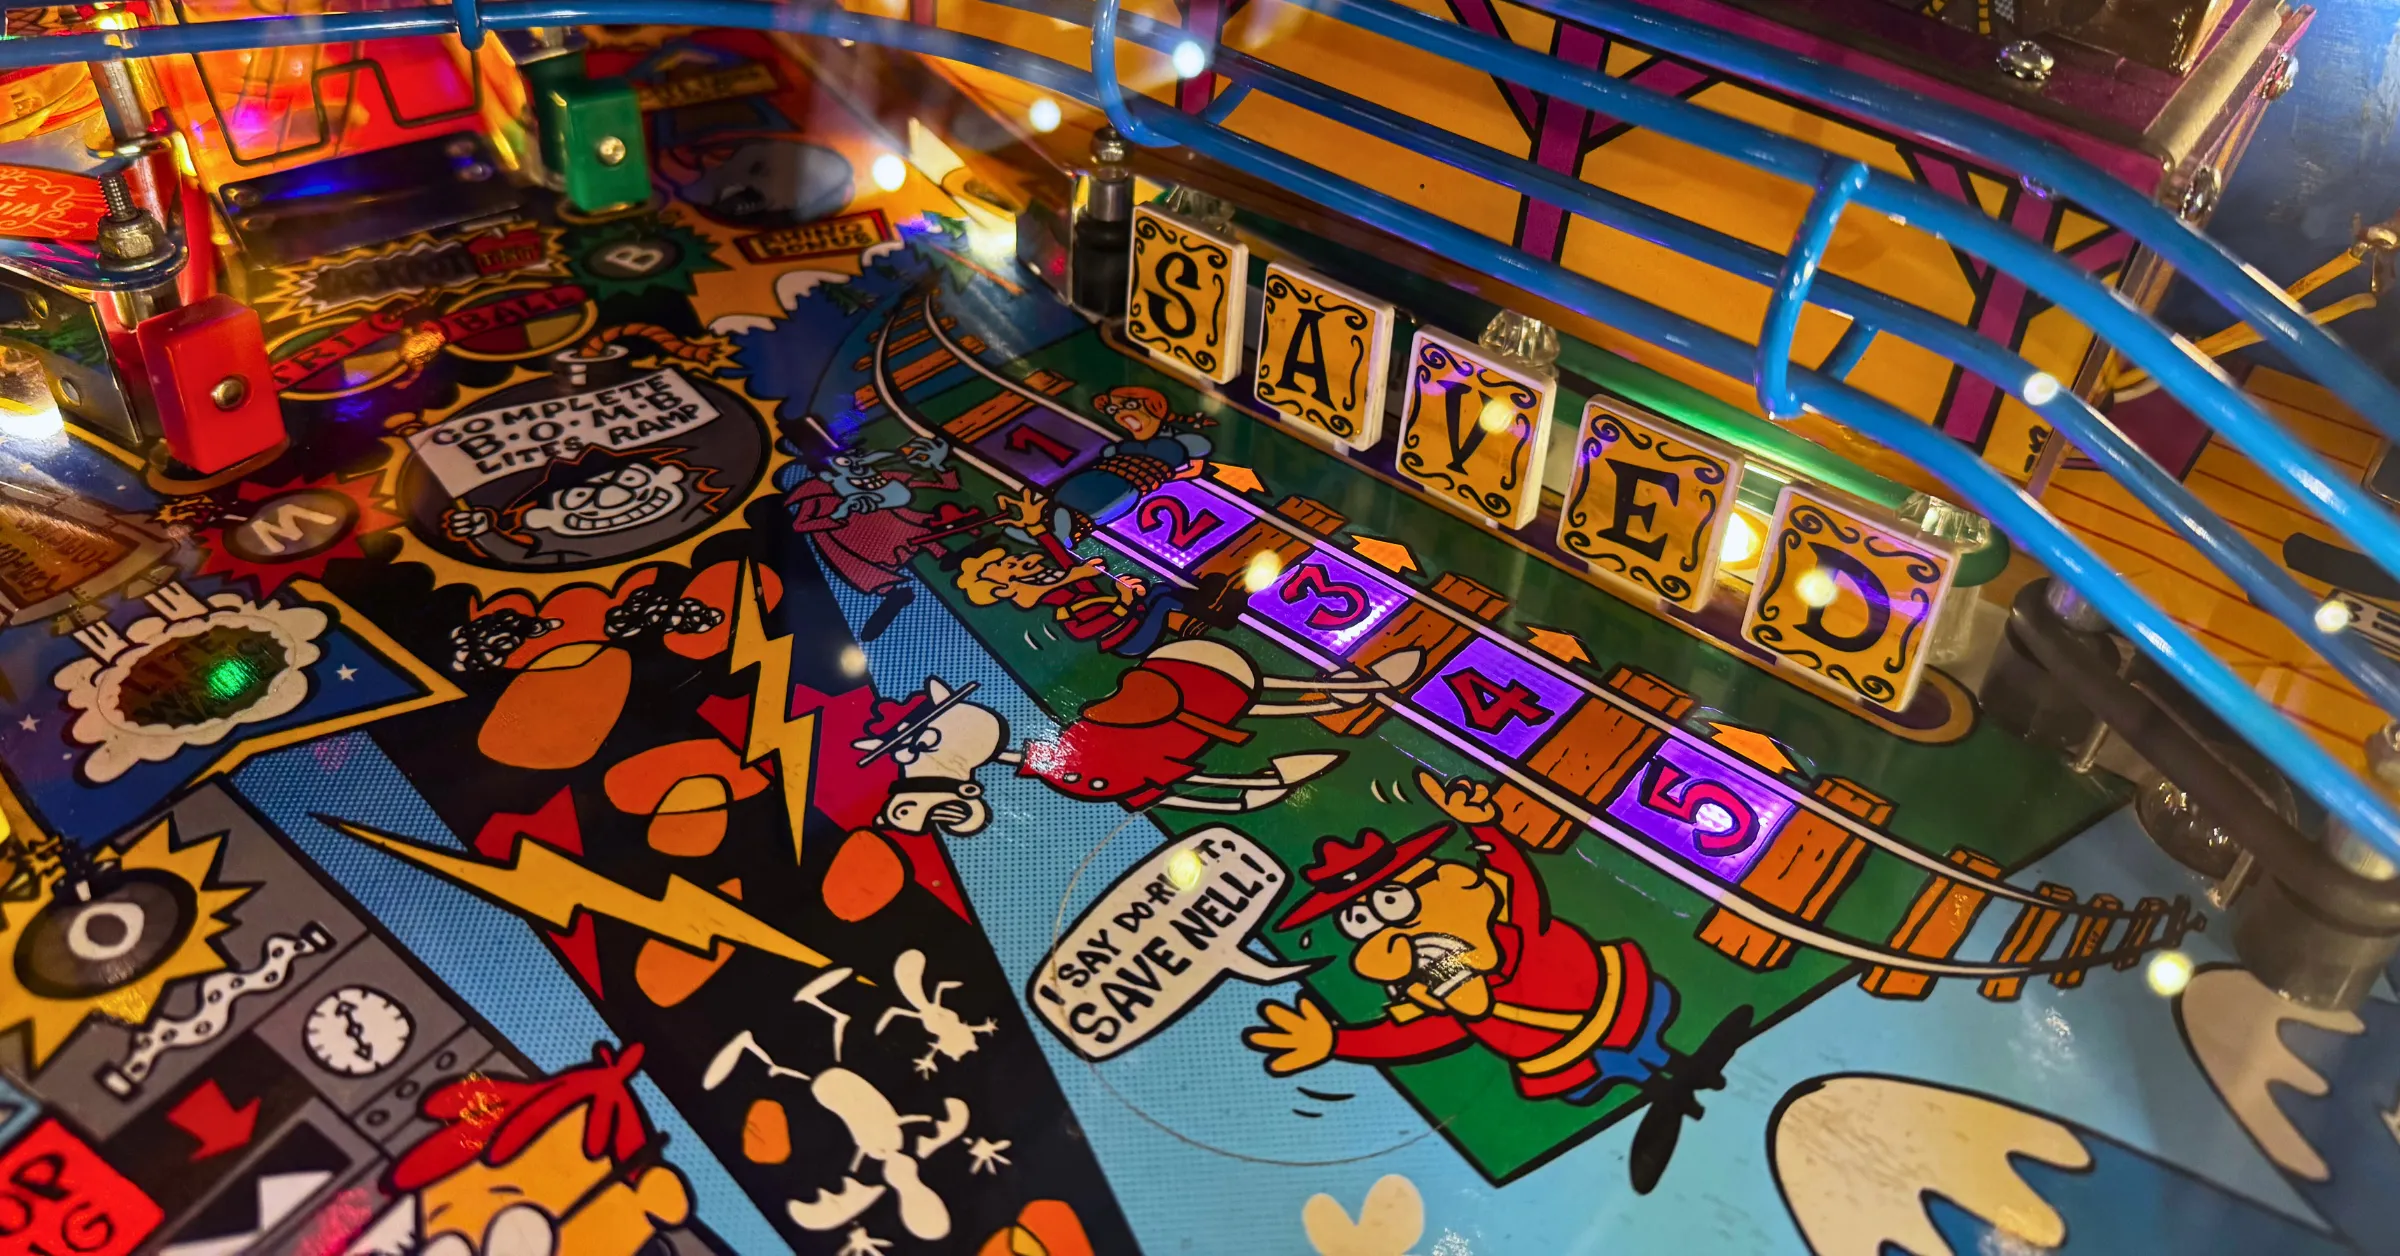
Completing the drop targets enough times – as indicated by the numbers in front of them – advances towards a quick 15-secound round to save Nell by hitting any drop target. The first time Nell is saved on a ball, 25M is scored, then 50M for every subsequent time she’s saved this ball.
A very well-hidden extra ball (or extra 25M if disabled) is available if the player manages to knock down all 5 drop targets as soon as the mode starts, but this is incredibly difficult, and I’ve never managed to do it myself…
Laser Kick
The rules for this machine’s kickback are more than a little confusing as was tradition for Data East machines of this time (their Star Wars table also had odd rules behind the laser kick and how to light it). Normally, laser kick is lit by hitting the right orbit twice – once to light “light laser kick” and again to light the kickback. However, if the average ball time is above 90 seconds, then the player will not be able to light laser kick this way (though they can still light it through other awards like ??? or mystery select). Adjustment 45 (tournament mode) in the settings removes this rule so only two shots are needed regardless of average ball time.
The laser kick itself scores either 1M, 3M, 5M, or adv. X (bonus multiplier) and is changed by rolling through the flashing inlane that changes with the flippers. If you’ve reached 10x bonus, collected bonus hold, and maxed out the bonus at 2M, keep the kickback on “adv. X” as every kickback will award 20M!
Noah’s Strategies
- During tri-ball, cradle one ball on the left flipper and another on the right. Hit the left orbit from the right flipper, then the right ramp from the left flipper. Rinse and repeat. You can go for add-a-ball or double jackpot if you want, but neither are necessary for getting high scores and are better for putting the hammer down on opponents.
- Always go for WABAC awards. They’re as simple as hitting the left ramp, then the center scoop, then surviving the left kickout feed, and are the most reliable way of getting tri-ball consistently. Letting the ball bounce off the right flipper from the left kickout feed tends to be safer than holding up the right flipper, as sometimes the ball can be sent right past it down the drain.
- Puzzle modes in preferred order: spin ‘n win > rocket squirrel scoring > 2M drops > back in time. Try to save Back in Time for early on when you have only a few WABAC panels lit rather than when many of them are lit.
- Weigh your mystery select options accordingly. For instance, choosing between 20M or Save Nell, you should choose Save Nell because it’s pretty easy to collect that 25M just by hitting one drop target
VHS collector, media archivist, and pinball rules aficionado, Noah has been invested in the hobby since he was a teenager - much to the surprise of his parents and others his age. As an expert on brand new machines he’s the guy to call if you’re new to the hobby, or an experienced player who wants some help. Noah hopes to participate in and perhaps even win major tournaments like INDISC as his skills improve and desires for pinball to become a more inclusive hobby.
Like what you're reading?
Get pinball news, analysis, and deep dives delivered to your inbox.
Related Posts
More in Pinball Tutorial or browse all topics.