The 8th Wonder of the World: Stern King Kong Tutorial
The King Kong series is a license that has had a bit of a cursed history with pinball. Data East attempted a table based on the license in 1990 that moved the story’s location to their home of Chicago, but production costs prevented the game from being released despite ROMs and a playfield for it being finished. As pinball evolved in the decades following its release, Stern Pinball figured maybe it was time to return to the license, and who better to create a machine based on it than the “king” himself, Keith Elwin?
King Kong: Myth of Terror Island is loosely based on the original 1933 novel but is largely a Stern creation designed to emulate the feel of 90s Williams tables in its atmosphere and theme, particularly Indiana Jones: The Pinball Adventure and Congo. As expected for an Elwin design, the table is packed with unique shots and ones that had only been experimented with a few times, including the return of the sweepable drop targets from Quicksilver that can now be hit from three different flippers instead of just two. In the Elwin pantheon, this table is best comparable to Avengers: Infinity Quest as both tables place heavy emphasis on flow, drop targets, and making good decisions about which modes to play and when. And I fully approve as someone who owns that table!
About King Kong: The Myth of Terror Island
Jack Denham leads an expedition to capture King Kong, the beast of Terror Island. Players explore the island, attempting to fend off Kong along the way and escape with whatever treasure they can as their battle takes them from the island all the way to the shores of New York City.
- Manufacturer: Stern Pinball
- Release Year: 2025
- Design: Keith Elwin
- Code: Rick Naegle, Joshua Henderson
- Mechanics / Electronics: Harrison Drake
- Art: Kevin O’Connor, Greg Freres, Jeremy Packer
- Displays: Chuck Ernst
- Music / Sound: Jerry Thompson
Playfield Overview
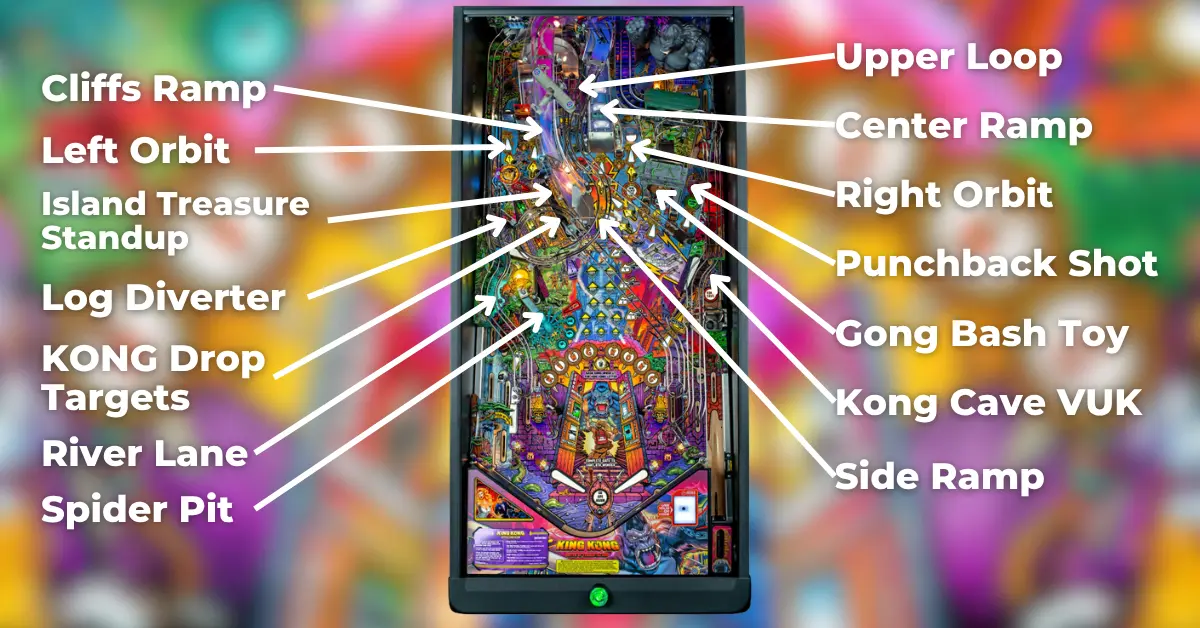
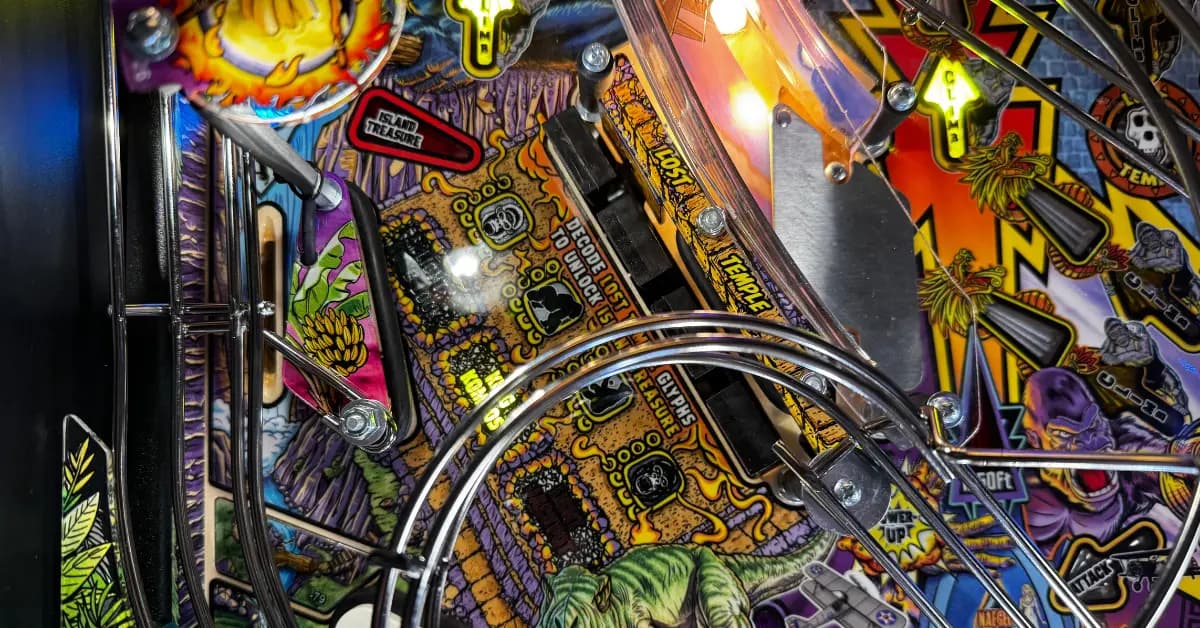
Though King Kong’s playfield seems to be loaded with shots that can be made from the left flipper, all four flippers are equally important, as expected from an Elwin design. The farthest shot on the left of the playfield is a 3-bank of standup targets for the spider pit, with a magnet that holds the ball when one of the pit multiballs starts. Located above the pit is a heavily involved mini-flipper area with four drop targets, an island treasure standup target behind the upper two drops, and a “cliffs” ramp shot that feeds the upper right flipper. The area also features a “log” diverter that activates during certain modes to help feed the ball to the upper flipper and can be manually activated by pressing the action button. A “river” lane is located behind the diverter that sends balls to the left flipper.
Near the large rubber in this mini-flipper area is the entrance to the left orbit, which sends the ball around to the upper flipper with strong shots but weak shots can exit through the right orbit. Two shots are located near the right of the mini-flipper area: the upper loop, which is designed to send the ball to the mini-flipper via bouncing off the rubber, and the side ramp, which advances towards starting biplane attack and is the main source of jackpots during King Kong multiball. The center ramp passes through the mini-playfield area and can be hit from either flipper but is generally easier from the right flipper, and locks balls for King Kong multiball when lit via the drop targets (virtually on Pro, physically on Premium / LE).
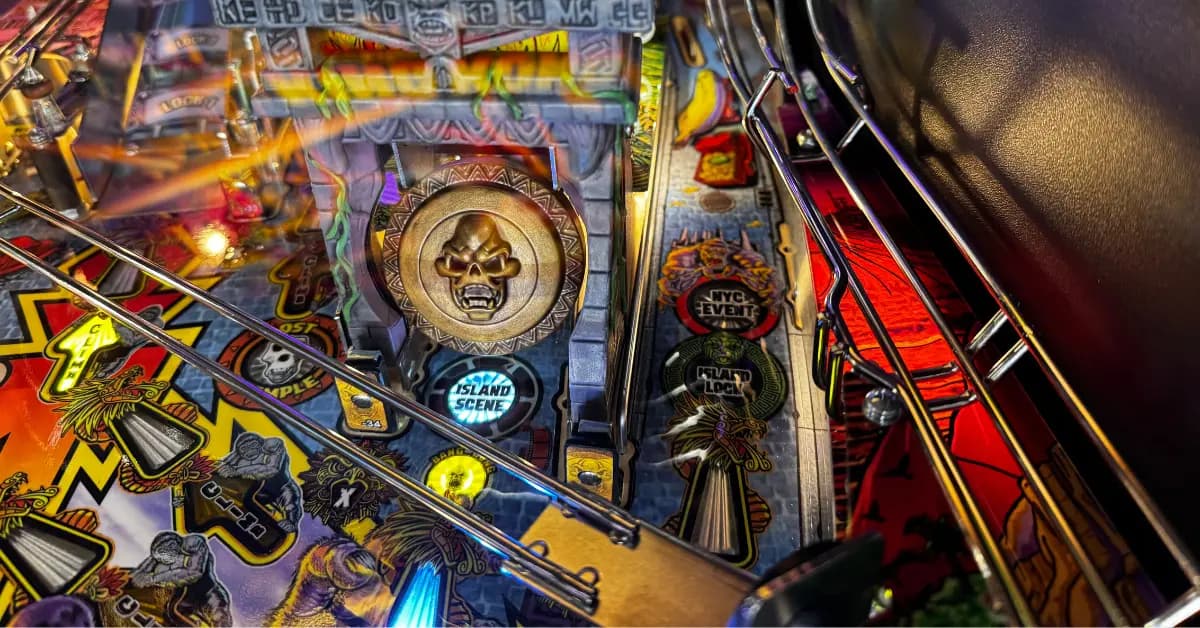
The main way of accessing the mini-flipper area is by shooting the right orbit, which is gated by a spinner and can either send the ball to the mini-flipper or the river lane depending on what is currently lit there. A gong bash toy is located to the right of this orbit, gated by two orange “X” standup targets; it can be hit from either lower flipper, but backhands are tougher than direct shots to it from the left flipper. The punchback shot is aptly named because it’s an orbit that feeds a kicker target designed to send the ball flying back to the upper flipper, though the kicker target can turn off to allow the ball to be locked in a hidden sinkhole for island locks. Located near all three of these shots is a King Kong animatronic that breaks the train mech to start multiball.
Farthest to the right of the playfield are the Kong Cave VUK, in a similar position to the DB5 eject on James Bond 007, and an entrance that allows the player another skill shot attempt whenever the ball happens to fall in there. King Kong features an unusual flipper / inlane layout with three inlanes, one to accommodate the feed from the river lane, and an outlane in between the two left inlanes. It is also the first machine since The Uncanny X-Men to be intentionally designed with a center post in mind, which can help save weak shots to the center ramp.
Scoring on King Kong is average for its era, with scores of 100M being considered average scores and 300M+ scores often winning tournament games. As with all new Sterns, however, scoring is subject to change as code evolves!
Getting Started with King Kong: Myth of Terror Island
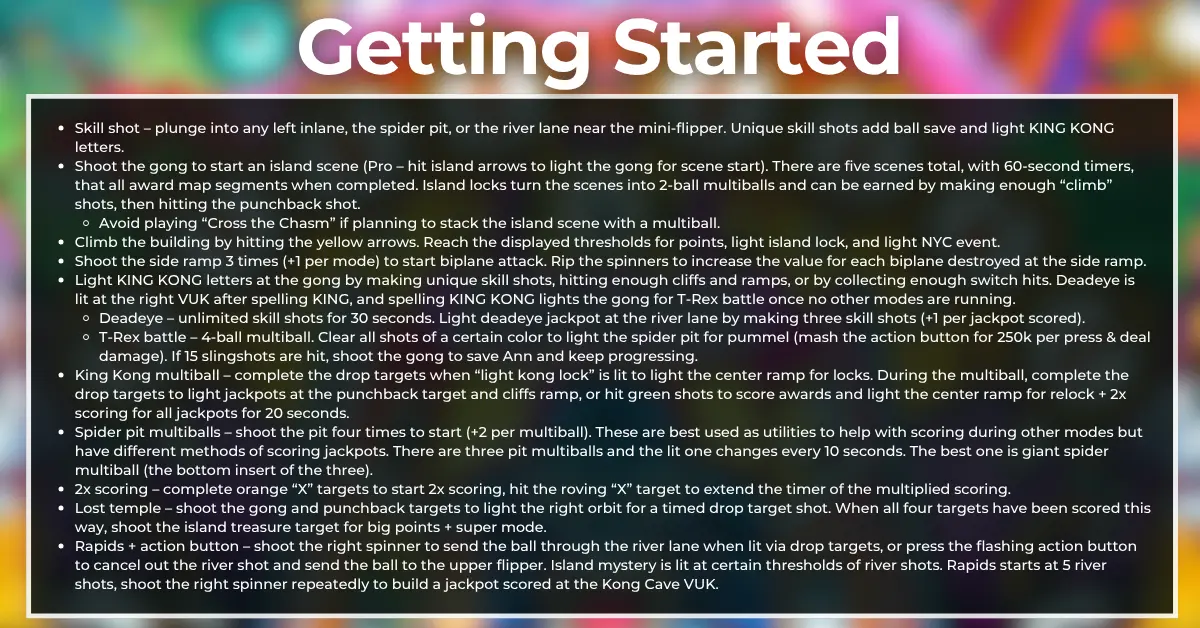
- Skill shot – plunge into any left inlane, the spider pit, or the river lane near the mini-flipper. Unique skill shots add ball save and light KING KONG letters.
- Shoot the gong to start an island scene (Pro – hit island arrows to light the gong for scene start). There are five scenes total, with 60-second timers, that all award map segments when completed. Island locks turn the scenes into 2-ball multiballs and can be earned by making enough “climb” shots (200 ft & 500 ft), then hitting the punchback shot.
- During scenes with island locks, complete the required shots to start the victory challenge and light shots to award points based on the total of the points scored in the mode. Shoot the cliffs ramp to light island jackpot at the pit and collect a majority of your mode score, then knock the held ball into the pit within 5 seconds for a 2x island jackpot.
- The sixth island scene, "Crash the Gate", becomes available after all five of the other island scenes are played. Hit any lit shot to light the gong for a hurry-up starting at a percentage of the total points scored in one of the modes. The side ramp super jackpot lights after completing sets of shots and increases in value with each complete set.
- Avoid playing “Cross the Chasm” if planning to play the island scene with an island lock or stacked with a multiball.
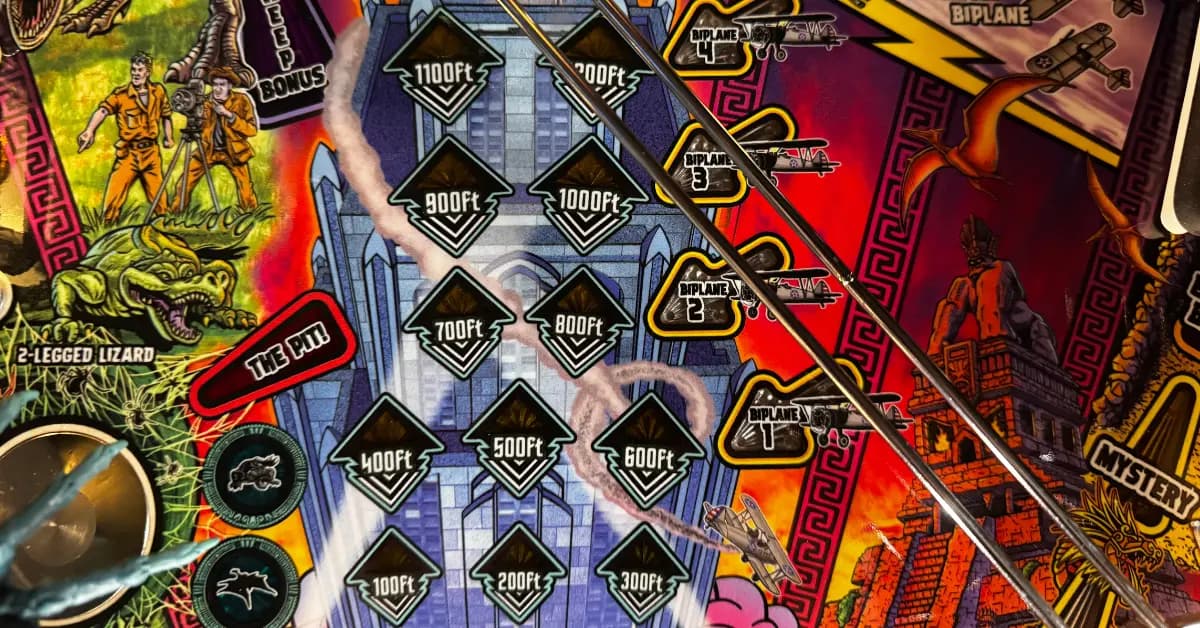
- Climb the building by hitting the yellow arrows. Reach the displayed thresholds for points, light island lock, and light NYC event.
- There are three different NYC events, and three different ways to play them: multiball with 1x, limited flips with 2x, and single-ball with 3x. Weigh your options accordingly.
- Shoot the side ramp 3 times (+1 per mode) to start biplane attack. Rip the spinners to increase the value for each biplane destroyed at the side ramp. Only one biplane attack can be started per building row.
- Light KING KONG letters at the gong by making unique skill shots, hitting enough cliffs and ramps, or by collecting enough switch hits. Deadeye is lit at the right VUK after spelling KING, and spelling KING KONG lights the gong for T-Rex battle once no other modes are running.
- Deadeye – unlimited skill shots for 30 seconds. Light deadeye jackpot at the river lane by making three skill shots (+1 per jackpot scored).
- T-Rex battle – 4-ball multiball. Clear all shots of a certain color to light the spider pit for pummel (mash the action button for 250k per press & deal damage). If 15 slingshots are hit, shoot the gong to save Ann and keep progressing.
- King Kong multiball – complete the drop targets when “light kong lock” is lit to light the center ramp for locks. During the multiball, complete the drop targets to light jackpots at the punchback target and cliffs ramp, or hit green shots to score awards and light the center ramp for relock + 2x scoring for all jackpots for 20 seconds.
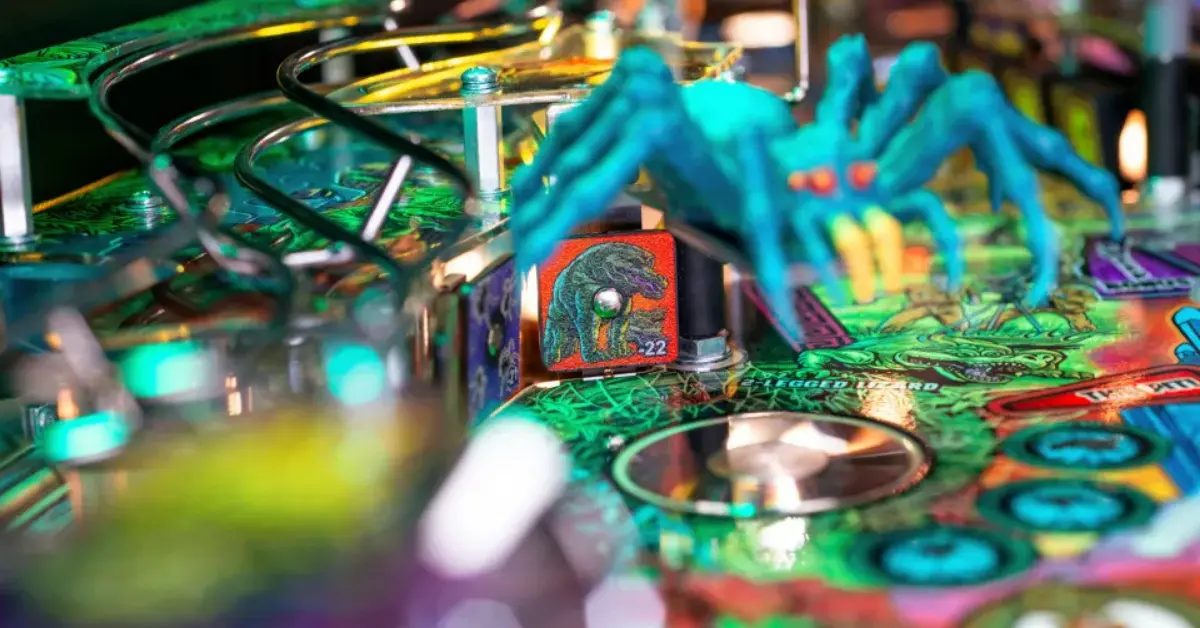
- Spider pit multiballs – shoot the pit four times to start (+2 per multiball). These are best used as utilities to help with scoring during other modes but have different methods of scoring jackpots. There are three pit multiballs and the lit one changes every 10 seconds. The best one is giant spider multiball (the bottom insert of the three).
- Map segments & treasure hunts - complete game objectives to score map segments. Once all 6 segments have been found, shoot the kong cave to start treasure hunts. Make the randomly lit gold shots to find the treasure, a perk that lasts for the rest of the game!
- 2x scoring – complete orange “X” targets to start 2x scoring, hit the roving “X” target to extend the timer of the multiplied scoring.
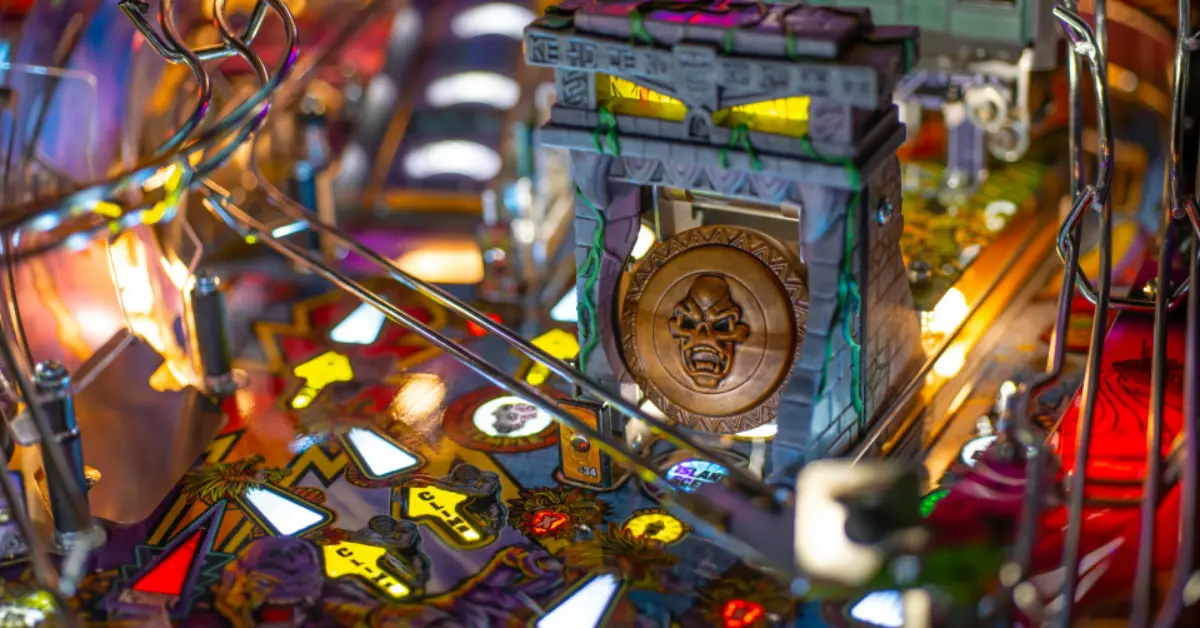
- Lost temple – shoot the gong and punchback targets to light the right orbit for a timed drop target shot that also completes the next drop target bank instantly. When all four targets have been scored this way, shoot the island treasure target for big points +super mode.
- Rapids + action button – shoot the right spinner to send the ball through the river lane when lit via drop targets, or press the flashing action button to cancel out the river shot and send the ball to the upper flipper. Island mystery is lit at certain thresholds of river shots. Rapids starts at 5 river shots, shoot the right spinner repeatedly to build a jackpot scored at the Kong Cave VUK.
Skill Shots
The three main types of skill shots on Stern’s King Kong send the ball to the left inlanes / outlane, the spider pit targets, or the river lane (with one hidden skill shot requiring a reflex flip up the cliffs ramp). Each unique skill shot scored in a game lights the gong to collect a KING KONG letter, and ball save is added for each skill shot. Skill shots are also used in the Deadeye mode after scoring enough KING KONG letters.
Due to the importance of skill shots on this machine, both at the start of balls and during the Deadeye mode, it might be a good idea to memorize the plunger strength required to hit each skill shot to guarantee that you can hit the inlane or spider pit skill shots reliably.
Island Scenes
Shoot the gong to light the saucer behind it to start an island scene. On Pro copies, instead of hitting the gong directly, the player must shoot white island arrows to light the gong to start the next scene, lit at various shots around the playfield.
There are five total island scenes, and each one awards a map segment once complete:
- Save Ann: Shoot flashing shots to build a jackpot at the gong, with combos increasing the award by further amounts. After three lit gong hits, the fourth gong hit is lit on a hurry-up timer for the total value of all three prior gong shots.
- Cross the Chasm: Alternate between the cliffs ramp and upper loop to help get six explorers across the chasm. The right spinner will always divert the ball to the mini-flipper during this mode to assist with cliffs ramp shots.
- Pterodactyl Attack: Hit the flashing drop target to light the kong cave VUK for mode progress and increase the value scored with each VUK shot. The mode is completed after defeating three pterodactyls with three lit VUK shots.
- Stegosaurus Encounter: Take one of two paths to escape the stegosaurus. The slower flashing shots are the “easy path” and score lower points, while the quicker flashing shots are the “hard path” and score more. Both paths are 7 shots long, they start at the right orbit and end at the punchback target.
- Escape the Swamp: Shoot the flashing shots to build up the value of the jackpot scored at the punchback shot. Multiply the jackpot by making a shot from the upper flipper: side ramp for 2x, upper loop for 3x, or river for 4x. The mode ends after scoring three punchback jackpots.
All modes can be turned into 2-ball multiballs via the island lock feature, lit at the right orbit after making enough yellow “climb” shots (200 ft, then 500 ft up the tower). With island lock active, all the points scored during the mode are added into an island jackpot award that can be scored by shooting the cliffs ramp to light it, then shooting the pit to collect the island jackpot, with a very short timer to knock the held ball into the pit for a 2x island jackpot. Completing scene's mode's requirements lights all major shots for awards based on the mode total with a 50% collect of the total available at the gong if all shots have been made. No multiballs can be stacked with scenes boosted by island lock, but balls can be added if mystery was lit prior to starting a boosted scene.
The sixth island scene, Crash the Gate, is made available if all five of the previous scenes were played (they don't need to be completed). This mini-wizard mode can be worth substantial points even if just one mode was played for substantial value. Five major shots are lit to light the gong for hurry-ups starting at a percentage of the total value from one of the island scenes. After collecting all five hurry-ups, the side ramp will light to score a super jackpot worth their combined total, but the super jackpot multiplier increases exponentially with each hurry-up set completed! This mode has a long 200-second timer and has the highest scoring potential out of any mode in the game, but gauge your options accordingly and make sure you've gotten good value (at least 80M or 90M) out of at least three or four of the island scenes before starting it.
Climbing the Building & NYC Events
Certain shots are lit yellow over the course of the game to ascend the building. As the game progresses, more and more shots are lit, and the thresholds to ascend each building level appropriately increase. This rule is reminiscent of White Water’s hazard rule but gives different awards with each level reached. For instance, 100 ft awards 5M & a map segment, while 200 ft lights extra ball and the island lock.
There are three NYC events in the game, after reaching 300 ft, 600 ft, and 1000 ft. Shoot the right orbit to start them whenever they become available. There are three ways to play every NYC event: multiball with 1x scoring, limited flips with unlimited ball save and 2x scoring, and single-ball timed with 3x scoring. Every NYC event completed awards a map segment described further in this guide.
- Stage Fright: Break the chains by shooting the flashing major shots a few times (center ramp - right spinner - left spinner - drop targets - cave) then hitting the punchback shot in between each shot. With every chain broken, more shots become available to multiply the value for breaking the next chain. The value can also be increased by hitting the side ramp before shooting the punchback shot.
- Manhattan Rampage: Conquer the city by hitting the major shots enough times to make all their lights solid. With the multiball perk active, this will light a super jackpot at the U-turn; with limited flips, this will light the kong cave to complete the mode; and with the timer, the player will be allowed to complete the mode or keep going when they hit the kong cave. Use the U-turn in either of the latter modes to spot the leftmost unlit shot.
- Window Shopping: Climb the building in search of Ann by shooting the lit "climb" shots. Every section climbed lights a jackpot that can be scored at a red shot or multiplied +1x by hitting the side ramp before scoring it. The mode ends once six levels of the building have been climbed.
Biplane Attack

This valuable side mode can be started during single-ball play but cannot be started during multiballs (though it can be brought into them). 3 shots to the side ramp (+1 per biplane attack mode played) will start the attack and light the spinners to increase the value for hitting the side ramp, alternating between left and right spinners with each shot made to them. Only one biplane attack mode can be played for each row of the building climbed.
Bonuses are given for destroying enough biplanes: defeating 3 will award a KING KONG letter, and extra ball will be lit after 6 are defeated. Defeating 5 biplanes lights the "Biplanes Defeated" insert above the flippers and collecting at least 25M from a single biplane will light the insert at level 2.
KING KONG Letters, Deadeye & T-Rex Battle
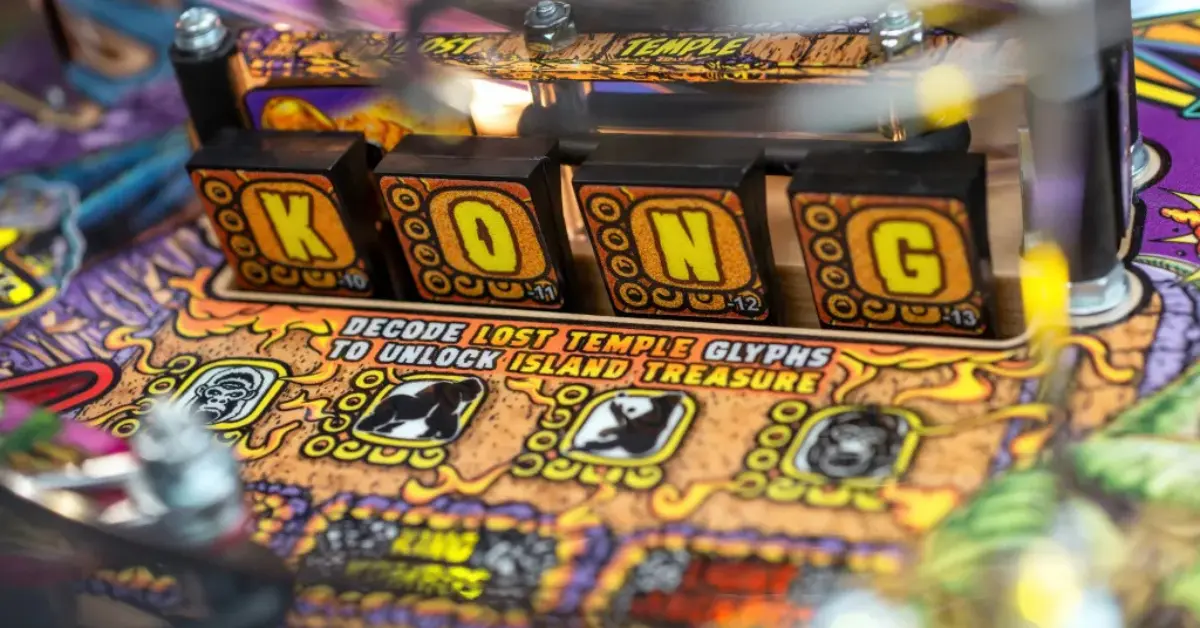
KING KONG letters are comparable to the RAMPAGE letters on Godzilla but are way easier to score due to being lit at the gong instead of the difficult left spinner shot on that machine. There are also fewer ways of lighting KING KONG letters; score unique skill shots to light one instantly, collect enough cliffs ramp shots to light one, or collect enough switch hits (displayed via the green bar on the left of the LCD) to light one.
Each KING KONG letter gives a different award, and the awards for subsequent letters (past the first completion) are different from those of the first completion. When all eight letters are lit, the gong will light for T-Rex battle if no other modes are currently running.
- Deadeye: This mode is lit at the Kong Cave VUK after spelling KING the first time (KING KO on the premium) and can only be started when no other modes are available. It greatly resembles the Skill Fire mode on Williams’ Congo in that for the next 30 seconds, the player will only be able to make skill shots, and the flippers will be turned off for the duration. Make three skill shots to light the river lane for deadeye jackpot.
- T-Rex Battle: This is a 4-ball multiball that takes priority over all other game features (excluding treasure hunt, which can be started before playing T-rex and brought into it). There are two T-rex to defeat and each one is represented by a spread of three shots - three on the left and three on the right - with random shots able to be spotted at the side ramp. Once all three shots of the same color are hit, shoot the spider pit and prepare to mash the action button to deal damage to the T-Rex and score an increasing value per mash that increases further as red flashing shots are made around the playfield. Each T-rex requires three sets of their colored shots to defeat. Defeating one of the two T-rex will add a ball and defeating both is a requirement for the wizard mode.
King Kong Multiball
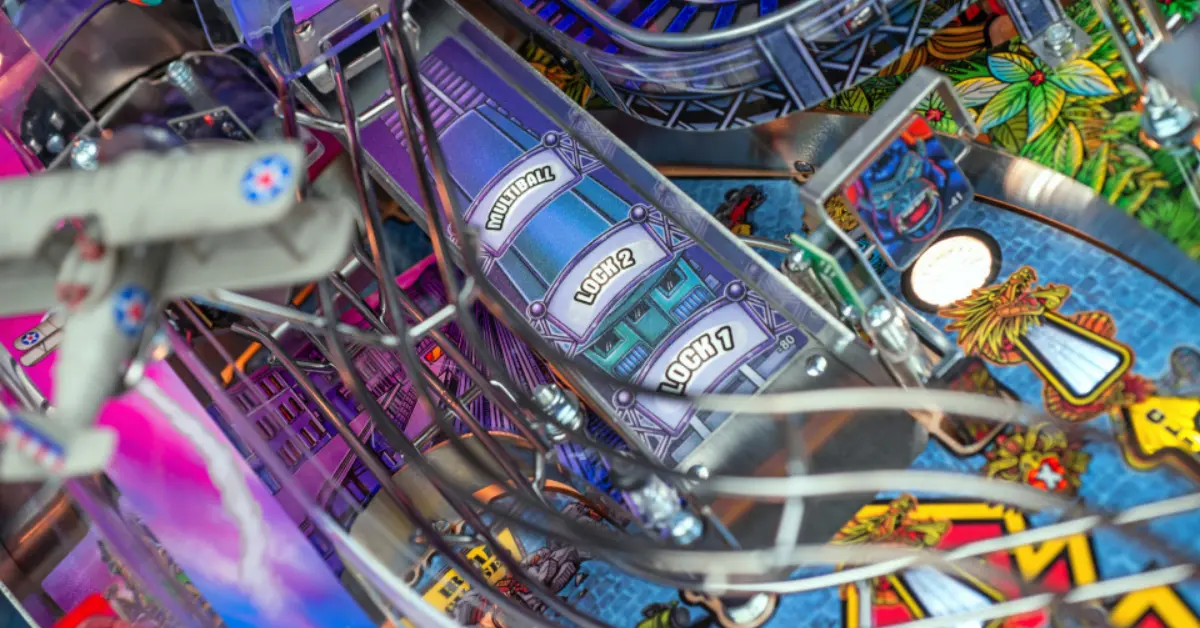
Light the locks for this multiball at the center ramp by completing the drop targets when “light kong lock” is lit (requiring two completions for the first multiball of a game). The first multiball lights all three locks instantly but subsequent multiballs require the drop targets to be completed once for each lock.
King Kong multiball is ideally played as a controlled multiball. At the start of the multiball, the left orbit, center ramp, and cave shots are lit green to score arrow awards with the side ramp scoring a Kong award worth 5x the arrow award. Once all arrow awards have been scored, the center ramp will light to relock the ball and multiply jackpots by 2x for 20 seconds. All of the arrow awards and Kong awards add to the jackpot value.
The jackpots can only be lit by hitting a drop target and are lit at two shots: the punchback shot (1x), and the cliffs ramp (2x) - and it can be further multiplied through the relock method or by starting 2x scoring. After scoring either jackpot, the side ramp is lit to score a super jackpot worth 2x the jackpot value + all arrow awards scored prior. The super jackpot lights for 30 seconds and its timer decreases every time one is lit, after which the drop targets will be lit for "light jackpot" again (but all four drop targets must be cleared for subsequent jackpots).
This multiball doesn't feature the traditional "add-a-ball" mystery award, but balls can be added once per multiball by shooting the gong twice.
Spider Pit Multiballs
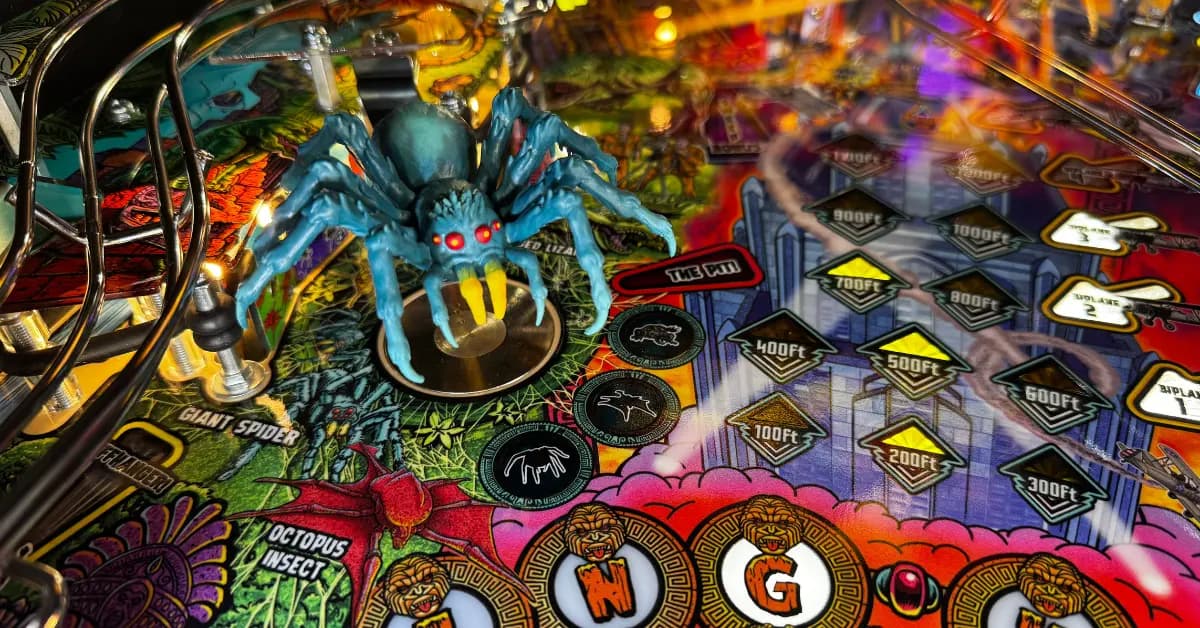
These multiballs are best used as utilities to help with island scenes or make progress towards other objectives. Shoot the spider pit four times to start the first pit multiball of a game. Each subsequent multiball requires two more hits than before. When multiball is lit, the lit insert will correspond to the multiball about to start; it moves from top to bottom by one insert every 10 seconds.
There are three different pit multiballs. The first two score about the same, typically averaging around 20M to 30M if played well, but giant spider multiball - the bottom of the three inserts - is in a league of its own when it comes to scoring and can blow up the game if played well. Jackpots during all three multiballs are scored at the pit targets.
All of the multiballs have "add-a-ball" functionality. If island mystery is lit, it will always award an add-a-ball during any pit multiball, the first time it is scored.
- 2-Legged Lizard: Shoot the pit three times to collect awards and light jackpot. Lit shots increase the jackpot.
- Octopus Insect: Shoot right-side orange standup targets to light jackpot and shots in between them to increase the jackpot.
- Giant Spider: Collect switch hits (30 + 5 per jackpot) to light jackpot. Shoot lit ramps to increase the jackpot multiplier by +1x.
Map Segments & Treasure Hunts
Completing game objectives will award map segments towards completing the current map. The easiest ways to score these are by completing island scenes, completing NYC events, scoring the deadeye jackpot, or scoring the rapids jackpot. Each map takes 6 segments to complete.
Once the map has been completed, the kong cave will light to start a treasure hunt. For as long as the ball is still in play, the player can make gold lit shots to progress towards completing the hunt and scoring the perk associated with each map; but if the ball drains, the treasure will be lost and cannot be scored. The final shot of each hunt will always be at the cave, and the treasure jackpot awarded for it increases as treasure hunts are completed or lost temple treasures are scored (from the standup target behind the drops). The first perk extends the timer for super modes, and the second perk doubles end-of-ball bonus for the rest of the game!
2x Scoring (Orange Targets)
There are four orange standup targets marked with an “X” scattered around the playfield. One is near the cliffs ramp, one is near the center ramp, and two are located to the left and right of the gong shot. Once all four targets are hit, hitting the orange target that moves from the left to the right side of the playfield and back will start 2x scoring.
During 2x scoring, the lit target will keep on moving. Hitting this flashing target will extend the 2x scoring timer and award bonus points if hit while 2x scoring is already running. The timer can be extended four times every time 2x scoring is started.
Lost Temple & Island Treasure (Drop Targets)
The lost temple is accessed slightly differently than the drop targets normally are. To light the right spinner for lost temple, the gong and punchback target must be hit, and it can be lit at any time during single-ball play (even during island scenes that aren’t pterodactyl attack). One drop target will then start rapidly flashing, and the player must cradle the ball on the mini-flipper before hitting the flashing drop target. Hitting the flashing drop target will advance the glyph and give credit for an entire bank's worth of drop targets!
Repeating this process for all four drop targets will light the island treasure target behind the upper two drop targets. When hit, a big score is awarded (10M + 10M per treasure) and a super mode is qualified, which will start on the next shot of a certain type. The first mode is super spinners, lighting the left orbit and right loop for alternating spinner rips that max out at 25M per rip (50M with 2x scoring); the second treasure starts super kombos, and the fourth treasure starts super rapids. The third treasure awards an extra ball, and subsequent treasures past the fourth award 100M each. Each island treasure also increases the multiplier for the treasure hunt jackpot described earlier.
River Awards & Log Bridge (Action Button)
Light the river shot by completing the drop targets. Different awards are given after reaching certain thresholds of river shots during a game.
- Light Island Mystery: Mystery is lit at the Kong Cave VUK after 3, 9, 12, etc. river shots. Mystery scores one of several awards and will give the traditional add-a-ball if a pit multiball is running and mystery is scored.
- Rapids: 30-second timed mode given at 5, 15, 25, etc. river shots. Shoot the river shot via the right orbit to increase a value scored at the Kong Cave VUK and increase the timer for the mode. The maximum multiplier on the award increases from 6x by +1x every time rapids is played.
- Light Extra Ball: Scoring 8 river shots lights the extra ball at the Kong Cave VUK.
If the player doesn’t want to collect river awards and instead wants to get the ball to the mini-flipper, there are several ways to accomplish this. “Lost Temple” described above will send the ball there, but the player can also manually divert the ball there by completing the drop targets to earn log bridge uses, which can be used by pressing the action button (flashing blue) to activate the diverter. Skillful use of this diverter can help with drop target completions, allowing players to light the King Kong multiball locks quicker.
The Secret Passage
Hidden below the Kong figure is a lane marked with "2.42 Million Bananas" (the 1 million bananas from Data East's King Kong, adjusted for today's inflation). If a ball falls through this rollover lane and into the sinkhole below it, the lane will give some extra bonuses - it will spot the leftmost lit Climb arrow and spot one mode shot's worth of progress if one is currently active. Unlike the similar hidden lanes in machines like Avengers Infinity Quest, the secret passage can be used an unlimited number of times. The difficulty comes more from actually getting ball to fall in there.
The shots most likely to enter the secret passage are weak shots to the left orbit, particularly shots that sweep some of the drop targets on the way up, and slingshot bounces into the right orbit / punchback target that don't make it all the way around. This shot's unreliability prevents it from being a viable scoring option but it will always be willing to help out if a ball winds up there.
Noah's Strats
- I always start the game going for two shots, the gong shot and the spider pit, making the spider pit skill shot if possible to advance towards starting a spider pit multiball. I tend to play Cross the Chasm or Stegosaurus Encounter as my first island scenes of a game as both heavily incentivize shot accuracy and can be very difficult to complete with a multiball stacked. Afterwards, I focus on the remaining three modes, primarily playing Pterodactyl Attack with any multiball.
- Avoid playing Cross the Chasm or Stegosaurus Encounter with a multiball. The shots are incredibly difficult to make during the chaos of multiball.
- Weigh the scoring options of NYC events wisely, as once you use one of the three perks, it can no longer be used for the rest of the game.
- My preferred order is limited flips w/ Manhattan Rampage, single-ball w/ Stage Fright, then multiball w/ Window Shopping; but find out which option works the best for you!
- After the first mode + spider pit stack, I start working on the drop targets to light the center ramp for Kong lock, and try to start the King Kong multiball right away (bringing in an island scene if I’m in a safe position to hit and recover from the gong shot). During the multiball, I aim for the drop targets above all else, then try to get under control and score the 2x jackpot at the cliffs ramp by shooting the right spinner, pressing the action button, and holding up the mini-flipper to cradle the ball for a shot at the cliffs ramp.
- If a treasure hunt is available to start, always try to start it. If you're worried about losing the treasure, then try starting a multiball, either with island lock or from the spider pit, to help in collecting it. Or start an NYC event with limited flips or multiball perks & take advantage of the ball save!
- Biplane attack is always nice to have running. Whenever I hit the cliffs ramp or the punchback shot, hitting the side ramp to advance towards biplane attack is my top priority. This side mode can also help with practicing the left orbit to side ramp combo.
- I don’t intentionally aim for cliffs ramp awards, river awards, or KING KONG letters as I prefer them to happen on their own as I play. However, if you’re one letter away from Deadeye, it might be worth ripping either spinner or hitting the cliffs ramp to ensure you can collect that final letter.
- Depending on the copy, the gong can be hit effectively as a backhand, and it is generally easier to recover from these backhanded shots compared to forehands that might bounce into the “X” targets that gate the gong shot.

VHS collector, media archivist, and pinball rules aficionado, Noah has been invested in the hobby since he was a teenager - much to the surprise of his parents and others his age. As an expert on brand new machines he’s the guy to call if you’re new to the hobby, or an experienced player who wants some help. Noah hopes to participate in and perhaps even win major tournaments like INDISC as his skills improve and desires for pinball to become a more inclusive hobby.
Like what you're reading?
Get pinball news, analysis, and deep dives delivered to your inbox.
Related Posts
More in Pinball Tutorial or browse all topics.