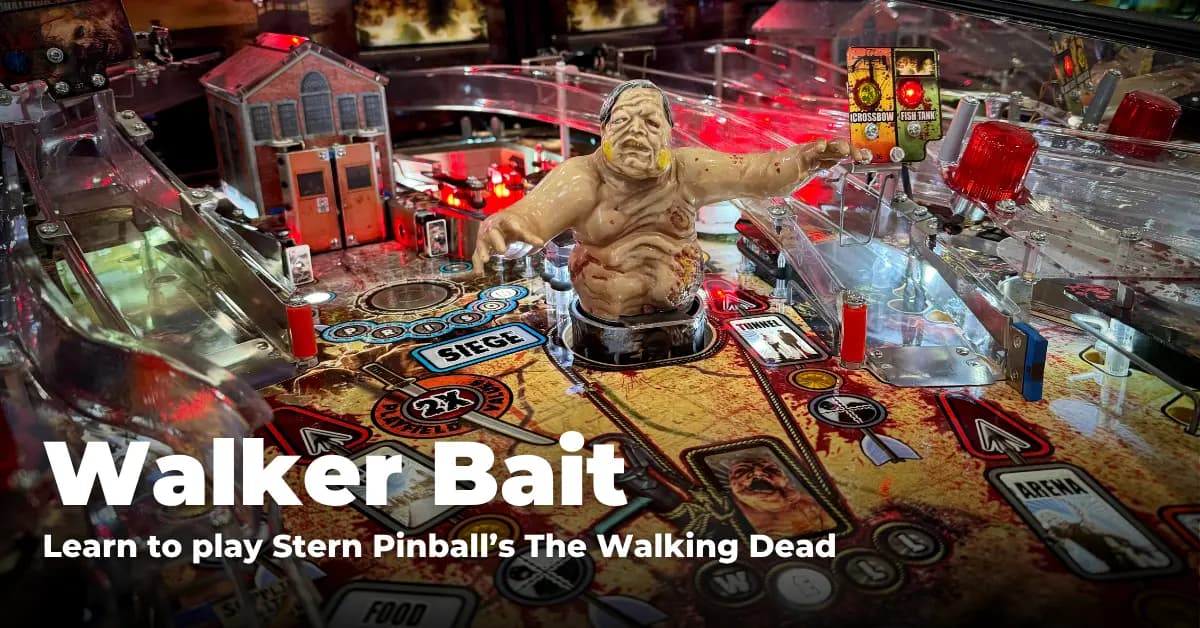
Walker Bait: Learn to Play Stern's The Walking Dead Pinball
I remember hearing about The Walking Dead in my freshman year homeroom class – my soon-to-be history teacher was particularly enthusiastic about the upcoming second season, and shortly after that, it became one of the most popular shows on television. It makes sense, considering that zombies were a rather prominent element of early 2010s pop culture, but honestly, reminiscing on the show just makes me sad. Might be a story you’ve heard far too many times already, but the first season was great – largely due to Frank Darabont’s involvement with production – and after he was fired (for financial reasons), the quality took such a nosedive.
I gave up about halfway through the second season – how the show lasted eleven seasons afterward is beyond me. Still, it’s hard to deny how popular a show it was, and if you enjoyed it, that’s great! You may not like the machine, though—just like the show, The Walking Dead pinball is brutal, unforgiving, and has a tendency to kill those on it far too early. So, let’s see if we can help you outlive your competitors.
About The Walking Dead Pinball
- Manufacturer: Stern Pinball
- Release Year: 2014
- Design: John Borg
- Code: Lyman F. Sheats Jr.
- Animation: Mark Galvez
- Art: Greg Freres, Kevin O’Connor
- Music / Sound: Brian Schmidt, Vince Pontarelli
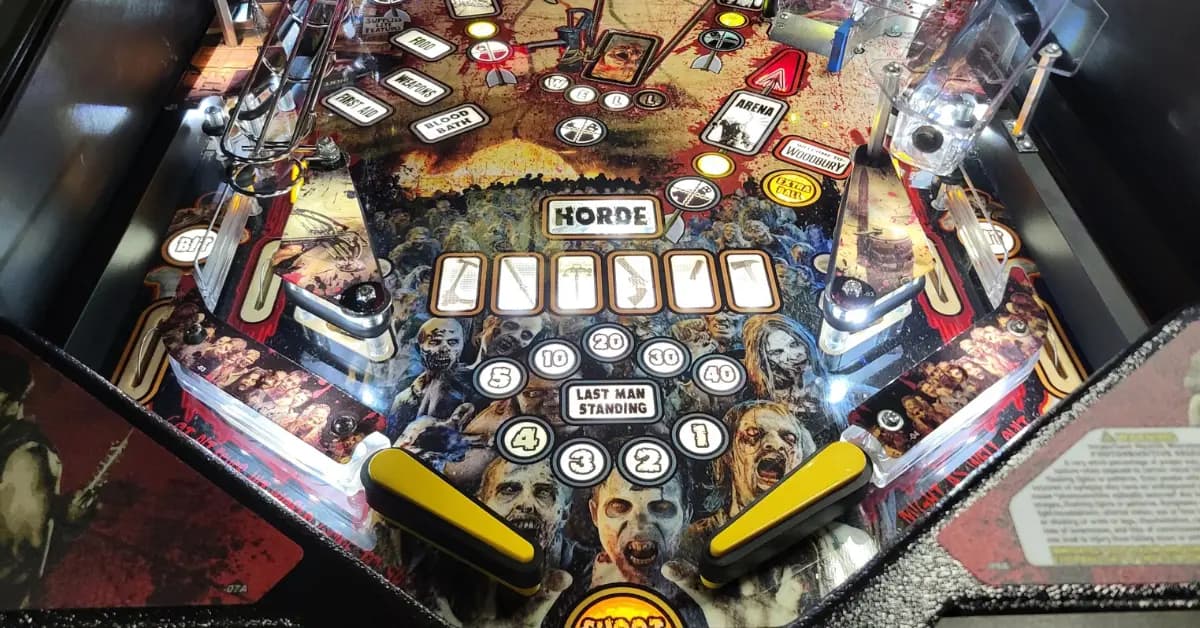
Playfield Overview
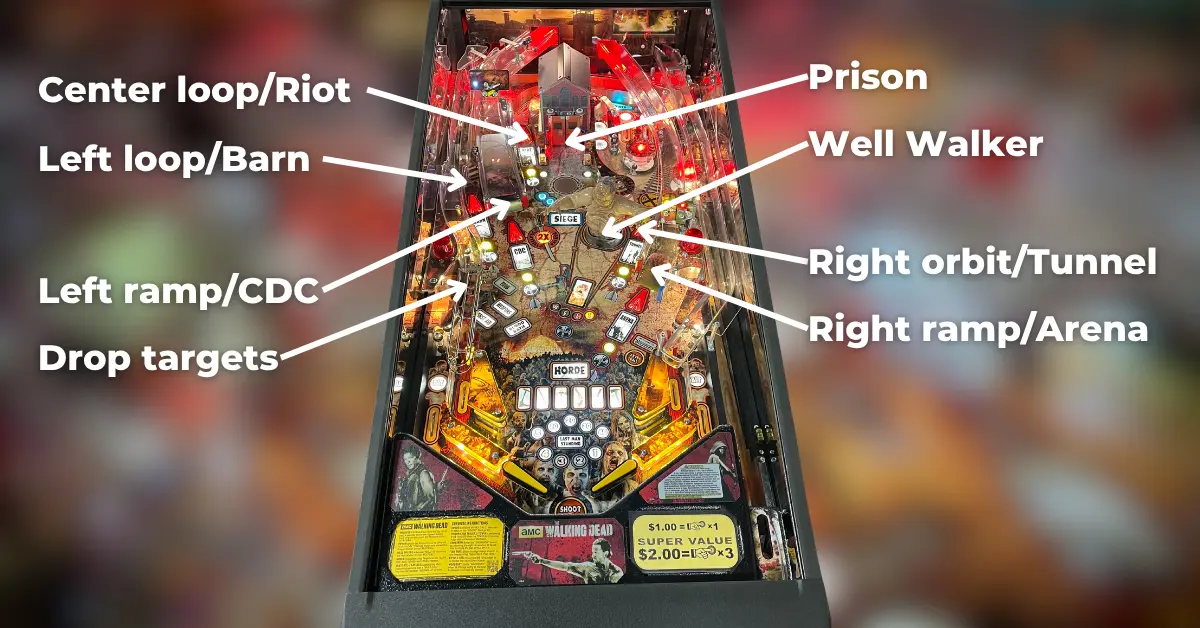
The Walking Dead's layout is nasty, and as such, it frequently discourages players from getting too deep into the rules. Chances are, if you're not a fan of the machine, it's because you hate the layout. I don't really blame you, to be honest – it's enough to keep a lot of players, both new and experienced, from dropping more quarters into it. Aside from the fact that most shots necessary for big scores send the ball completely out of control, the shots which do give you control usually kill you should you miss. On top of that, the flipper gap is substantially wider than usual, and the initial feed from the pop bumpers (i.e. where every ball will start out) is completely unpredictable. It's entirely possible to play a full game of TWD without ever getting to touch the ball, something that can't be said for many other machines of this day and age.
As mentioned, the feed out of the pop bumpers/left orbit is vital to figure out immediately. That's much easier said than done, though – it's usually quite inconsistent and can send the ball to either flipper (or straight down the middle). Stay on your toes whenever a ball is coming out of the bumpers! Don't concern yourself too much with gaining control right away – all you should be worried about is keeping the ball out of the middle. Survive first, then get control.
Shockingly, the most important feature at the table is the drop targets on the left. You need to clear these to light modes, which can be quite lucrative—but they’re also important because they house one of the three major multiballs available. They are pretty dangerous, but they are vital for high scores. Clear them early and often—consider using your ball save timer to sweep them if you have the chance.
There are two (rather long) ramps on each side of the playfield, with two loops on the left and one orbit (through the bumpers) on the right. The two left loops both feed the bumpers, so if the bumper feed is particularly dangerous, these loops should be avoided. The right orbit is a difficult shot, but nothing too dangerous (assuming you can get control on the left flipper right away). The ramps here are quite weird – both are "loopable," but neither of them really warrants looping. As such, the ramps actually don't serve as much of a purpose as one might think. You can't use either to pass the ball to the other side, nor are they prominently used in any major scoring feature. While there are mode points available at each, there are much more important things to aim for if there's nothing else going on.
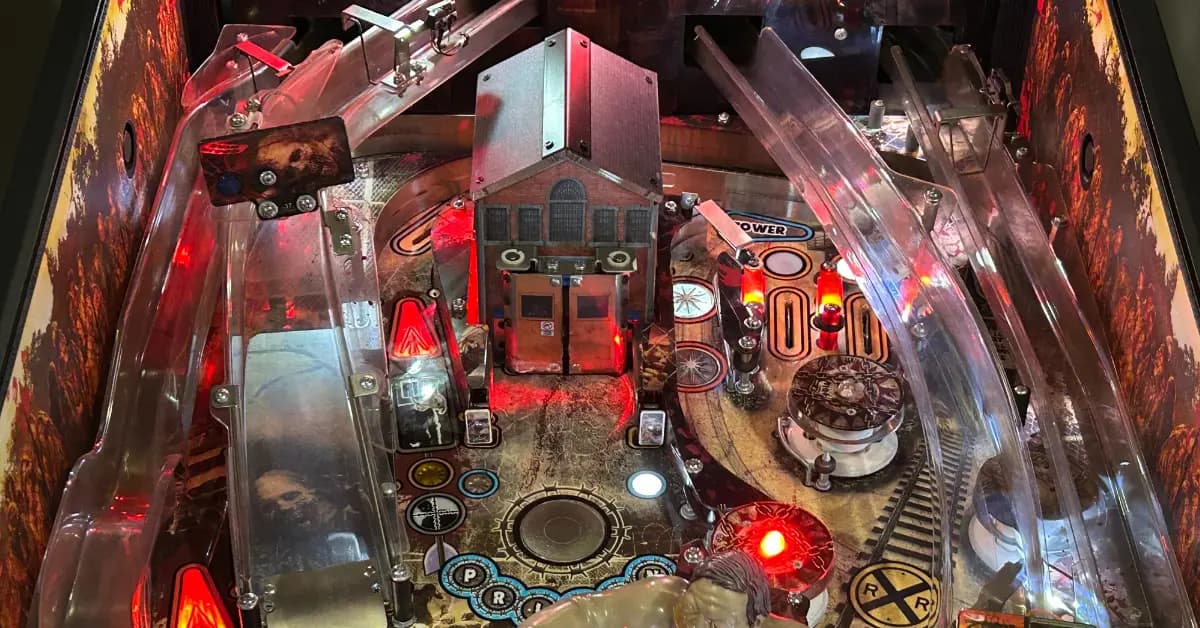
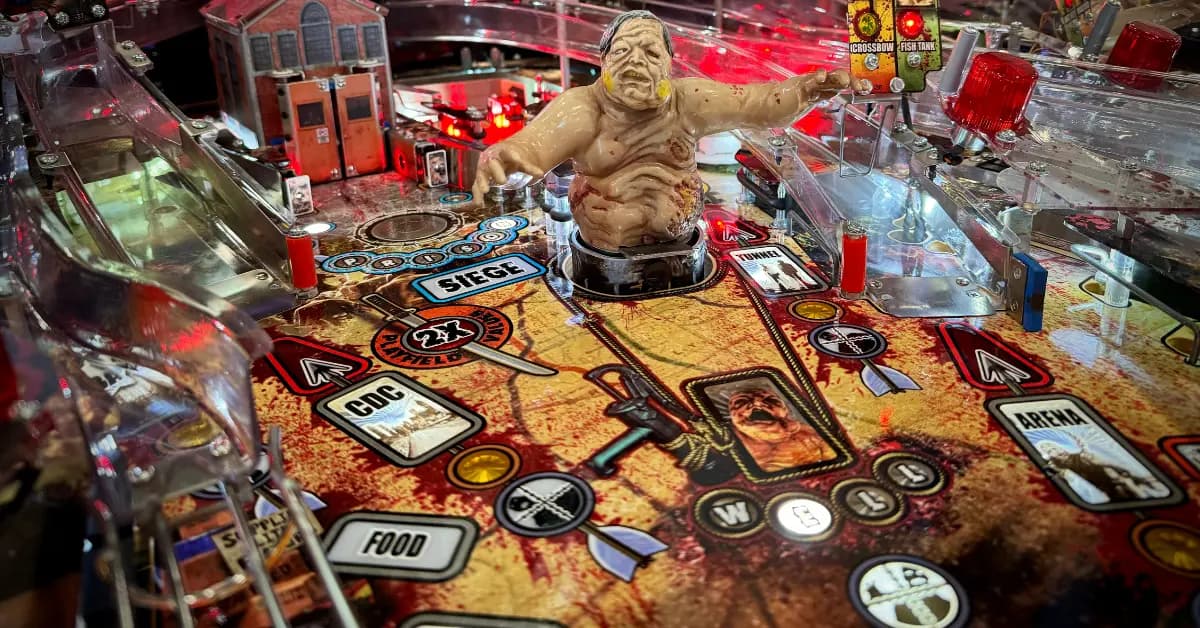
There are two prominent toys — the Well Walker in the center-right of the playfield and the Prison straight up the middle. Both advance you towards multiballs, and as you may have guessed, are both absurdly dangerous. The prison, in particular, is guarded by an electromagnet that tends to just throw balls straight down the middle, so proceed with caution when aiming for it. The prison doors will occasionally open, revealing a zombie's face. This zombie face is effectively just an arrow insert—it works the same as the doors; it’s just indicating you should aim at the prison. However, the face frequently fails to register hits. As such, most competitive TWDs will just disable the door-opening mech so that all prison shots are to the doors, which are much more responsive. Honestly, this barely warrants explaining, but if you're wondering why the doors are or aren't opening, there you go.
The Well Walker is much easier to hit, but can often bank backhanded shots from the right over to the left outlane, or can just send balls right down the middle. Convention would have you think the safest way to hit the Well Walker is to graze it on your way into the bumpers, but as mentioned above, the bumpers aren't exactly safe, either. Sometimes I can backhand the Well Walker and safely return it to the right flipper, but that's an exception and not the expectation.
On a particularly mean copy of The Walking Dead, scoring 50,000,000 is pretty commendable. However, if someone's able to find their groove, retain control, and keep a ball in play for long enough, it's not impossible to reach a quarter billion or more.
Abridged Tutorial

- Play with intent and keep control as best as you can. The Walking Dead is very rewarding to precise play – flailing around will not get you very far.
- There are two “easy” multiballs available:
- Prison is started by bashing the prison up the middle to spell PRISON, then shooting all other major shots. During prison multiball, alternate between major playfield shots and the Prison again.
- Well Walker is started by bashing the Well Walker a whole bunch. During Well Walker multiball, hitting enough switches lights a jackpot at the Well Walker.
- These two multiballs cannot be stacked with one another and do not have add-a-balls, but are worth decent value and provide some safety.
- Clearing the drops on the left side of the playfield lights modes at the five major shots:
- Barn and Riot are both “shoot one shot all day” and are good multiball picks.
- CDC has you loop the left ramp a whole bunch, then shoot other shots, then back to the left ramp. Can be absurdly valuable if you prolong it long enough (read: loop the left ramp a lot, then shoot everything but the left ramp a lot, then hit the left ramp again). It’s the best mode for single-ball play by a pretty considerable margin.
- Tunnel and Arena are both similar to CDC, but are worth far fewer points and are trickier to start.
- Note that you can—and should—light and start modes during multiballs, and vice versa.
- Clearing the drops also spots one of the three Supplies listed on the side of the playfield. Getting all three solidly lit lights Blood Bath, a switch frenzy multiball, which is very lucrative. The lit supply will rove so long as all three drops are up – time your shot to lock in a supply you haven’t already gotten yet.
- Shooting Walkers around the playfield will light or increase a shot multiplier available on the inlanes. Use this wisely—most shots are worth decent points, but some are extremely lucrative. Multiplying a high-value shot—such as a multiball super or CDC completion shot—can be game-clinching.
- Shoot the tower (inner left loop) enough times to light & start a 2X playfield multiplier, best used for multiballs.
- Playing modes & multiballs well will light Multi-Kills, indicated by yellow inserts at assorted shots. These points can add up quickly!
Getting Started with The Walking Dead

The skill shot on Walking Dead is, for the most part, a top-lane skill shot. Plunging into the flashing lane (which you can control with your flippers) awards you points. However, you score more points by hitting the rollovers on the way up while they're flashing. There's not really anything better to aim for, and it's worth enough to make a difference in games where nobody is able to get anything cooking, but otherwise, nothing to worry about if you happen to miss it.
As with many modern Sterns, there are some omnipresent rules we should probably go over before we discuss any major objectives. In case you weren't aware, The Walking Dead is about how "walkers" (zombies) have taken over the world. So, there are walkers all over the playfield that need to be taken care of. At all times, some white crosshair inserts will be lit, scattered around the playfield. Shooting one will kill a walker, with the total number of walkers you've killed being tallied up by some inserts just above the flippers. At the start of the game, all shots will be lit for walker kills; after you've killed a few, they'll start reappearing with each kill. Essentially, half of the shots will be lit for walker kills; getting a kill will move the kill somewhere else. All that this really means is that you can't repeatedly loop the same shot endlessly for repeated kills.
Kills themselves are actually not that valuable – roughly 250k each – so if you're just after the points, they're not worth aiming for. Walkers can become valuable on their own with a high enough bonus X. Your end-of-ball bonus will be worth 50k per kill that game, meaning with a 10X bonus, each walker kill is worth half a million – but that's more of a testament to bonus X being good late-game. It's also worth noting that with no kills at all, you won't get any end-of-ball bonus, nor will you get any end-of-ball bonus animation. It'll just go right to the next ball. That said, walker kills are always available, so you'll be earning them regardless of what else you're doing. The main reason why I bring it up now is because many features are lit by killing enough walkers and/or have their values governed by how many walkers you've killed, the most important being...
Multipliers
With every other kill you collect, you'll light the X over the inlanes. You can control which lane is lit with the flippers – tripping a lit inlane will double the value of the next shot you make. If you would light the X when it's already lit, instead, the value of the multiplier will just increase by 1. So, if you get six kills without using the multiplier, the X will quadruple the value of the next shot.
Unlike many multiplier-heavy games, though, the X multiplier here should be used sparingly. While you'll have your X available much more often than not – especially if you're making your shots consistently – good scores on TWD generally come from a couple of monster jackpots, rather than a ton of little ones. 8-digit shot values show up out of nowhere, and that’s what you really want to be multiplying. What would you prefer: doubling every other shot from being worth, I dunno, 500k to 1M, or not double anything, build up that multiplier to like, 6X, and then turn a 50M jackpot into 300M?
Granted, it’s extremely easy to waste the X, to the point where even once you have that giant multiplied shot lined up, you’re probably going to miss it as soon as you trip the inlane. Even so, I’d honestly say it’s better not to use the X at all than it is to use it on something worthless. It might sound counterintuitive, but it’s a good mantra to have if you want to play with intent – something TWD awards in spades.
There is a second multiplier—a playfield multiplier—lit by completing the two standups surrounding the Prison up the middle. When lit, you can shoot the loop immediately to the left of the Prison (sometimes called "Riot") to send the ball into a standup in the upper right-hand corner. Hitting it will double all scoring for 30 seconds, which is multiplicative with any shot multipliers (so a 3X shot made with 2X scoring will be worth 6X). You can also extend the timer by 10 seconds by completing the Prison standups again while the 2X playfield is lit (but not running). Just like the shot multipliers, try to preserve your playfield multiplier for when you actually have something good going on. 2X scoring is no joke, but those Prison standups are deadly.
Prison Multiball
Smashing the prison door right up the middle will add letters to P-R-I-S-O-N. (On default settings, you'll have P-R-I-S-O spotted for free at the start of the game.) When complete, hitting the Prison one more time will cause a magnet to snag the ball, as the display tells you to take care of all the walkers in the prison yard. You now need to re-spell PRISON: each of the five major shots, plus the prison, will each award 500k when hit and add a letter. While each major shot can only be shot once, after the prison shot has been collected, each subsequent prison hit will spot one of the other five shots. You can also multiply the value of the next prison letter by completing the prison standups, although deliberately choosing to do so is absolutely not worth it.
As a quick note, the game refers to these as "prison walkers," but unless the shot is also lit for a regular walker (i.e. with the white crosshair), it will not count as a walker kill. That's neither here nor there, as prison walkers are much more important (and valuable) than regular walkers, but I felt like I'd mention it anyway. Also, you do not have to spell PRISON in one ball. If you drain, your next ball will pick up where you left off.
Once PRISON is complete for a second time, hitting the prison again will start Prison Multiball. This is a pretty straightforward three-ball multiball, during which all major shots are lit for jackpots. After hitting one, you need to hit the prison to relight everything else (save for the shot you previously hit). Each jackpot you collect will, again, add letters to PRISON to indicate your progress. Six jackpots will light the super jackpot at the inner loop (aka Riot). Collecting it will advance you to the next phase. Once more, jackpots – this time, at the Prison, and lit by the ramps – will add letters to PRISON. Completing PRISON here does not award a super, but instead, will light a mini-wizard mode called Siege.
We'll go over Siege later. It's only accessible via Prison Multiball, and fortunately, you will preserve all your progress from one multiball to the next. (For example, if you scored five jackpots in your first multiball, you only need one jackpot for a super, and seven for Siege.) Prison is a pretty valuable multiball, especially if you manage to get a 2X playfield going at some point, but it does require taking really dangerous shots to make it pay off. All that said, Prison pales in comparison to the value of some modes. If you want to make Prison really worthwhile, just make sure you're shooting at the actual prison now and again. Even then, it's best to use Prison to make progress towards other features.
Well Walker Multiball
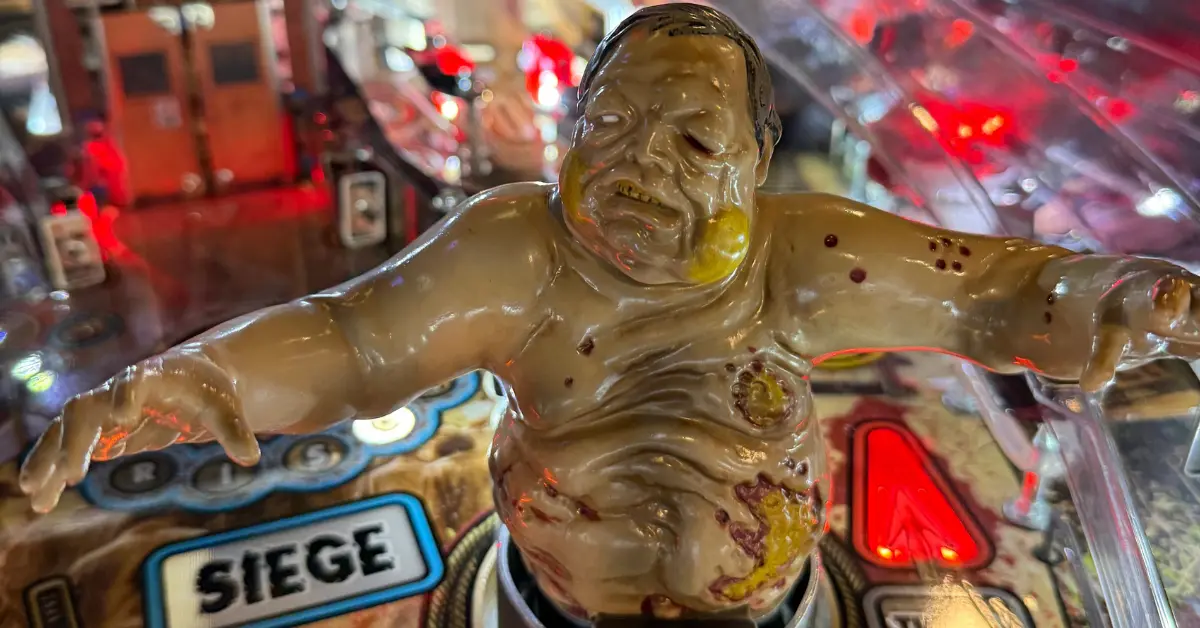
The Well Walker, aside from being one of the most visually appealing toys in all of pinball, also represents one of the stupidest plotlines in television history. In the show, the group finds a bloated walker at the bottom of their water well and risks their lives to get it out of the well so it doesn't contaminate the water. How the zombie gets this bloated and gross without contaminating the water already is beyond me, but that's neither here nor there.
Anyway, the Well Walker can be hit at any point during the game to add letters to WELL. Completing it, like completing Prison, will start another setup phase where you have to hit the Well Walker a bunch to start a multiball. During this phase, the letters in WELL will strobe around; the more letters lit when the Well Walker is struck, the more valuable the hit will be (it's never really that valuable). The display will tell you how many hits you need to start multiball, although it does so with an unannotated number: that otherwise nondescript number, which looks like it could be a mode timer? That's how many hits remain. Once you hit enough, Well Walker Multiball will begin.
This is a two-ball multiball, during which switch hits will gradually light the letters in WELL again. Smashing the Well Walker here will award a jackpot based on how many switches you've hit since the last jackpot, and completing WELL will award a super jackpot worth the sum of all jackpots scored thus far. This jackpot has the potential to be absolutely huge, and is a great opportunity to use your X. After scoring the super, you enter a second phase, like Prison's second phase, during which you shoot ramps to build up the jackpot value and collect it at the Well Walker.
Well Walker's weakness is that it's a two-ball multiball. The potential value of the super is astronomical, but it's hard to pull off, since this multiball usually burns out awfully quickly. That said, it's generally easier to start Well Walker than it is to start Prison – albeit a touch more dangerous – but it is worth progressing towards whenever you can do so. Either way, it's best to use Well Walker to facilitate scoring in more valuable modes, unless you're absolutely dialed in on that Well Walker and are confident in your ability to X a huge super.
You cannot progress to or start Prison while Well Walker is running, or vice versa. Neither multiball has an add-a-ball either, which dramatically increases their difficulty (and decreases their inherent value). Also, unlike Prison, Well Walker progress does not carry over between attempts.
One thing to be aware of with the Well Walker is that it's usually sensitive enough to register hits when you give the game a firm shove. This means that if you're only one hit away from starting multiball, the tilt isn't too tight, and you have some spare warnings, you can—and should—hip-check the game as the ball goes down the drain just to start Well Walker. I've done this on multiple occasions, and it's won me games. Having that in your pocket also means you can do something much more dangerous, such as shooting at the drop targets or at the Prison, with relative impunity—when the ball would drain, just slam that game! Just be careful that you don't tilt the game, since you're going to start Well Walker Multiball before your tilt erases all of your progress.
It may seem like a slimy move, but note that the IFPA Tournament Rules explicitly permit this. Just be warned that bangbacks and death saves are still illegal, so you'll still be disqualified if your move constitutes either of those. If someone calls a TD on you for doing the move, kindly ask the TD to review the rulebook. The only thing that could arguably make it illegal is if it's possible to trip the Well Walker without using a tilt warning, as it would then be repeatable. In that case, the tilt is set too loose, and the TD should adjust it anyway.
Dead Features
These are TWD's modes, and are lit by clearing the drop targets. Your first mode only requires you to complete the bank once; subsequent modes require you to complete it twice. Once modes are lit, shooting any lit shot will start a mode at that shot, with each shot housing a different mode (similar to Jaws or Baywatch). Modes can be lit and started during multiball, but cannot be stacked.
Most modes are worth a rather substantial amount of points, so get them going early and often. However, the drops are difficult and dangerous. A lot of players will avoid shooting them entirely, which means they’re not going to be taking modes, either. Don't be like a lot of players! Not only are the modes worth going for, but the drops also house a third multiball—the most valuable of them all—which we'll get to shortly.
All the modes are pretty standard timed affairs—shooting lit shots will award points. During any mode, clearing the drops again will add 10 seconds to the mode's timer, and shooting the shot for a mode you've already completed will increase the value of the currently running mode. For example, the left orbit is Barn. If you've already played Barn, shooting the left orbit while Tunnel is running will increase the value of Tunnel. (Be warned that some modes – such as Tunnel – can penalize you for certain shots.)
However, that’s about where the universal overlap ends. Some modes are substantially more complicated than others – Barn and Riot are both “one-shot all day” rounds, whereas the others require more nuance and precision. CDC, in particular, is more complex than the other four modes combined. On top of that, some modes can be beaten, some can’t – and beating a mode can be a bad thing, since there’s usually no bonus for doing so, and it removes the scoring opportunities the mode provides. Ordinarily, I’d explain the modes in left-to-right order, but I’m gonna try to group them by similarities - so please, bear with me as we break this down.
The Simple Modes
Barn is probably the simplest mode at the table. While it’s running, the left orbit will award 2.5M per hit, increasing by 500k per shot. Simple as that. You can’t beat the mode, and it’s worth solid value.
Riot is the other simple mode, which is the same idea - shoot the Tower shot all day (i.e., where you started the mode) for points. The difference between Barn and Riot is that Riot increases the value on switch hits, rather than with each successive mode shot. This makes Riot the best mode for a multiball stack by a mile. Barn is second place, but that’s mostly just due to how precise the other three modes expect you to play them.
CDC
Let’s talk about CDC next, as it’s very similar to another mode we’ll get to shortly – but it’s also extremely lucrative, and is arguably the best mode for single-ball play. It’s a mode that plays out in two phases.
During the first phase, it’s left ramp all day. Each shot is worth 750k, increasing by 25k/shot, which isn’t too bad. Each ramp shot you make also lights an additional shot (they light up from left to right), until all four other shots are lit. Hitting any of those lit shots will award the sum of all left ramp points you’ve earned in the mode and advance you to phase two.
During the second phase, all shots lit from phase one – excluding the left ramp – are worth that same sum. You have to hit each of the lit shots (again, left ramp excluded) once in order to relight all of them. You can do this as much as you want, or shoot the left ramp to re-score the sum of everything scored in phase two. The first time you shoot the left ramp during phase two will award the same sum value; the second time will re-score the entire value of phase two and end the mode.
Beating CDC is not hard at all. Technically, shooting the left ramp, then the left orbit, then two more left ramps will do the trick—but doing that is a really bad idea. Aside from the fact that you’re putting a ton of work into scoring, like, four million points, you’re also giving up the tremendous scoring opportunity this mode provides. In case it’s not obvious, each time you advance a phase, you effectively double the value of the phase you just played - and that’s not taking into account the points you earn from the additional shots. The challenge with CDC is figuring out when you want to advance to the next phase.
On the one hand, you could just loop the left ramp all day. It’s very repeatable, and you’re looking to score 30-40M, assuming you never miss for the entire duration of the mode. But even so, bare minimum, you should take a left orbit or tower shot towards the end of the timer just to re-score that 30-40M - especially if you have an X ready to roll. On the other hand, the more shots you make to the left ramp, the more shots you’ll need to relight all of your phase 2 shots. To be more specific, after three ramps, you’ll need to hit the right orbit/tunnel in order to relight all of your shots, which could seriously hamper your scoring potential.
Personally, I like to loop the left ramp until I miss, at which point I just shoot at whatever arrows I can get, and then cash out the mode, ideally with an X. I also try my best to refrain from playing this with a multiball, simply because CDC rewards precision greatly, and multiballs are the opposite of precision. But in short, it’s left ramp a bunch, then everything else a bunch, and then left ramp a bunch. Just keep an eye on the timer, and don’t forget to cash out (so long as you’re not cashing out too early).
The other two modes
Tunnel (right orbit) is very similar to CDC. All shots are lit for 5M a piece; shooting the right orbit will boost the shot value by 2.5M. Shooting any other shot will lock in the value and advance to phase two. During phase two, all shots will be lit, and collecting everything except the right orbit will relight all shots. The right orbit will just end the mode right away. The non-cumulative nature of Tunnel makes it much weaker than CDC is, but it's much simpler. Just shoot everything that's not the tunnel, and don't worry about finishing the mode. It's also much better than CDC is for a multiball. As long as you don't shoot the tunnel, you'll just collect 5M paydays on everything, so long as you divvy up your shots.
Arena (right ramp) doesn't make much sense to me. From what I understand, the mode has you loop the right ramp repeatedly for points, closing it out at Woodbury whenever you feel like it. It also apparently penalizes you for shooting non-right ramp shots or something? I dunno, it's not really one I ever aim for anyway since CDC is the best single-ball mode choice and Riot is the best multiball mode choice.
Supply Drops & Blood Bath
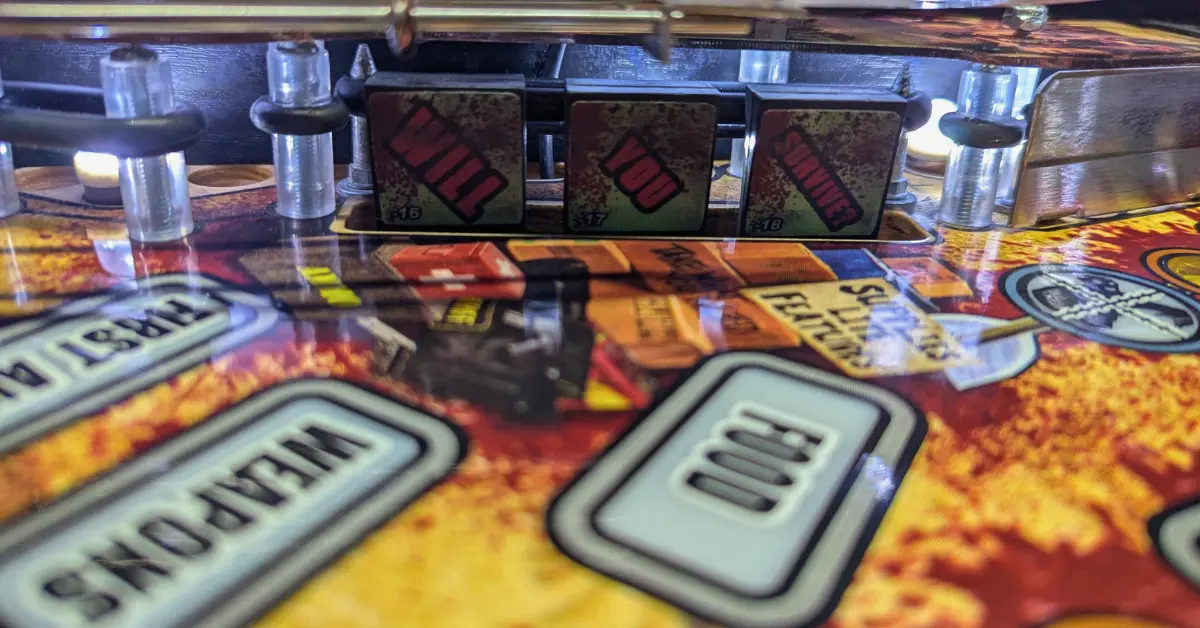
In front of the drops, there are three inserts indicating various types of supplies: First Aid, Weapons, and Food. If all three drops are standing, these lights will rove around between the three options. Once a target has been hit, the roving insert will stop moving, and completing the drops will award whatever you locked in, and will turn the corresponding insert solid. Each one of the three supplies awards something different:
- First Aid increases the value of Prison Walkers for the remainder of the game
- Weapons lights the Crossbow (which we'll get to later)
- Food will multiply the value of the next Well Walker hit
While these awards are nice, they’re far from significant – your priority should be getting all three inserts lit solid, as that’s how you light Blood Bath. So, if all three drops are up, and you’ve already collected some supplies, take a second and time a shot to lock in an insert you haven’t already collected yet. For example, if you already have Food and Weapons, trap up, wait until First Aid is lit, and hit the bank to lock that in. You don’t need to rush out and clear the bank, but locking in an insert you haven’t already collected spares you an extraneous bank completion.
Once you’ve collected all supplies, Blood Bath will be lit at the drops; completing the bank will immediately start it. This is a two-ball multiball where all switches are worth 15k/hit—not too bad—and will increase the jackpot value by 2,500 points. Clearing the bank of drops during Blood Bath will score the jackpot, and will add-a-ball the first two times you do so. Getting all three supplies again will award a Super Jackpot and will infinitely add balls back into play (although good luck getting any supers).
While it's the most difficult to start of the three multiballs, it tends to be the most lucrative. It's the only multiball with an available add-a-ball, and – most importantly – can be run with Prison or Well Walker (you can start either while Blood Bath is running, or vice versa, but only one). As such, I like to make starting a second multiball my top priority—if I’m playing Prison, I’ll go after Blood Bath; if I’m playing Blood Bath, I’ll go after Well or Prison (whichever is closer to the start).
(As an aside, on the Premium/LE, each bank completion will also light a "bomb" which can be used by pressing the action button to spot one hit in a specific mode. First Aid, for example, adds a "Prison Bomb" which can be used to spot a Prison Jackpot or advance you towards Prison. Weapons is for Horde, a wizard mode, and Food is a Well Walker bomb. Again, not that big of a deal, since Blood Bath is more important, anyway - but worth mentioning.)
Minor Modes
Let's talk about a couple of other minor scoring opportunities that happen here and there.
First off, there's Bicycle Girl, a tiny little round lit at the left ramp after killing 5 walkers, with subsequent Bicycle Girls lit every 20 kills after that. This is a pretty simple mode – when running, shooting the left ramp awards a hurry-up that can be collected up to three times before it times out. On the premium, the ramp will pop up and expose a zombie head, making it much more difficult to complete. Bicycle Girl isn't all that valuable, but it's worth picking off when it becomes available.
The Crossbow is another weird little mode that is lit at the right ramp by completing Weapons on the drop targets. This mode is weird: the general idea is that you have a very brief period of time to shoot any major flashing shot for a million points, plus 1M per successful shot. However, during single-ball play, some targets are seen as a "miss" and instantly end your mode. For instance, hitting the Well Walker in any capacity will stop Crossbow. (During multiball, those switches don't matter.) Hitting three shots successfully will start a mode called "Crossbow Frenzy," a mode which I've never seen, but from what I understand, encourages you to shoot the right ramp to make repeated Crossbow shots for rapidly-accelerating values. If you find a groove, it might be worth going after Crossbows, but I've never really found it myself. (On the Premium, the Crossbow uses a ball cannon between the flippers, similar to the cannon on Austin Powers, which is used instead of the flippers. I don't think that the rules change too much, though.)
Hitting 40 bumpers will light a "bumper jackpot" at the right orbit, which is pretty worthless, but I figured I'd mention it anyway.
Bit is a very small amount of points (500k or so) awarded on a lit outlane. This may look like a ball save, but no, it's just pity points. The value can be increased by completing the top lanes, but I've never seen it higher than a million or so, and even then, you should not care. Maybe I’m reading too much into it, but I feel like the game makes far too big a deal out of Bit than is deserved.
Woodbury is a cool little minigame reminiscent of the Super Skill Shot from Twilight Zone. It's lit by completing the fish tank (which is advanced through shots to the right ramp). When lit, you can shoot the little U-turn on the far right side of the playfield that returns the ball to the shooter lane. From here, you can flip the flippers to pick which target you're aiming for: either of the top lanes or either of the rollovers, as well as the value you're interested in. Hitting the wrong lane (you cannot change it once you plunge) or going past the selected rollover will count as a miss; getting in the correct lane or hitting the right rollover (without going over) will award whatever you selected.
It's a fun little mode, but value-wise, it's a complete joke. The best award (at least, on your first attempt) is a measly million points. The second-best award is, no joke, Light Bit. The value apparently can increase substantially with each successive completion, but I wouldn't even bother. You can also pick up extra balls at the Woodbury shot when lit, which are worth decent points when disabled. Honestly, the biggest reason to ever shoot Woodbury is for switch hits when needed, as it feeds the bumpers (plus a spinner on the Premium).
Multi-Kills
This is TWD’s equivalent of Monster Bash’s Instrument Bonus, or Spider-Man’s Spiders. By completing various playfield objectives, Multi-Kill will light at a major shot. This is indicated by a small yellow insert, and will remain lit for the remainder of the ball, although the insert will move with each collect. Starting multi-kill will also cause one of the six weapon inserts in the center of the table to flash – we'll talk about these in just a moment, but there's no difference between the weapons. It's purely aesthetic – there's no difference between Sword Multi-Kill and Axe Multi-Kill, and Crossbow Multi-Kill has nothing to do with the Crossbow mode.
Multi-Kills are started in a variety of ways, primarily by making enough shots in a mode or enough jackpots in a multiball. If you want a more comprehensive list, here are the ways you can start Multi-Kill. I wouldn't worry about memorizing it, even if most of the modes are pretty straightforward:
- Make three shots in Barn, CDC, or Arena
- Make two shots in Riot or Tunnel
- Score three jackpots in Well Walker or Blood Bath
- Score four jackpots in Prison
- Make three shots in Crossbow or Bicycle Girl
- Complete three Fish Tanks (at right ramp)
- Make 10 combos
- Collect Start Multi-Kill at Woodbury
Each Multi-Kill is worth 5% of the total value of whatever mode or multiball started it, and awards two walker kills. For example, if you score 10M in CDC, Multi-Kill will be worth 500k. If you score 100M, it'll be worth 5M. Obviously, you'll want to be scoring 100M anyways, so getting that free shot for 5M for the rest of the ball is a nice bonus!
On top of that, it's possible to run multiple Multi-Kills at once. Starting a second won't light a second light; it'll just add the value to the first. So, as long as you're hitting shots for your major objectives, Multi-Kill will just build and build over the course of the ball, always being available as you do what you were probably trying to do anyway. To be clear, Multi-Kills are by no means a predominant strategy in the game. I mean, let's be real – you want to score 100M in a mode so you can score 100M points, not so you have a shot lit for 5M for the rest of the ball. But an always-available 5M point shot is certainly nothing to ignore!
When you drain, your Multi-Kill will reset, and all flashing weapon inserts will turn solid.
Wizard Modes
Walking Dead has a whopping four wizard modes, of which I’ve only been lucky enough to see one. Unfortunately, documentation on these modes is a bit scarce, so this may be inaccurate or incomplete. Here’s my best understanding of each one:
Horde
Completing all six multi-kill inserts (regardless of what actually started the multi-kill) lights Horde at the Woodbury shot. In this mode, walkers will appear at the five major shots and gradually approach you (as indicated by the display and the number of inserts lit). Obviously, you want to kill walkers for points – but the closer they get, the more valuable they are. The trade-off is that if a walker gets too close, you die, and your ball will end. (Supposedly, the ball end is just on competition mode games, not on standard settings – but better safe than sorry!)
The walkers spawn in waves (i.e., three at once, then four, then five). Completing a wave awards a jackpot and an add-a-ball. Oh, yeah – this mode starts as a two-ball multiball, but it’s not exclusively a multiball mode; it’ll go until you either die or escape.
Siege
Not gonna lie, this one doesn’t make any sense to me. It’s lit at the Prison by scoring enough Prison Walker kills during prison multiball(s), and is basically a “shoot at all of the shots” mode while it’s running. Seems pretty straightforward, although it’s not easy to get to.
Escape Terminus
Lit by playing all five Dead Features, this mode is very reminiscent of Iron Maiden’s Two Minutes to Midnight mode. Basically, each shot is lit for a hurry-up, with the value determined by your score in a given mode. Collecting a hurry-up increases the value by the fraction of another mode’s value; collecting all five hurry-ups wins the mode. I believe the mode values are added in the reverse order you played them—i.e., the first hurry-up is based on your last mode value, the second on your second-to-last, etc. Whatever the case, it’s good if your modes were worth a lot, but I feel like playing even two modes is an accomplishment, let alone five.
Last Man Standing
Lit at Woodbury by killing 115 walkers. Yeah, I really know nothing about this one. According to tiltforums, it’s a four-ball multiball that encourages you to kill 115 walkers again, somehow, and is presumably just a big ol’ points bonanza.
As far as difficulty goes, I think that Horde is probably the easiest (since solid play will get you three or four multi-kills without too much trouble), followed by Last Man Standing, then Siege, then Escape Terminus. But to be honest, I’m just guessing – they’re all pretty difficult, largely owing to the difficulty of this game.
Hopefully, you have better luck than I at getting to some of them!
Like what you're reading?
Get pinball news, analysis, and deep dives delivered to your inbox.
Related Posts
More in Pinball Tutorial or browse all topics.