Emergency Broadcast: Defeat the Invading Martians and Save the World in Bally’s Attack from Mars

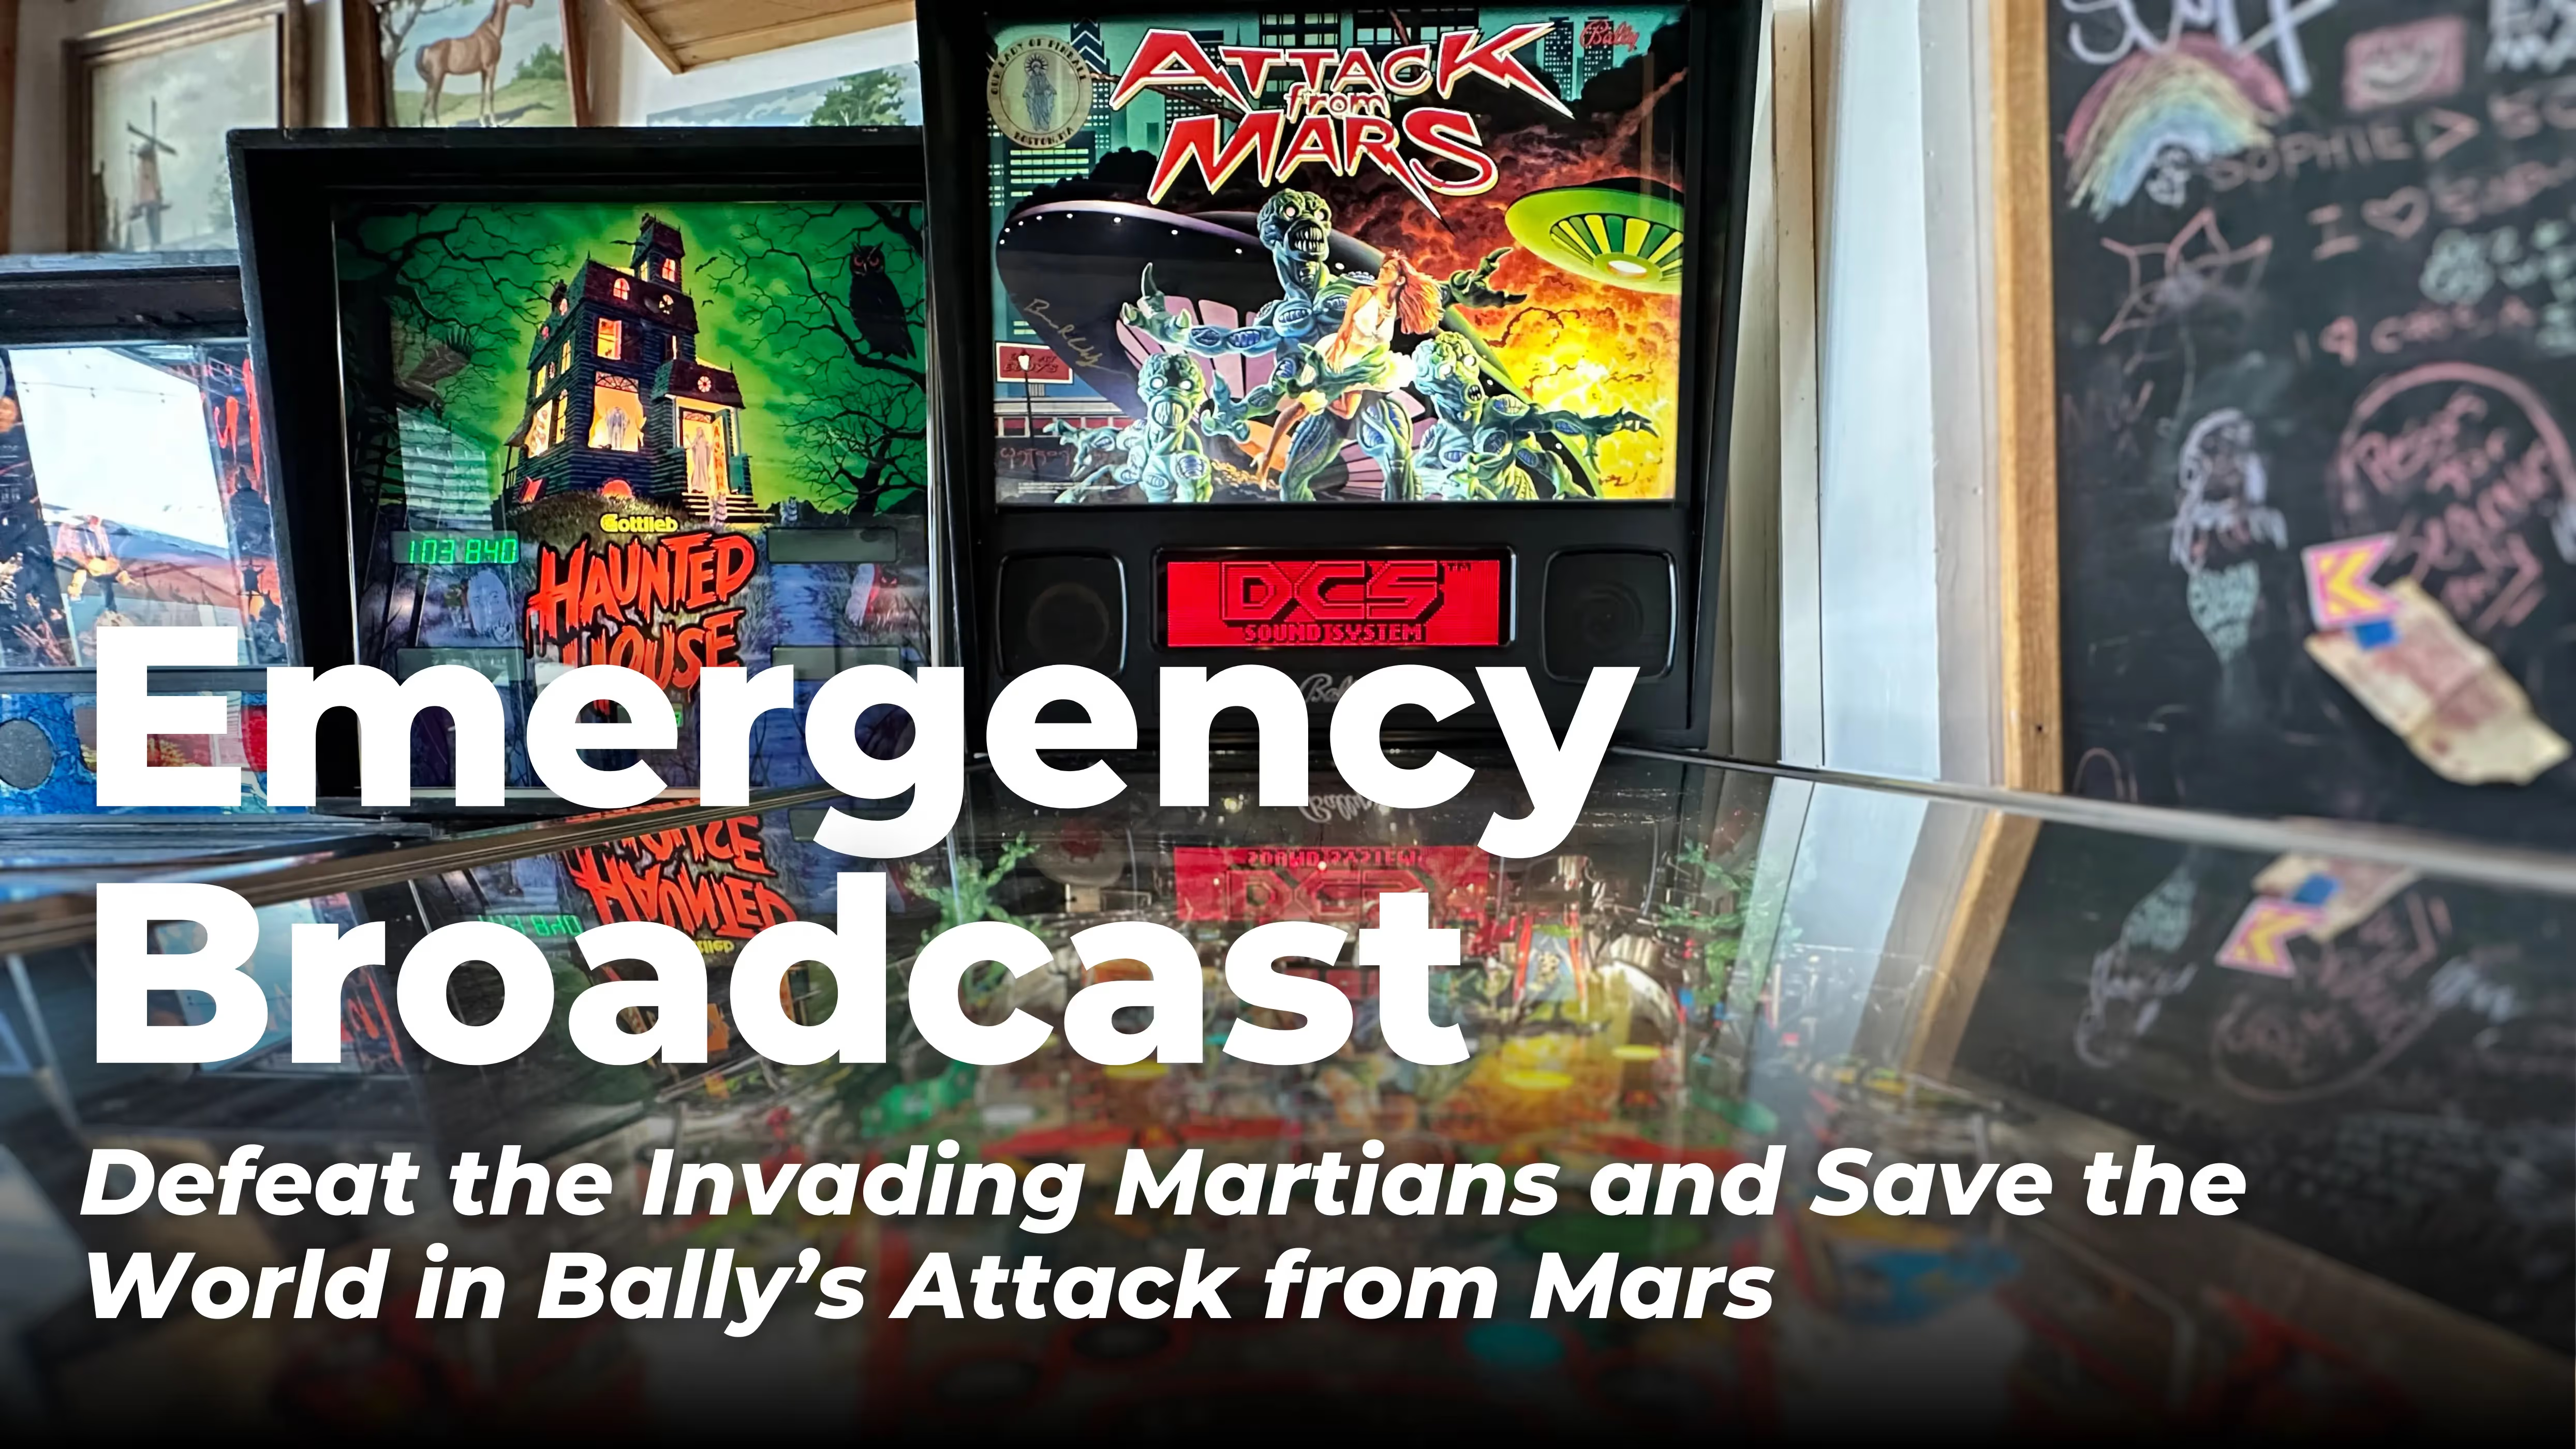
This classic table is unrelated to the similarly-named Tim Burton film of a similar name, despite being a cheezy B-movie extravaganza, chock full of puns, one-dimensional characters, and some hilarious objectives that are incredibly charming. For the uninitiated, this is a relatively simple game with clear-cut rules, but there are some ideal ways to stack things on top of each other to try and build up your score quickly.
About Attack From Mars Pinball
Attack from Mars was released in 1995 by Bally Manufacturing Co. The game is considered an all-time classic and was designed by Brian Eddy with code by Lyman F. Sheats Jr. and art by Doug Watson.
Check out more detailed info and links to additional resources on the Kineticist game page.
Attack From Mars Playfield Overview
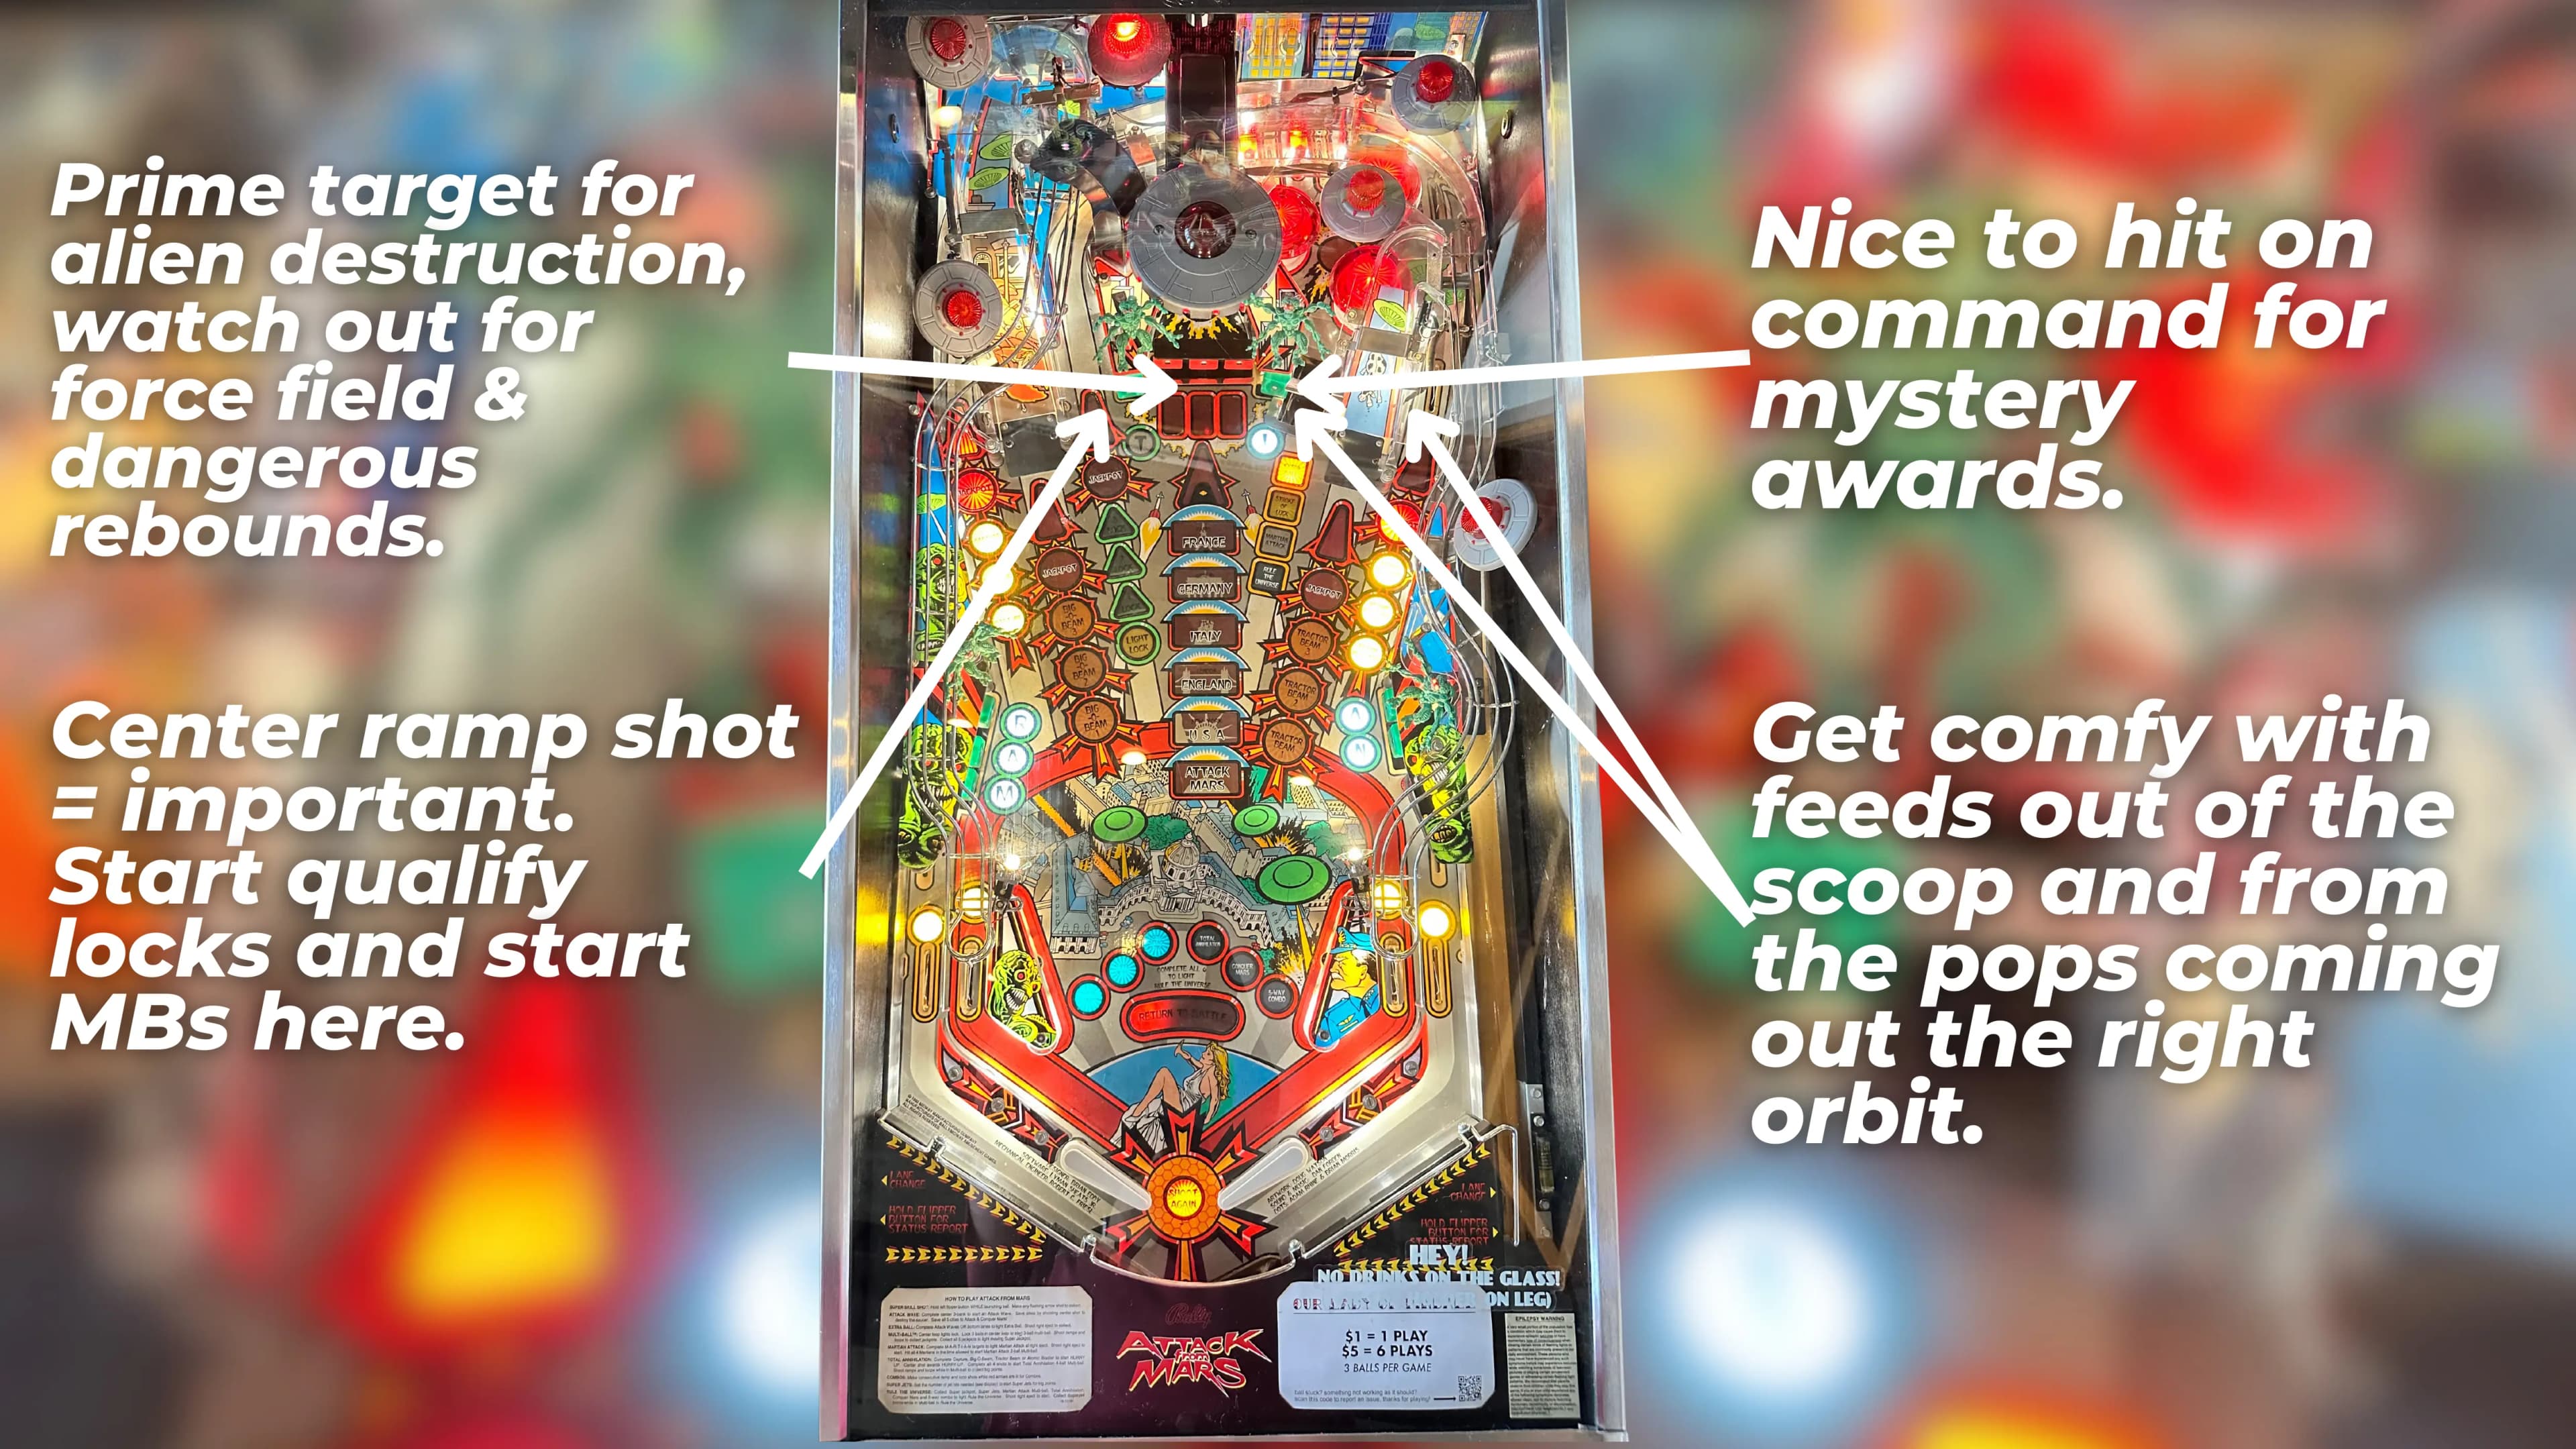
AFM has a standard two-flipper fan layout. The most notable feature is the Saucer in the center of the table, protected by a three-target "force field" that raises and lowers into the playfield to start each battle, exposing three targets behind it, one of which being a drop target guarding a hole. If you can get comfy with hitting those targets safely, things are likely to go well for you.
Otherwise, AFM features three ramps, two loops, and a scoop, all accessible from the flippers down below. If you can only hit one major shot, make that shot the center ramp - it looks like a loop and says "Light Lock" pointing into it. It’s not that hard to make - it looks tighter than it actually is. The scoop on the right is nice to hit on command and grants mystery awards, which can be very valuable. The other four shots - the two ramps and two loops - should be treated as a group. If you can hit all four, that’s great. If you can only hit three, then you can almost forget about them.
The pops can feed into the back of the scoop or out of the right orbit. Get comfortable with those returns, you might be seeing a lot of them.
One of my favorite parts of this game is that it features some of the most insanely inflated scoring in all of pinball. I’d say that you shouldn’t be too excited about your score until you have at least a couple billion, with a B. Scores tend to surge up the further in the game you get, though. 5 billion is a pretty solid score, but I’ve seen scores surge well into 11-digit territory (10,000,000,000 or more).
Abridged Tutorial
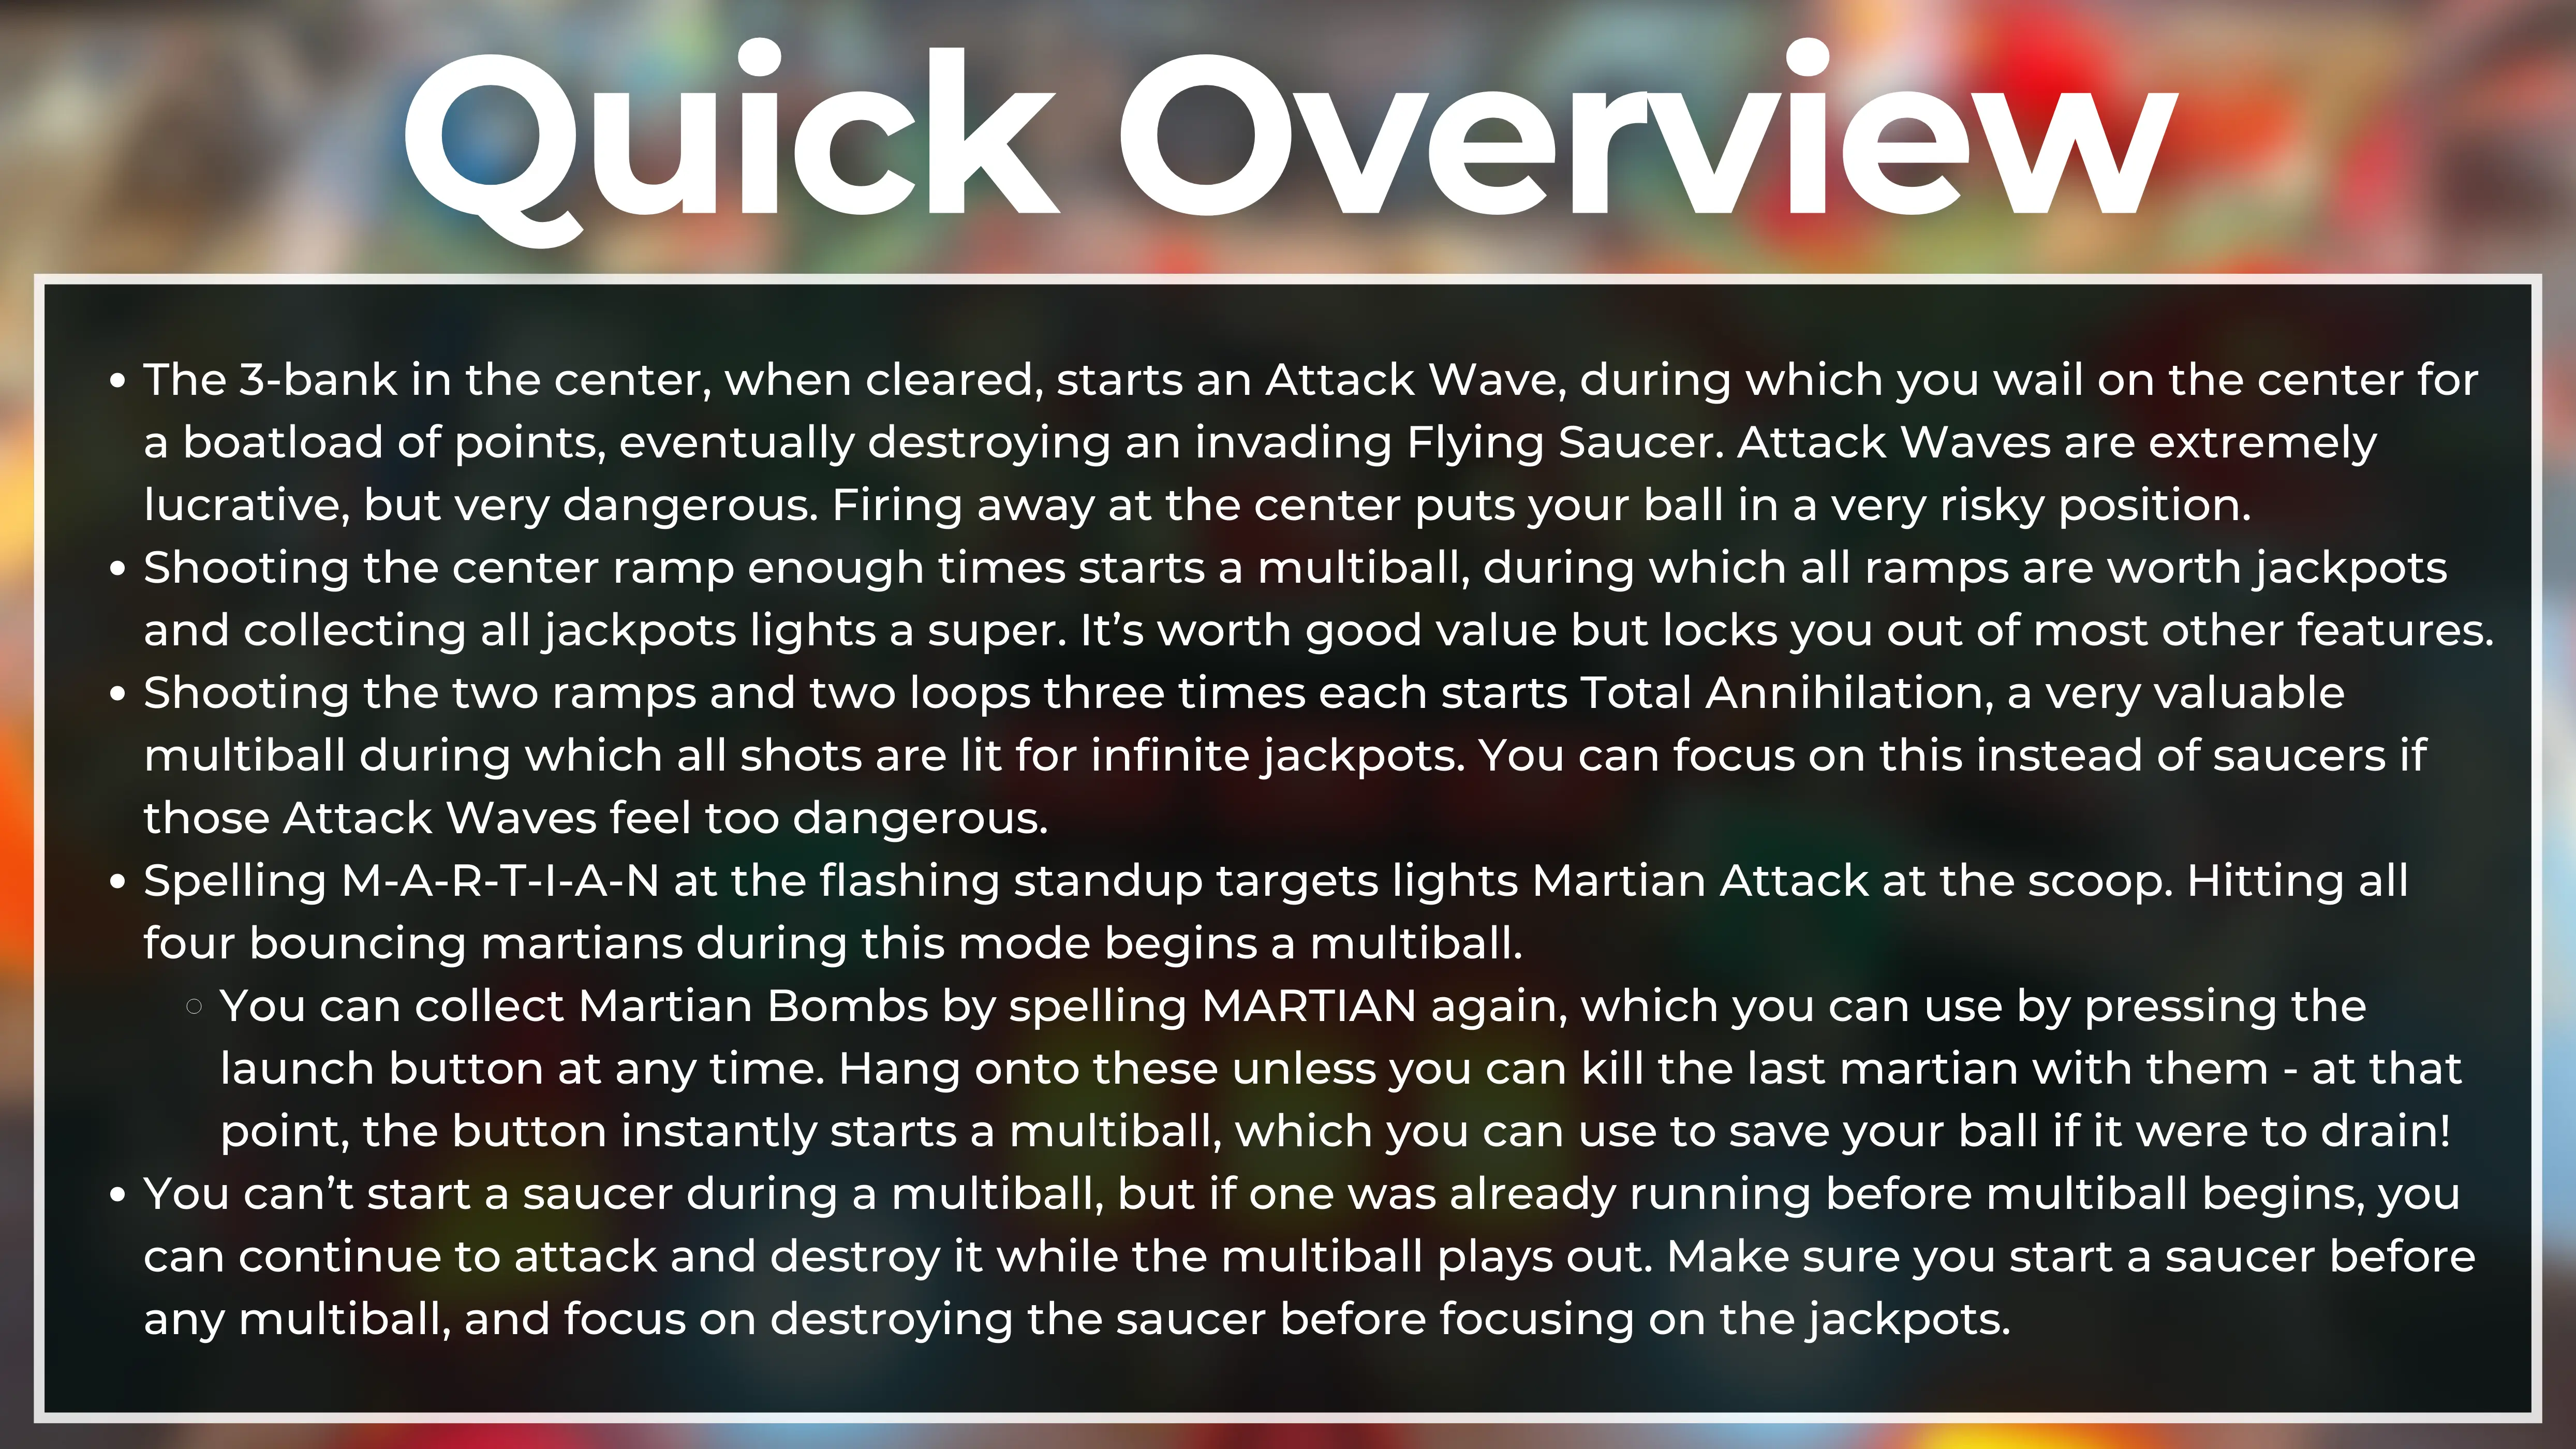
- The 3-bank in the center, when cleared, starts an Attack Wave, during which you wail on the center for a boatload of points, eventually destroying an invading Flying Saucer. Attack Waves are extremely lucrative, but very dangerous. Firing away at the center puts your ball in a very risky position.
- Shooting the center ramp enough times starts a multiball, during which all ramps are worth jackpots and collecting all jackpots lights a super. It’s worth good value but locks you out of most other features.
- Shooting the two ramps and two loops three times each starts Total Annihilation, a very valuable multiball during which all shots are lit for infinite jackpots. You can focus on this instead of saucers if those Attack Waves feel too dangerous.
- Spelling M-A-R-T-I-A-N at the flashing standup targets lights Martian Attack at the scoop. Hitting all four bouncing martians during this mode begins a multiball.some text
- You can collect Martian Bombs by spelling MARTIAN again, which you can use by pressing the launch button at any time. Hang onto these unless you can kill the last martian with them - at that point, the button instantly starts a multiball, which you can use to save your ball if it were to drain!
- You can’t start a saucer during a multiball, but if one was already running before multiball begins, you can continue to attack and destroy it while the multiball plays out. Make sure you start a saucer before any multiball, and focus on destroying the saucer before focusing on the jackpots.
Skill Shot
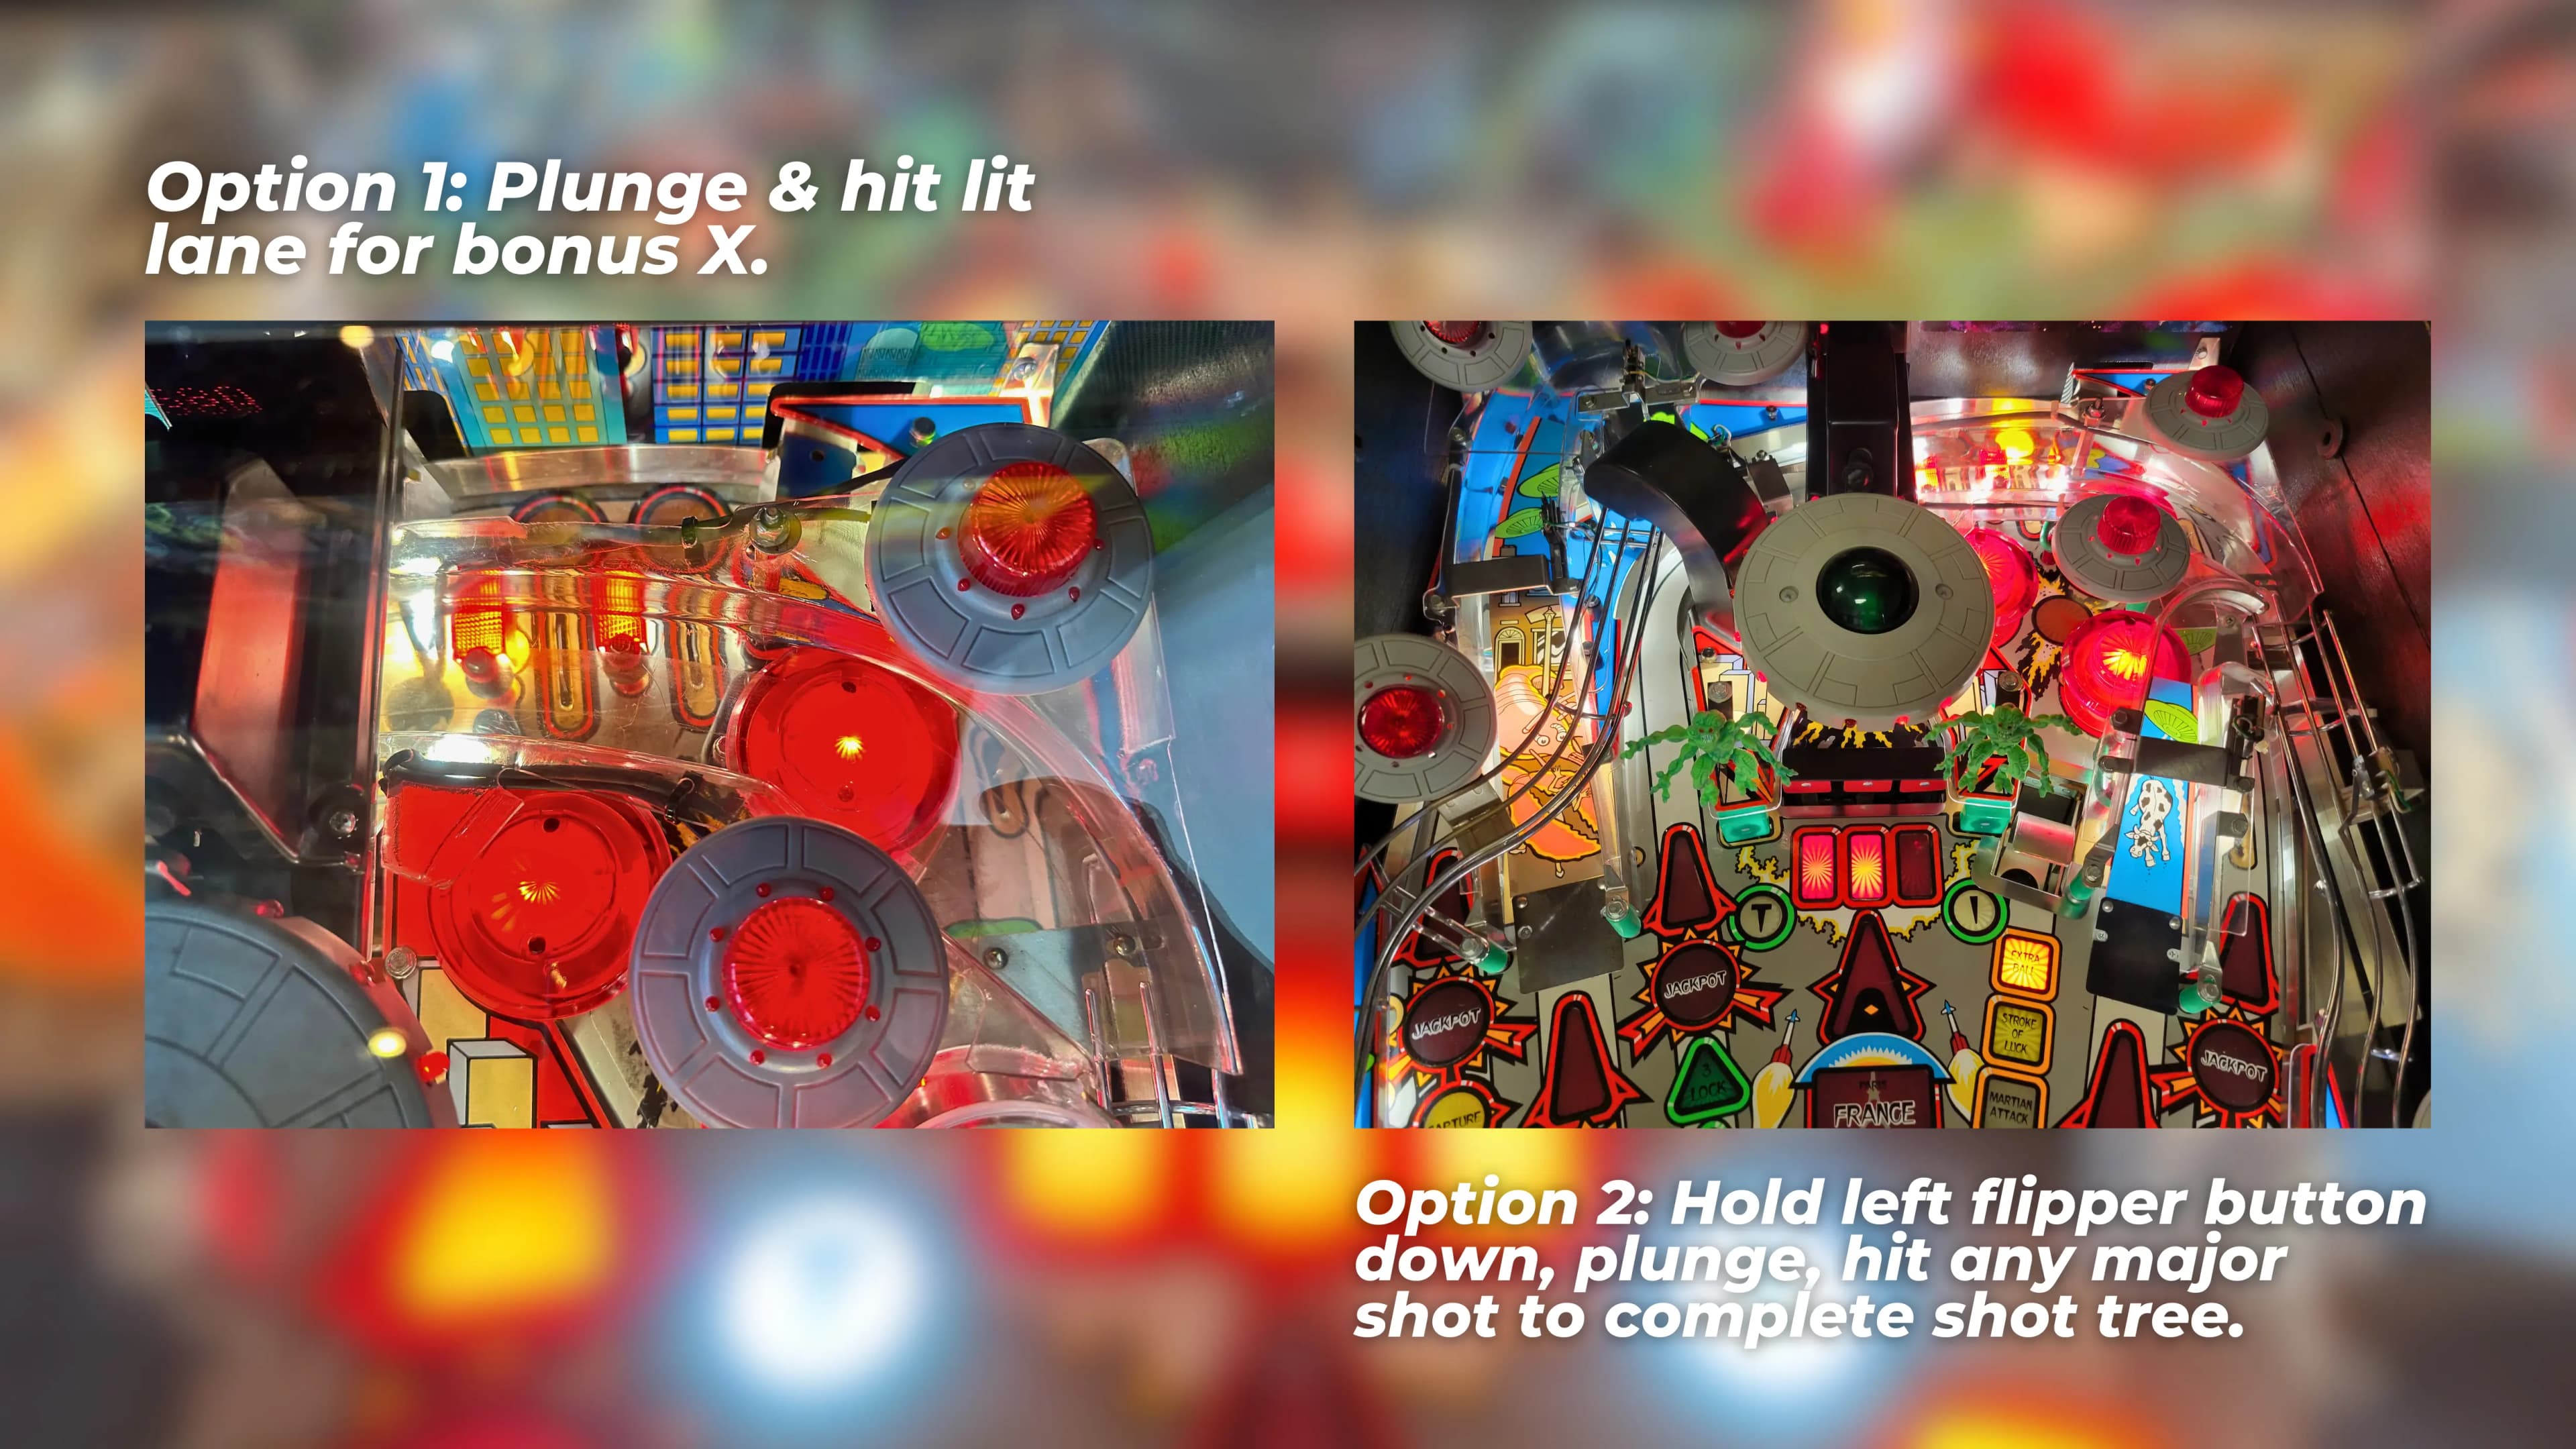
AFM's skill shot is simple - it has a launch ball button, rather than a plunger, but shoots the ball up to the top lanes above the bumpers. Rolling over the lit lane (you control it with the flippers) awards some bonus multipliers which aren’t very valuable. Alternatively, you can hold the left flipper button down as you press the launch button, which causes the ball to come all the way around to the flippers for a Super Skill Shot. Hit any ramp or loop to complete that shot (gives progress towards a lucrative multiball), or hit the three-bank in the center to lower it, starting progress towards a Saucer.
Personally, I take the super skill shot to lower the force field when it's up since it's worth a lot and is dangerous to shoot otherwise, and take the regular skill shot if it's already down. I have seen some players just shoot for the ramps and loops, though, since those can be worth a lot if you complete all of them.
Saucers
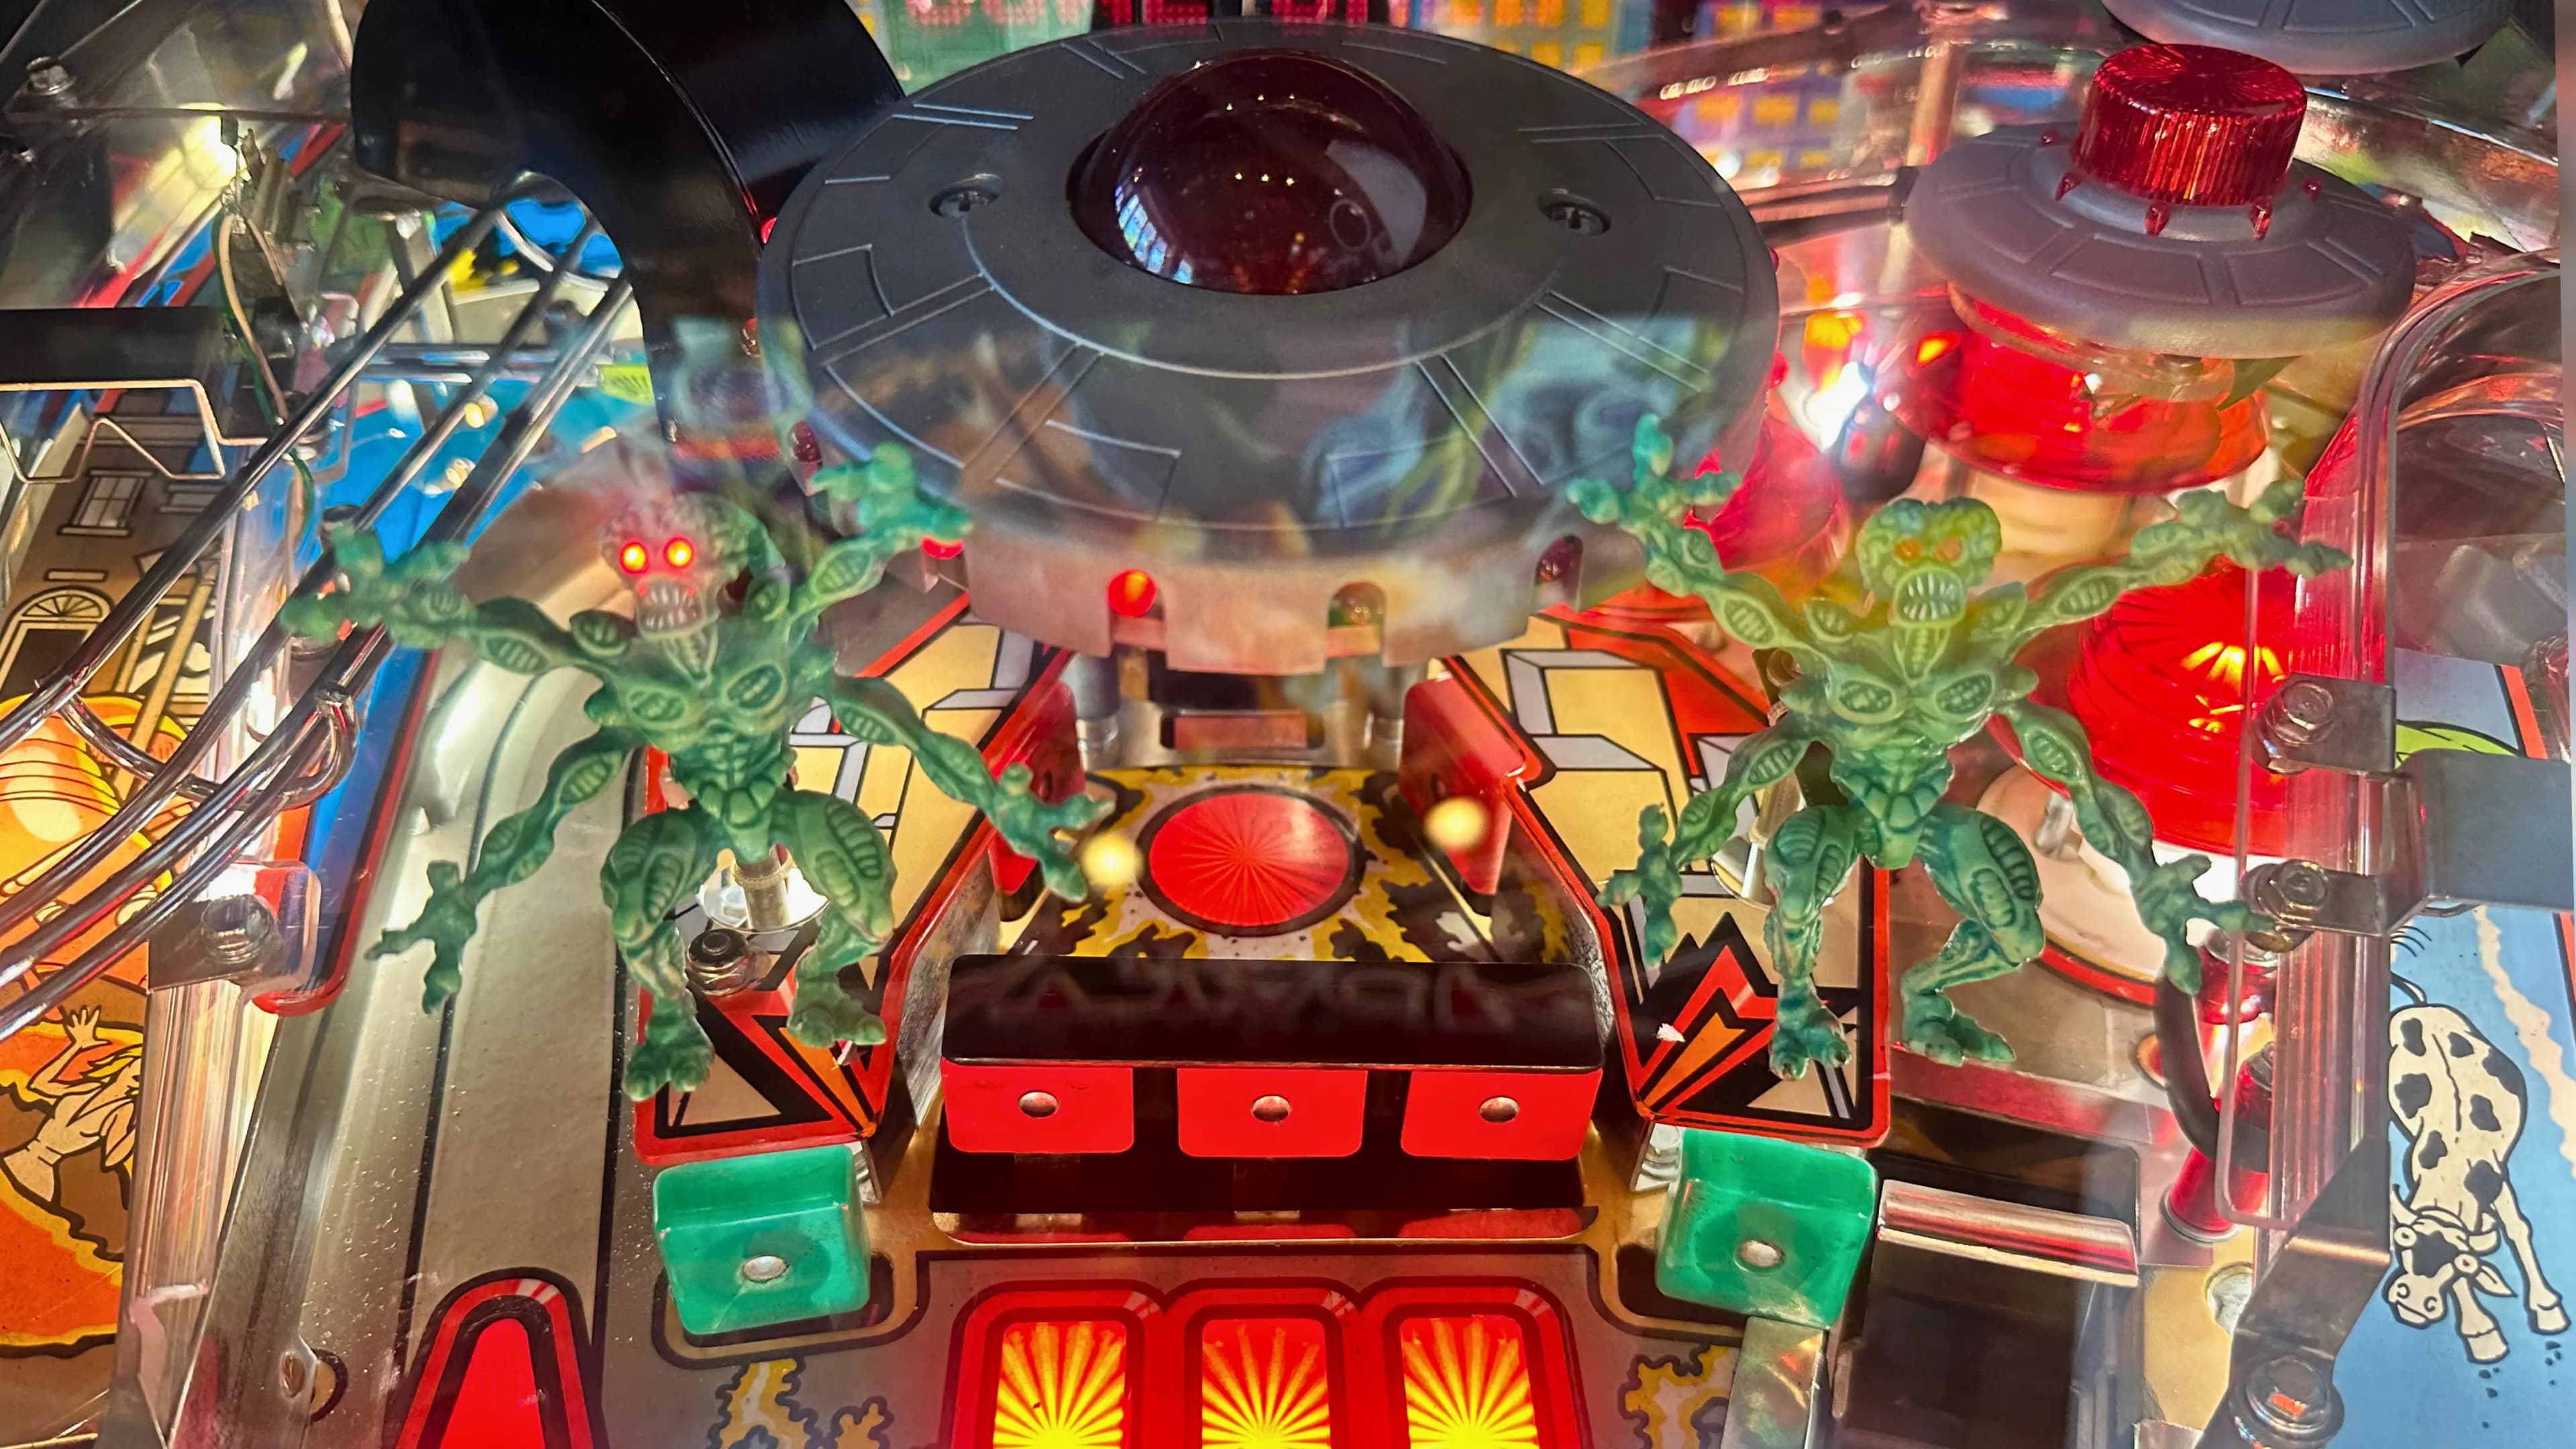
Brian Eddy loves making games which have one major center shot that's far more lucrative - and far more dangerous - than everything else. For AFM, it's the flying saucer in the middle. Hitting the three targets - known as the "force field" - will lower the bank into the table, starting an Attack Wave.
During each Attack Wave, the goal is to wail on the three targets behind the force field for huge points, damaging an invading Martian Flying Saucer. There's a life bar on the display - when it's empty, a hole will be exposed in the center which you can shoot to destroy the saucer. Saucers are untimed and will continue until the game ends or the saucer is destroyed.
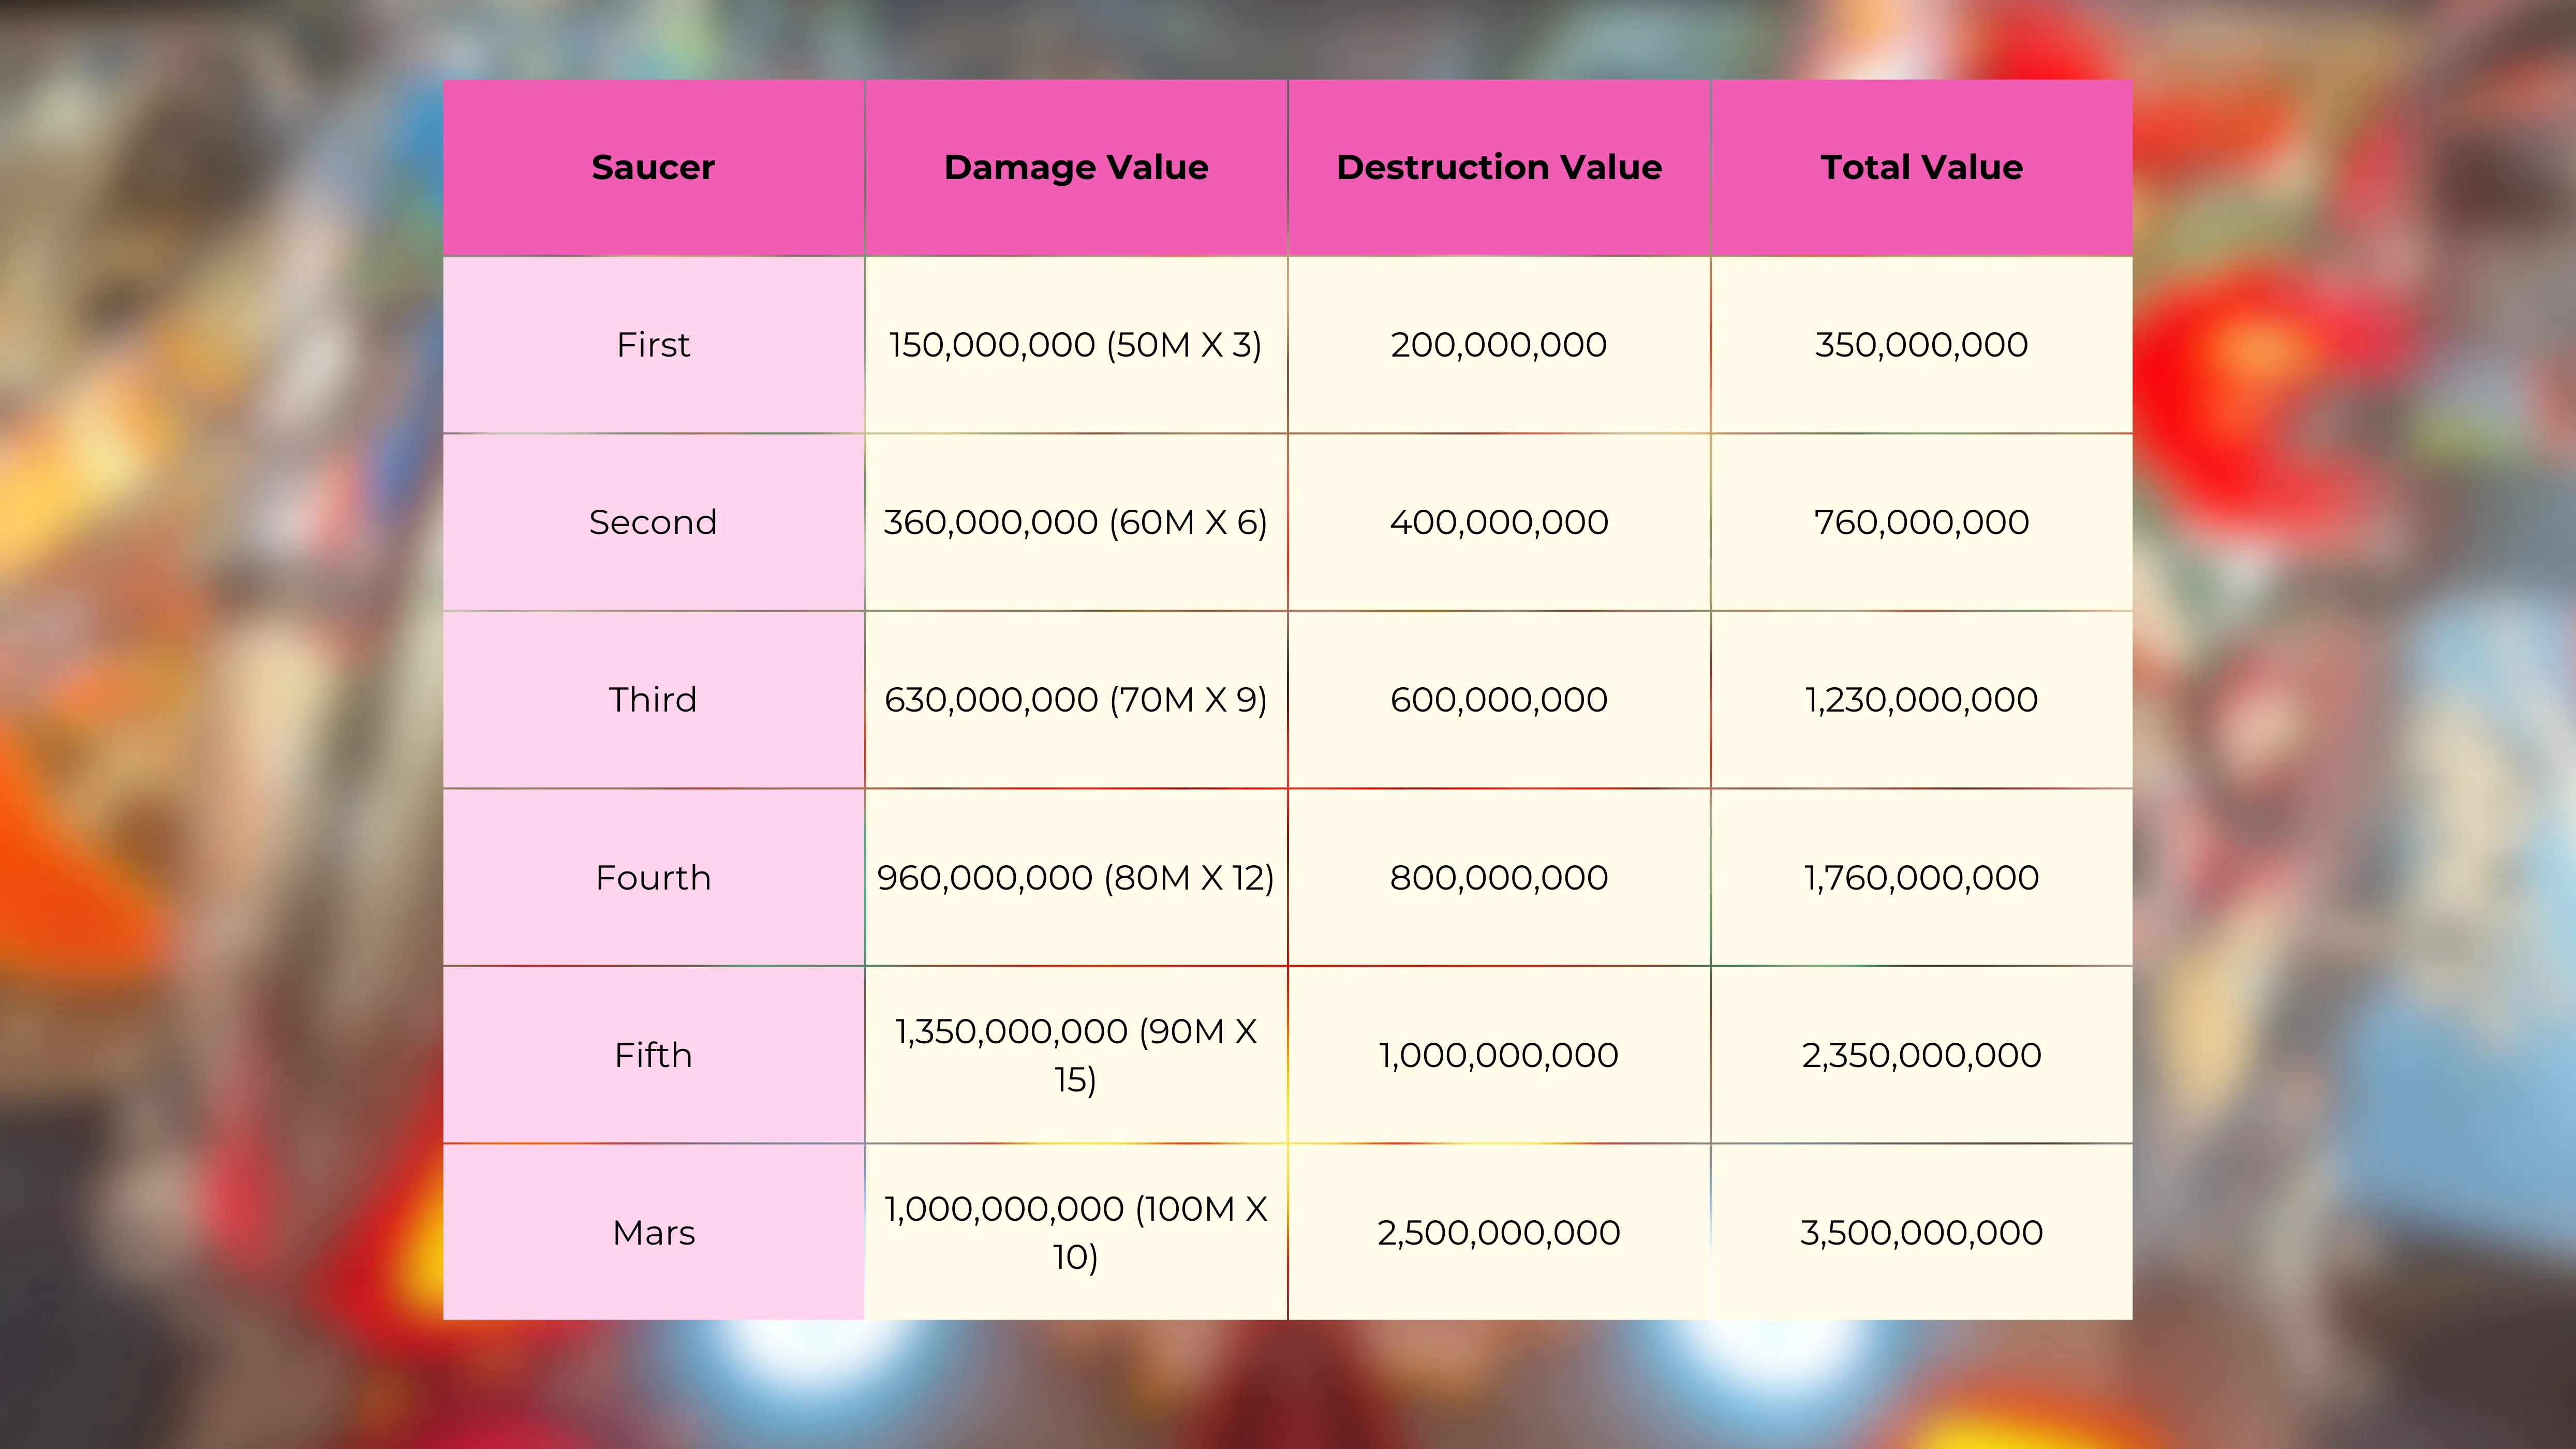
To call saucers valuable would be a massive understatement. The first saucer destroyed is worth 200M, with each saucer after that being worth 200M more than the last. You also score oodles of points just damaging saucers, too. While there are some scoring opportunities that are as lucrative, the constant availability and relative ease of shooting saucers make them - at least, in my opinion - the best scoring opportunity at the table.
Obviously, there’s a catch: they’re incredibly dangerous. Let’s be serious: it’s a shot right up the middle with a fast, unpredictable return, and requires so many hits for it to pay off. You’re likely to drain off of most saucer hits or at least lose control for some time. The Force Field (3-bank) is far more dangerous than the targets behind it, although the hole shot (to actually destroy the saucer) is pretty safe since it’s easy and returns the ball to the flipper.
There’s no difference between the cities listed. The only thing that matters is which saucer it is (first, second, etc.), as each saucer takes three more hits to destroy than the last (the first one takes three hits) and is worth more. Destroying five saucers lights the sixth and final attack wave, where you go and Attack Mars. For the most part, Mars is just like any other attack wave. The only difference is that damage is dealt by shooting the hole instead of the back targets and that it requires ten shots worth 100 million a piece.
Mars is a bit safer to attack than the other saucers since successful shots will return the ball to the flipper, lining you up for another shot. Destroying Mars is worth 2.5 billion points and will make all hits to the saucer worth 100 million points for the rest of the game, which is absolutely ridiculous if you happen to start a multiball at some point down the line.
Excluding extra hits, destroying all five saucers and Mars is worth just shy of ten billion points. For those who were curious, here’s what the total scoring looks like:
Multiball
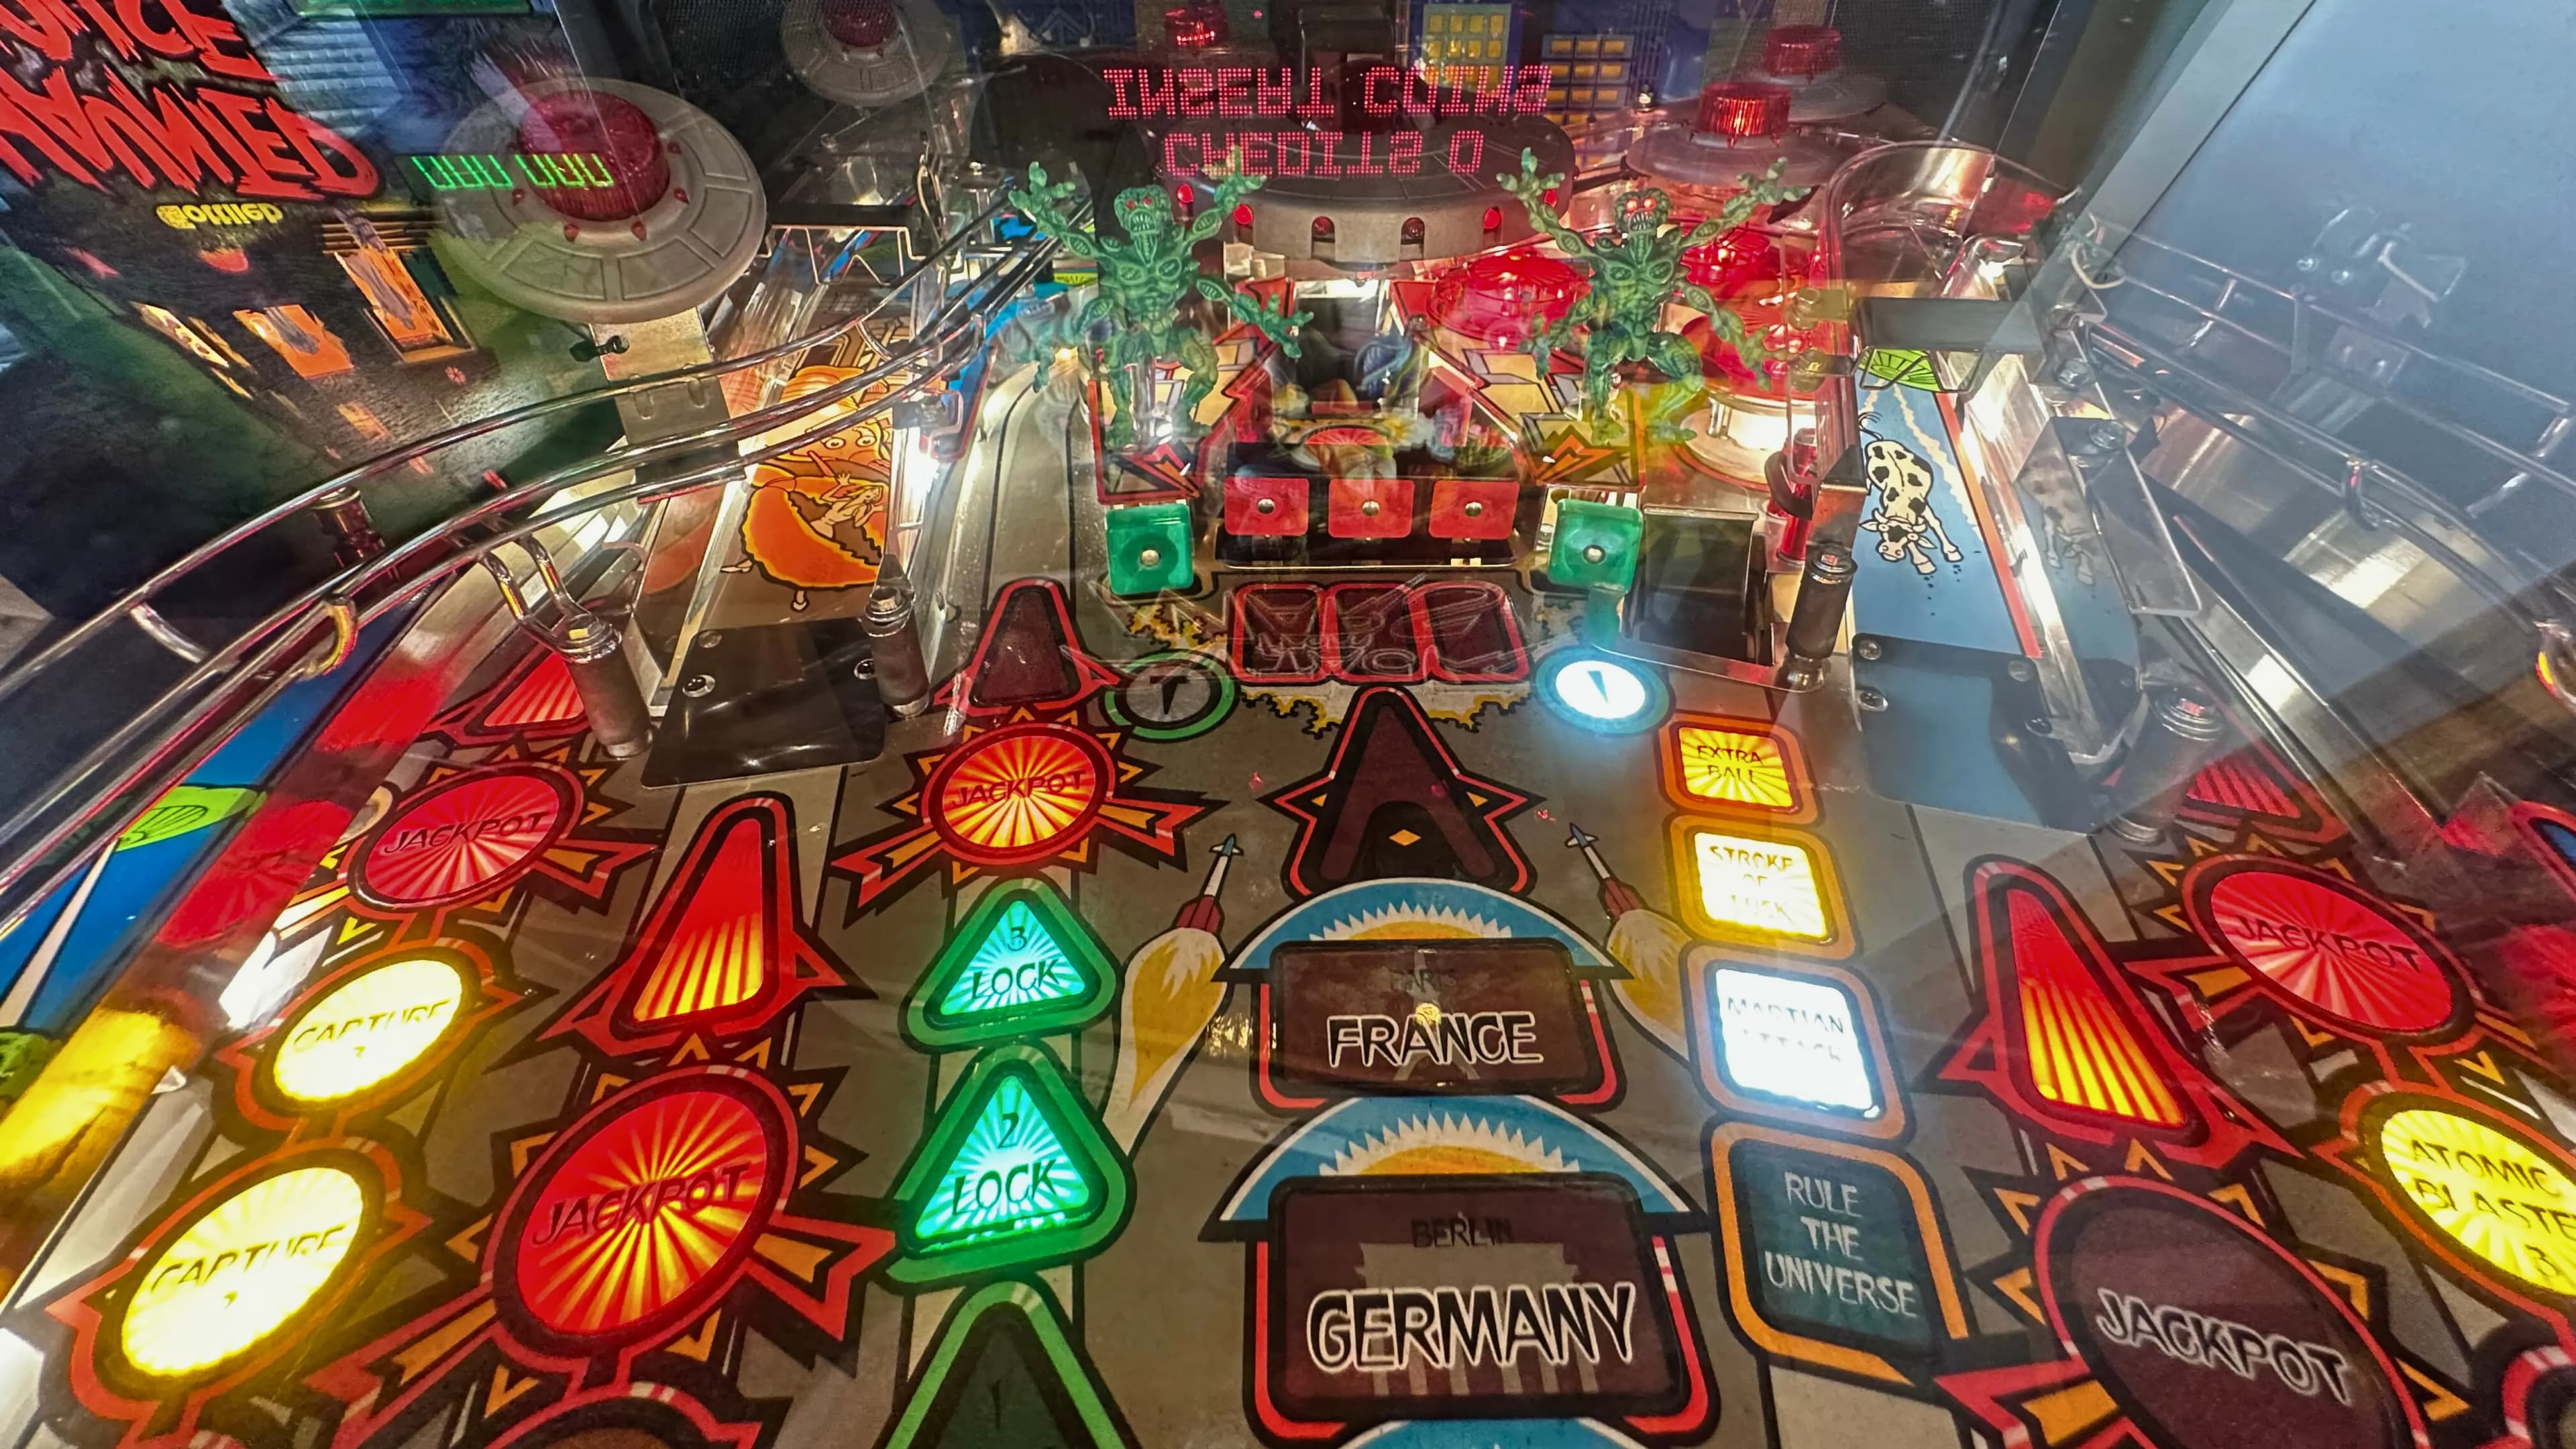
Attack from Mars has one conventional three-ball multiball. Locks are both lit and collected on the center ramp. Collected locks will return to the left flipper, lighting a lock will return to the right flipper. Being able to loop the ramp is very valuable, as is being able to pass that left feed back to the right for another shot. Locking three balls starts multiball.
During multiball, the ramps and loops are all jackpots worth solid points. Collecting all five shots lights a super jackpot, which is a roving shot - it will start on the left loop and move from left to right and back again. You have unlimited time to collect it, and it’s worth a lot, but it’s not exactly an easy shot. It’s all about timing - pick a shot you can hit, trap up, and shoot for the super when it’s on your shot. Collecting it relights all jackpots and rewards you with one of the greatest callouts in all of pinball. Also, if you light the super, but fail to collect it before multiball ends, the game will give you a “Last Chance” and keep the super lit on a brief timer.
That said, Saucers are more valuable than jackpots are. It’s better to use your multiballs to destroy saucers instead. While you can’t start an attack wave during a multiball, you can damage and destroy a saucer during an already-running attack wave. So, if you care about saucers, make sure you start an attack wave before starting any multiball. Since saucers are more valuable, you should focus on it until it’s destroyed, then focus on the jackpots.
One other thing to keep in mind: if a ball is to ever land in the “destroy saucer” hole while the force field is up, you get a “dirty pool” which automatically destroys the next saucer. It’s basically impossible to do intentionally during single-ball play. But, during multiball, if you lob a ball up towards the saucer as the force field is coming up, you can get it stuck there, knocking it back into the hole by hitting the force field, Newton’s Cradle-style. It’s tough to do, but it’s a free saucer.
For the unaware, in competition, stuck balls have to be freed immediately by trapping up and calling an attendant over, so you can’t take advantage of a malfunction. Dirty pooling in AFM is an exception to this rule: if a ball gets stuck there, you don’t have to unstick it, even if you’re not going for the dirty pool. That said, I’d advocate for dirty pooling over just leaving a ball up there. Saucers are much, much more valuable than jackpots.
Total Annihilation
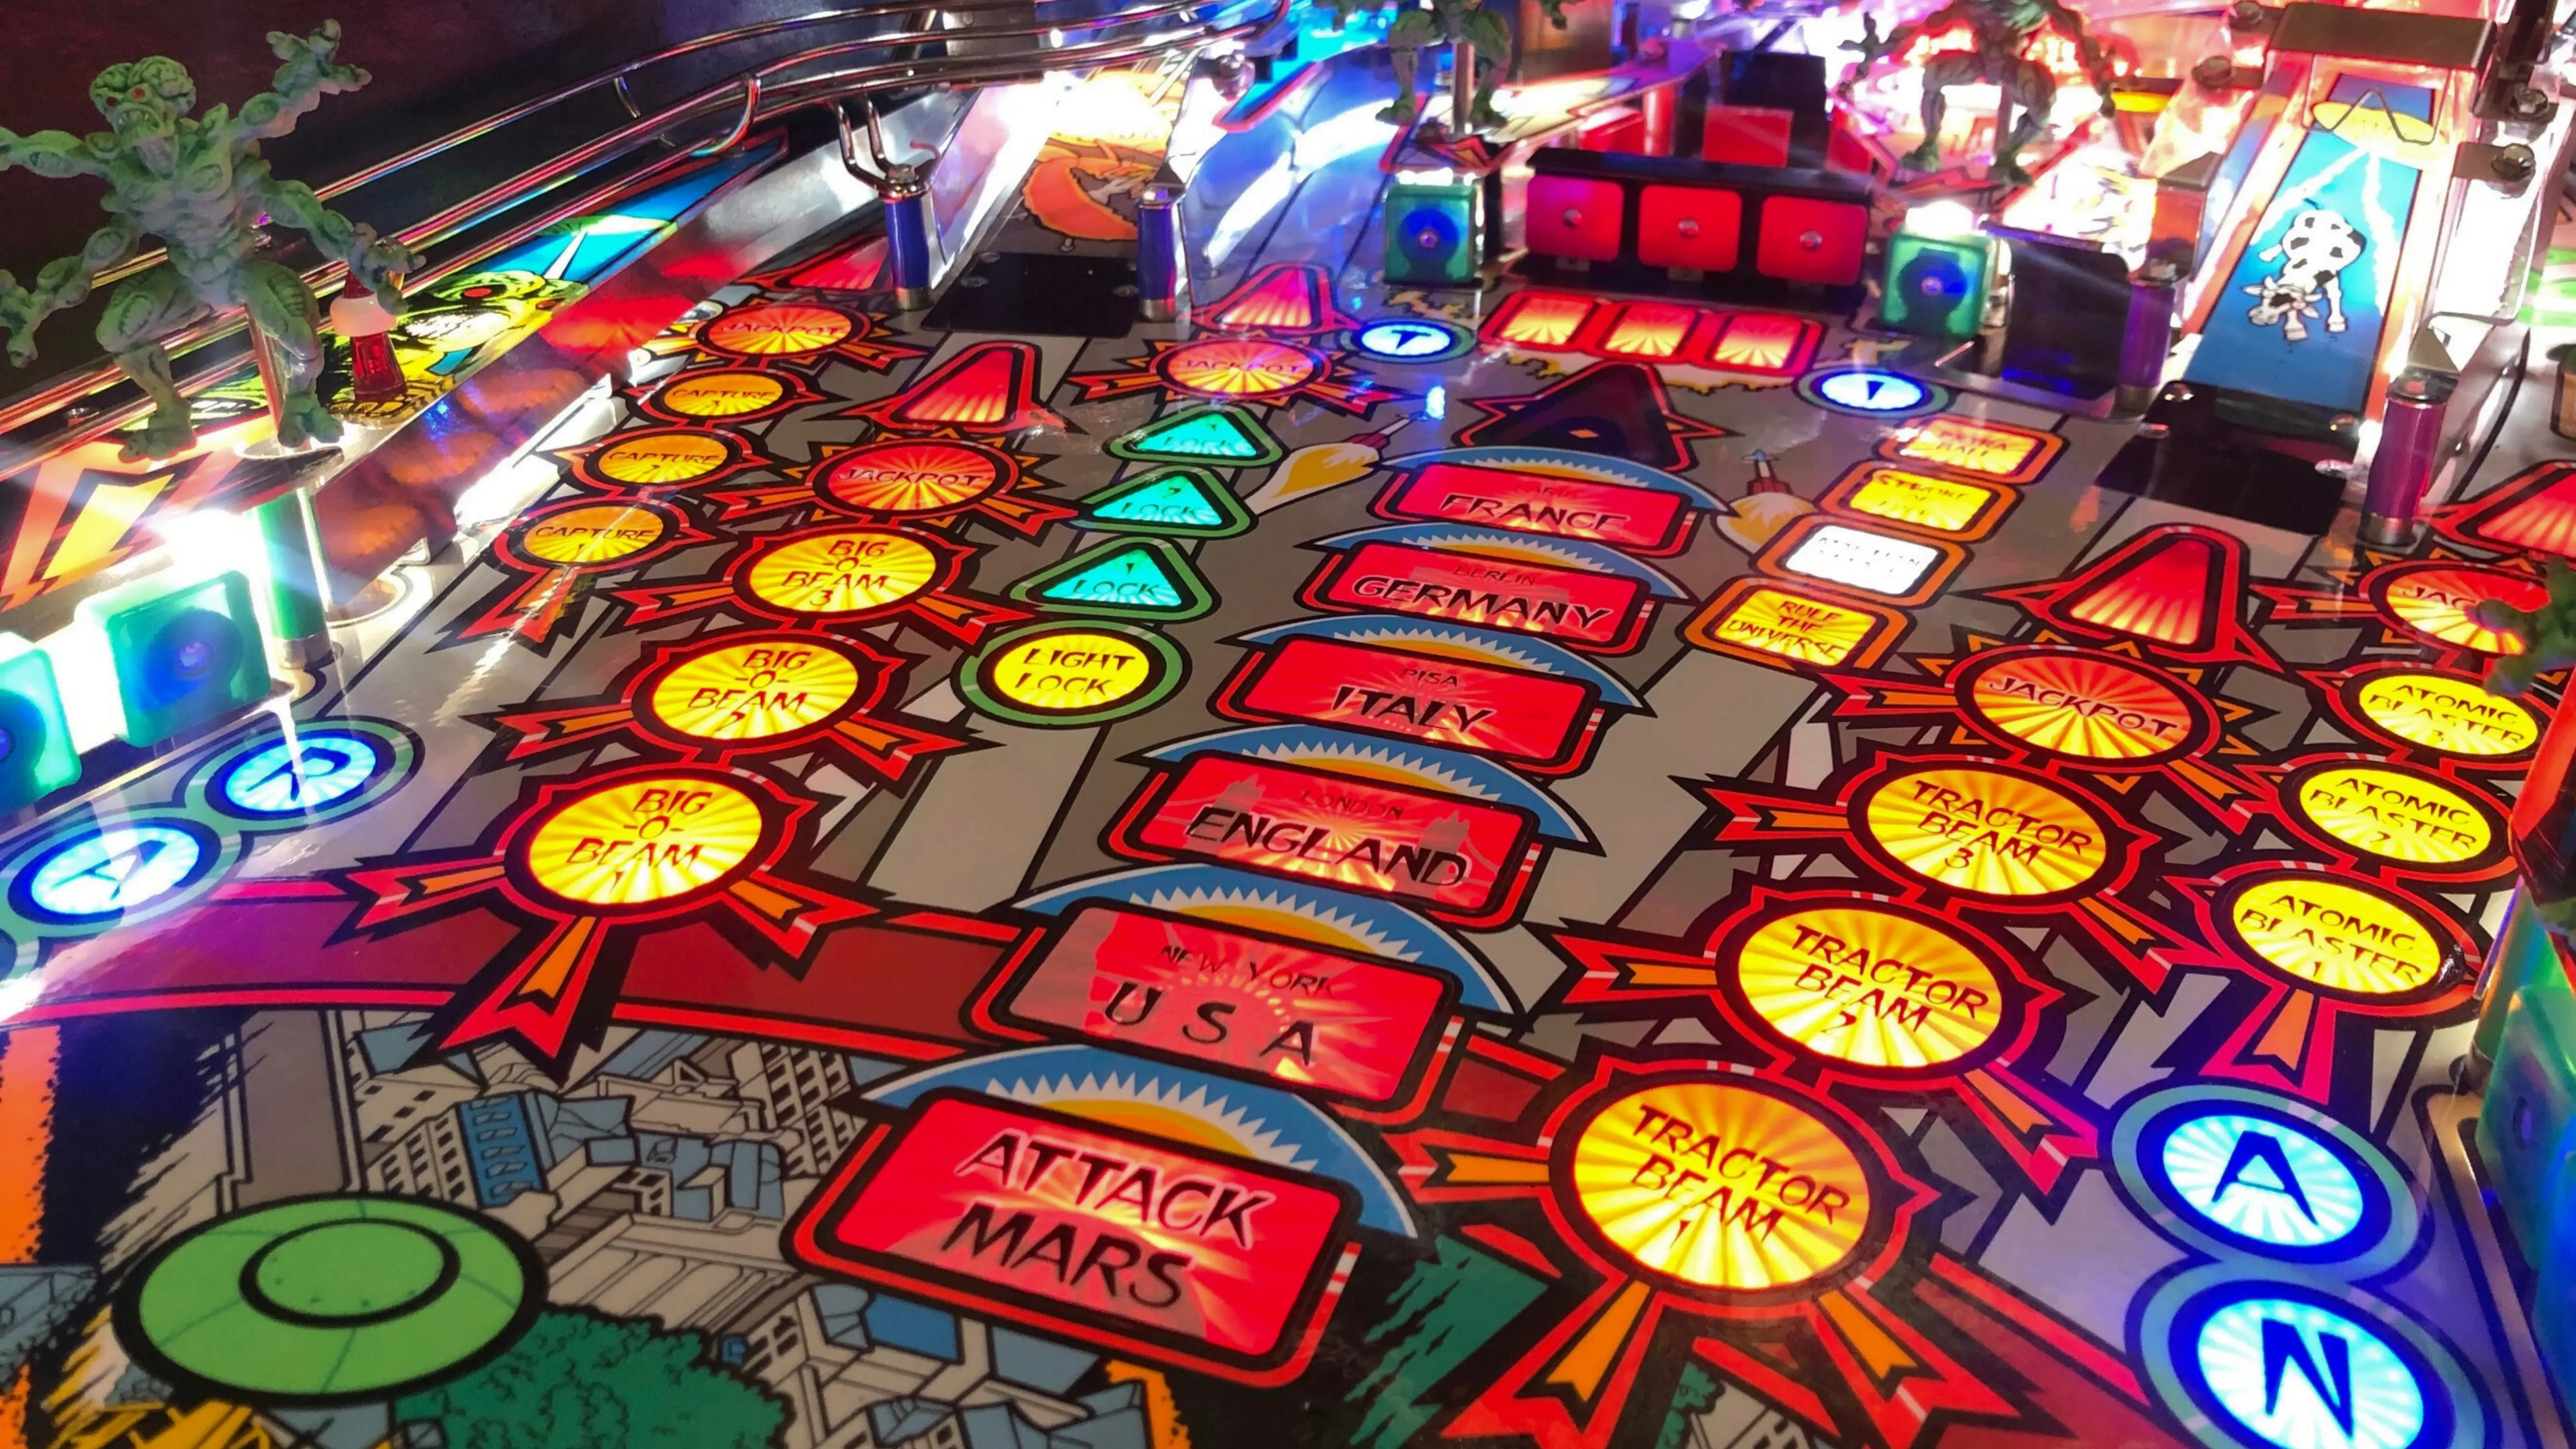
The two ramps and two loops that we haven’t talked about much yet each have to do with various events happening surrounding the martian invasion: Captures, Tractor Beams, Big-O-Beams, and Atomic Blasters. These all progress towards a very lucrative multiball called Total Annihilation. Functionally, all the shots work the same; they’re different in name/callouts only.
To start Total Annihilation, you have to shoot each shot three times. (The lights in front of each one tell you how many shots you’ve made.) Once you do so, Total Annihilation will immediately begin. It’s a four-ball multiball during which all major shots are jackpots, but unlike standard Multiball, all jackpots are always lit (so you can collect the same one repeatedly). The center ramp will award a super jackpot worth the total value of all jackpots scored since the start of Annihilation, or since your last super. (This is also always lit.)
Total Annihilation is absurdly valuable, and some players opt to ignore saucers altogether and just shoot for Annihilation. It’s a very solid strategy - a good Annihilation can be worth 2 billion easy, and unlike Saucers, Annihilation is relatively safe and never gets harder to get to; you always just need three of each shot. Also, making a Super Skill Shot to any ramp or loop will spot all three shots, making it even easier to reach if you’re going for it. That said, I personally prefer focusing on the Saucer during Annihilation, but that’s a personal preference.
One more thing of note are Hurry-ups. Completing a shot to get to Total Annihilation (i.e. the three shots to a ramp or loop) will start a hurry-up collected at the Saucer (or force field, whatever the middle shot is currently exposing). This hurry up is worth 100,000,000 points and will tick down until you hit the center shot. However, these can be stacked: starting a second hurry-up while one is running (i.e. by completing another shot) will reset the hurry-up value to 300,000,000 points. Starting three hurry-ups makes it worth 500,000,000, and collecting all four makes it worth 1,000,000,000 which is very valuable. If that’s not enough, starting Total Annihilation just cashes in the hurry-up for free, so stacking all four hurry-ups is basically a free billion, which is definitely worth shooting for if you’re close on all shots. Note that if you collect a shot as a Super Skill Shot, it will not start a hurry-up.
Martian Attack
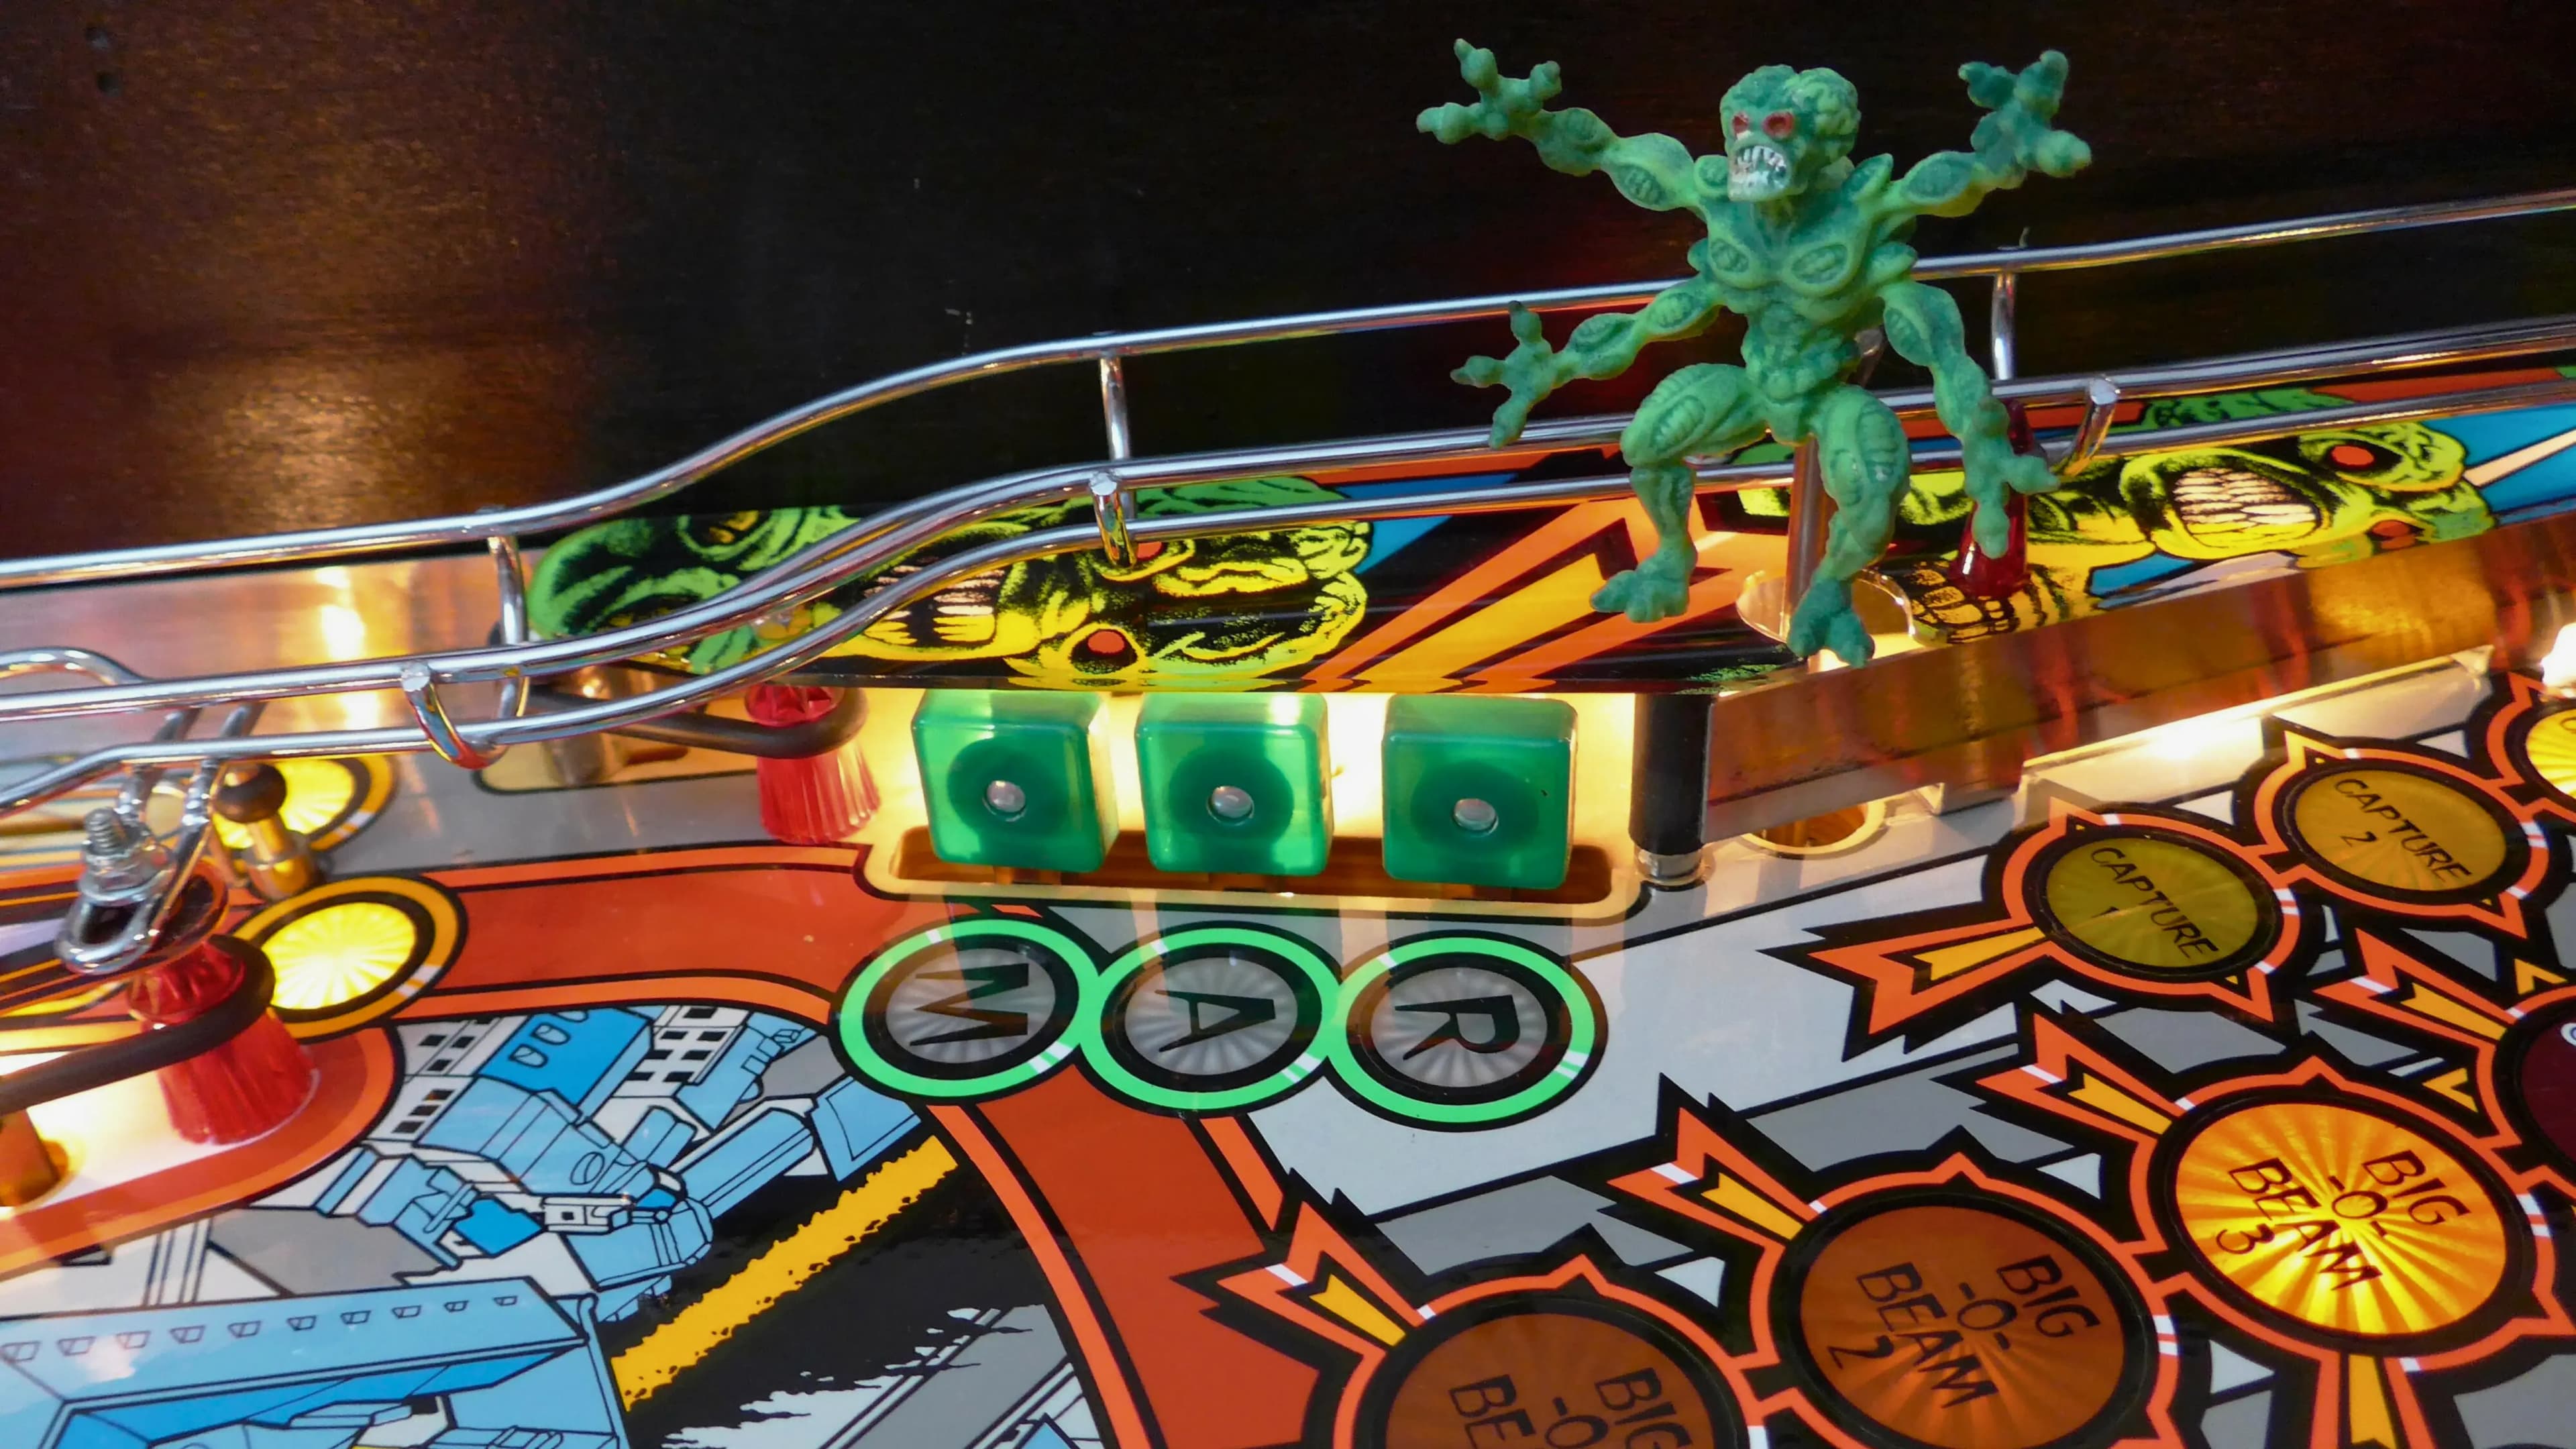
Spelling M-A-R-T-I-A-N on the green standups scattered around lights Martian Attack, a fun little mode where the martians on the playfield just start jumping around hilariously and is started at the scoop. The goal is to hit all four martians - MAR, T, I, AN - before the timer runs out. The T and I are particularly dangerous - the best way to hit them is to bounce off of the opposite martian first, e.g. bounce off of MAR into I or off of AN into T. Once all martians are killed, Martian Attack Multiball immediately begins.
Martian Attack Multiball is a two-ball multiball during which all martian hits are worth tiny points. It’s the least valuable multiball, but it’s still a multiball. Provided you have an attack wave running when you kill the last Martian, you can use it to progress towards saucers. It is, however, the only stackable multiball. You can’t start other multiballs when Martian Attack Multiball is running, but you can do so when Martian Attack is running. If you do, Martian Attack will play out alongside the other multiball, winning it will start Martian Attack Multiball as per usual, stacked with whatever else you have going on. If you’re going after saucers, this might not be ideal, since two multiballs are better than one. If you’re going after Annihilation, this is a good way to get a bunch of free points, so I recommend stacking in that case.
Also worth noting that you can collect “Martian Bombs” in a few ways (most notably spelling MARTIAN again while Attack is lit). It’s not really worth shooting for them, but definitely keep in mind how many you have: during a Martian Attack, you can press the launch ball button to use a Martian Bomb which kills a random Martian for free. There’s an important bit of strategy to keep in mind with your bombs, namely, you only want to use martian bombs to kill the last martian(s) needed.
For example, let’s say I have two martians left and one martian bomb. Using the bomb now just kills a martian and doesn’t do anything else, which isn’t super great. If I only had one martian left, then pressing the button will kill the last martian and start Martian Attack Multiball. Now we’re talking. More importantly, don’t think you need to use the bomb right away! If the button will start a multiball, then you can just fire away at the saucer. If you’re ever about to drain, or the attack timer is about to expire, use that last bomb to start the multiball and grant yourself a ball saver. You have a massive safety net in this situation - take full advantage of it.
Again, Martian Bombs aren’t worth shooting for deliberately since they’re so hard to obtain. But be sure to capitalize on them when you can. You can see how many you have in the status report in case you’re not sure. Keep in mind that the safety net exists as long as you can bomb the rest of the martians. (So if you had three bombs, you’re safe as long as there are fewer than three martians alive.)
One last thing - for some reason, Martian Attack is the only thing that’s ever started from the back of the scoop. Ordinarily, this isn’t a problem, since it just means it’s easy to start from the bumpers. But, if you’re playing in competition on a game where extra balls aren’t disabled, this means that plunging an extra ball is likely to start Martian Attack without you being able to actually play it out. If this is the case, I suggest calling over a TD to have them either deliberately tilt the game. You preserve your Martian Attack that way.
Stroke of Luck
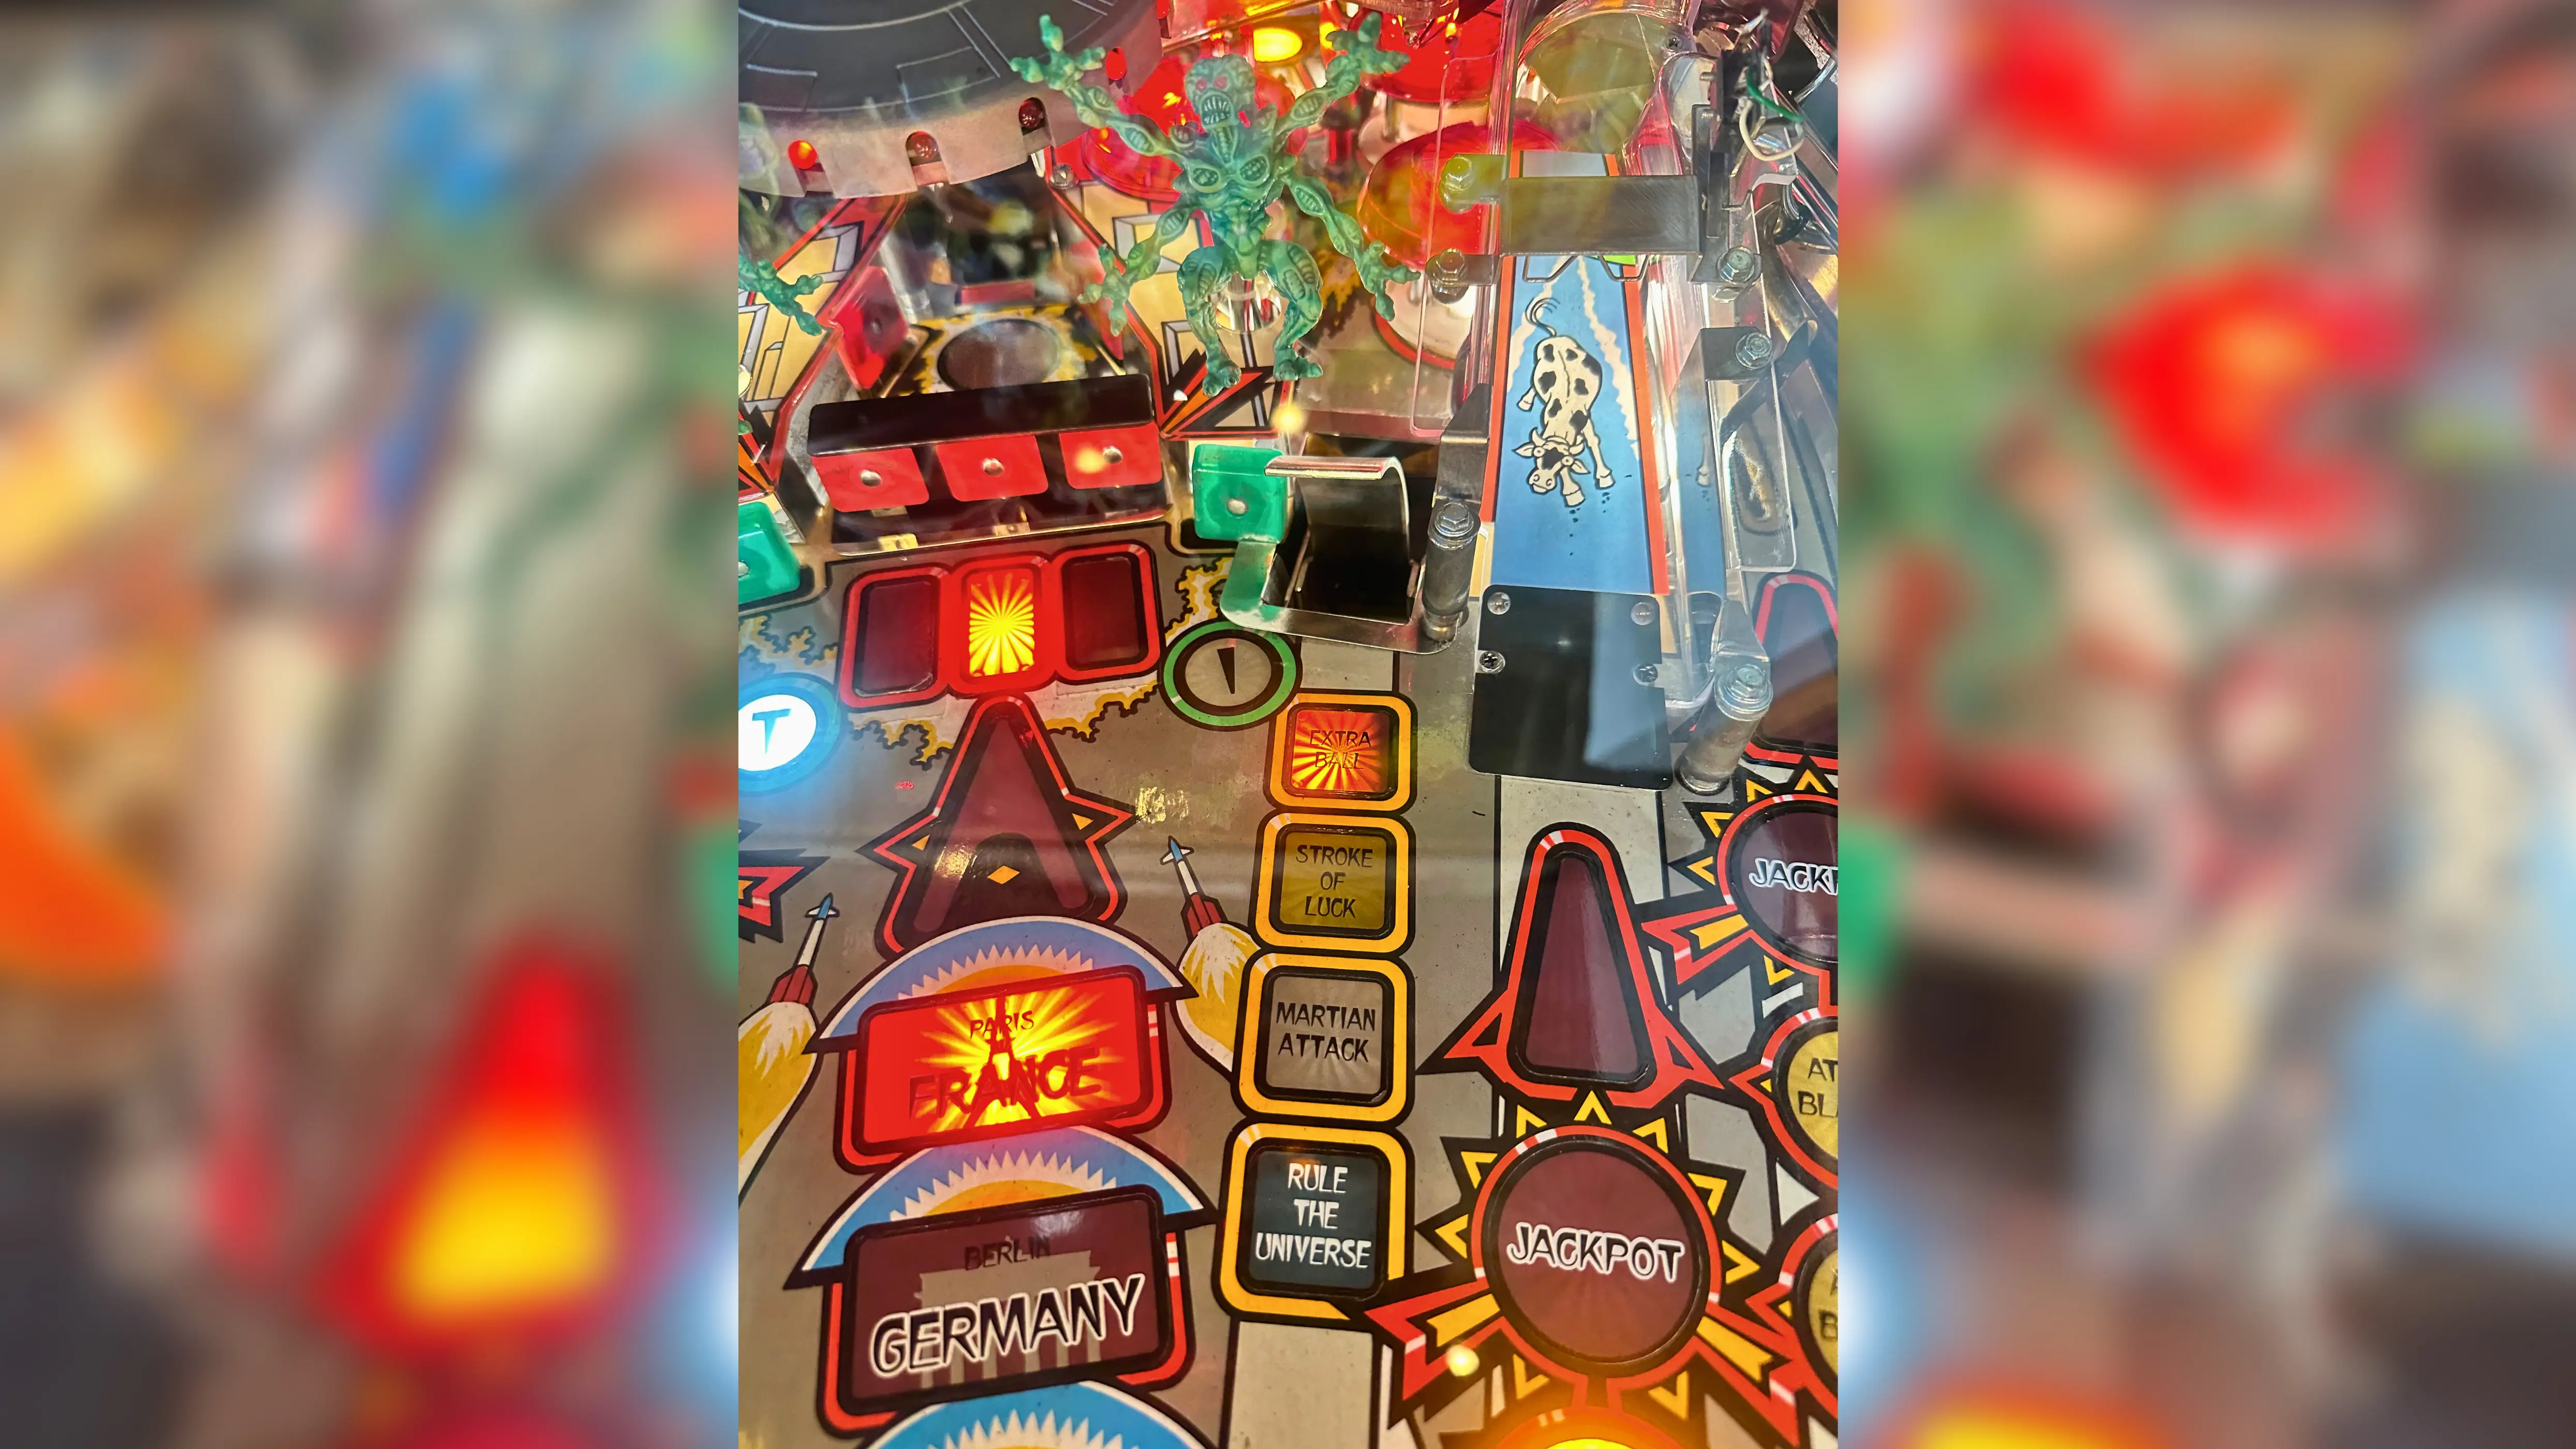
AFM’s mystery award. You get one lit at the start of the game, and you can relight them by completing the inlane/outlane lights which are otherwise nondescript. You can control these with the flippers, so pay close attention to your inlanes. Completing the inlanes 10 times lights an extra ball if those are enabled. If you’re not playing for extra balls, then avoid completing the lanes if Stroke of Luck is already lit, since all that does is make you go back and complete the lanes again.
Stroke of Luck can give you some cool stuff, such as Start Attack Wave, Light Lock, Multiball, Martian Bomb, Light Martian Attack, etc. On some competition games, it can be set to always award things that you’d want, such as starting an Attack Wave if you have nothing else going on, or giving you a Martian Bomb if Martian Attack is already lit. In that case, Stroke of Luck becomes pretty invaluable, namely because that Start Attack Wave award spares you from having to aim at the deadly Force Field. If possible, rely on that to start your Attack Waves instead of aiming at the center targets. Of course, it can also be set to just award 50,000,000 points every time, which is incredibly boring. Still good value to light, just not worth aiming for.
Other awards include Video Mode, where you use the flippers to shoot a machine gun at invading saucers (strategy here is to just wave left and right and pray for the best, you can press the launch ball button to destroy all saucers on-screen one time), Sneak Attack, which is a quick hurry-up to one martian for 150,000,000 and some martian bombs, and Strobe Multiball, an otherwise worthless multiball which is “bash the force field all day for an extra ball.” Strobe Multiball’s best feature is that it lights a brief ball-saver when it ends, which is good to keep in mind for saucer progress.
Rule the Universe
In case destroying Mars wasn’t enough for you, you can also Rule the Universe which is this game’s final wizard mode. To Rule the Universe, you have to do six things first, and then shoot the scoop to start the mode. The objectives are:
- Score a super jackpot during standard multiball
- Start Super Jets (100 bumper hits, absolutely trivial)
- Play Martian Attack Multiball
- Play Total Annihilation
- Destroy Mars
- Complete a 5-way Combo (should be trivial, if not, just combo ramps)
In short, Rule the Universe is a multiball where everything’s worth a gazillion points. It’s effectively a combination of the three major multiballs - Martian Attack, Total Annihilation, and the Super Jackpot phase of regular multiball. (Oh, and those hundred-million point saucer hits are available, too.) The goal is to score five billion points before draining back to single-ball play - doing so will award an additional five billion and earn you a spot on the high scores as “Ruler of the Universe” (which is separate from the actual high scores, for what it’s worth).
Personally, I find Rule the Universe to be laughably easy. You have a pretty lengthy ball save time, during which you can just flail away at the Saucer for hundreds of millions of points, letting drained balls get launched back into the jets for three million a pop. If your ball save time expires, then you should switch and focus on the roving Supers and/or the Annihilation jackpots. It’s a spectacular mode, in any case, but functionally it’s a jackpot worth ten billion points. And honestly, even if you don’t beat it, if you’re playing in a competition, it’s extremely unlikely that you’re going to lose to anyone else who doesn’t also Rule the Universe.
While beating Rule the Universe is easy, getting there is not. Destroying Mars is the most difficult objective to reach, but if you manage to get there, you likely used a multiball or two getting saucers and missed your super jackpot. That’s usually what happens to me. You should definitely prioritize saucers over supers during multiballs since saucers are more valuable anyway, but when Mars is destroyed, you should switch to your super if you haven’t gotten it yet.
Rule the Universe is unusual in that it’s an actual goal for competition should you get far enough. If you choose to adopt the Annihilation strategy and ignore saucers altogether, then Rule the Universe becomes pretty unreachable. There’s nothing wrong with that, of course - if you feel better about Annihilation, then go after that. If you are going after saucers, then blow up saucers first and focus on your other objectives second. The good news is that the other objectives all help you blow up saucers, with the sole exception of the super jackpot.
In any case, with four or five objectives complete, you should set your sights on ruling the universe. This goes double if you’ve destroyed Mars already - if the only thing left to do is score a super jackpot or get a combo, abandon everything else and get that last objective done. Best of luck!
Like what you're reading?
Get pinball news, analysis, and deep dives delivered to your inbox.
Related Posts
More in Pinball Tutorial or browse all topics.